Creating New Issues
You can quickly create new issues and folders right in Structure, or you can use the standard "Create Issue" dialog and have new issues added to your structure automatically.
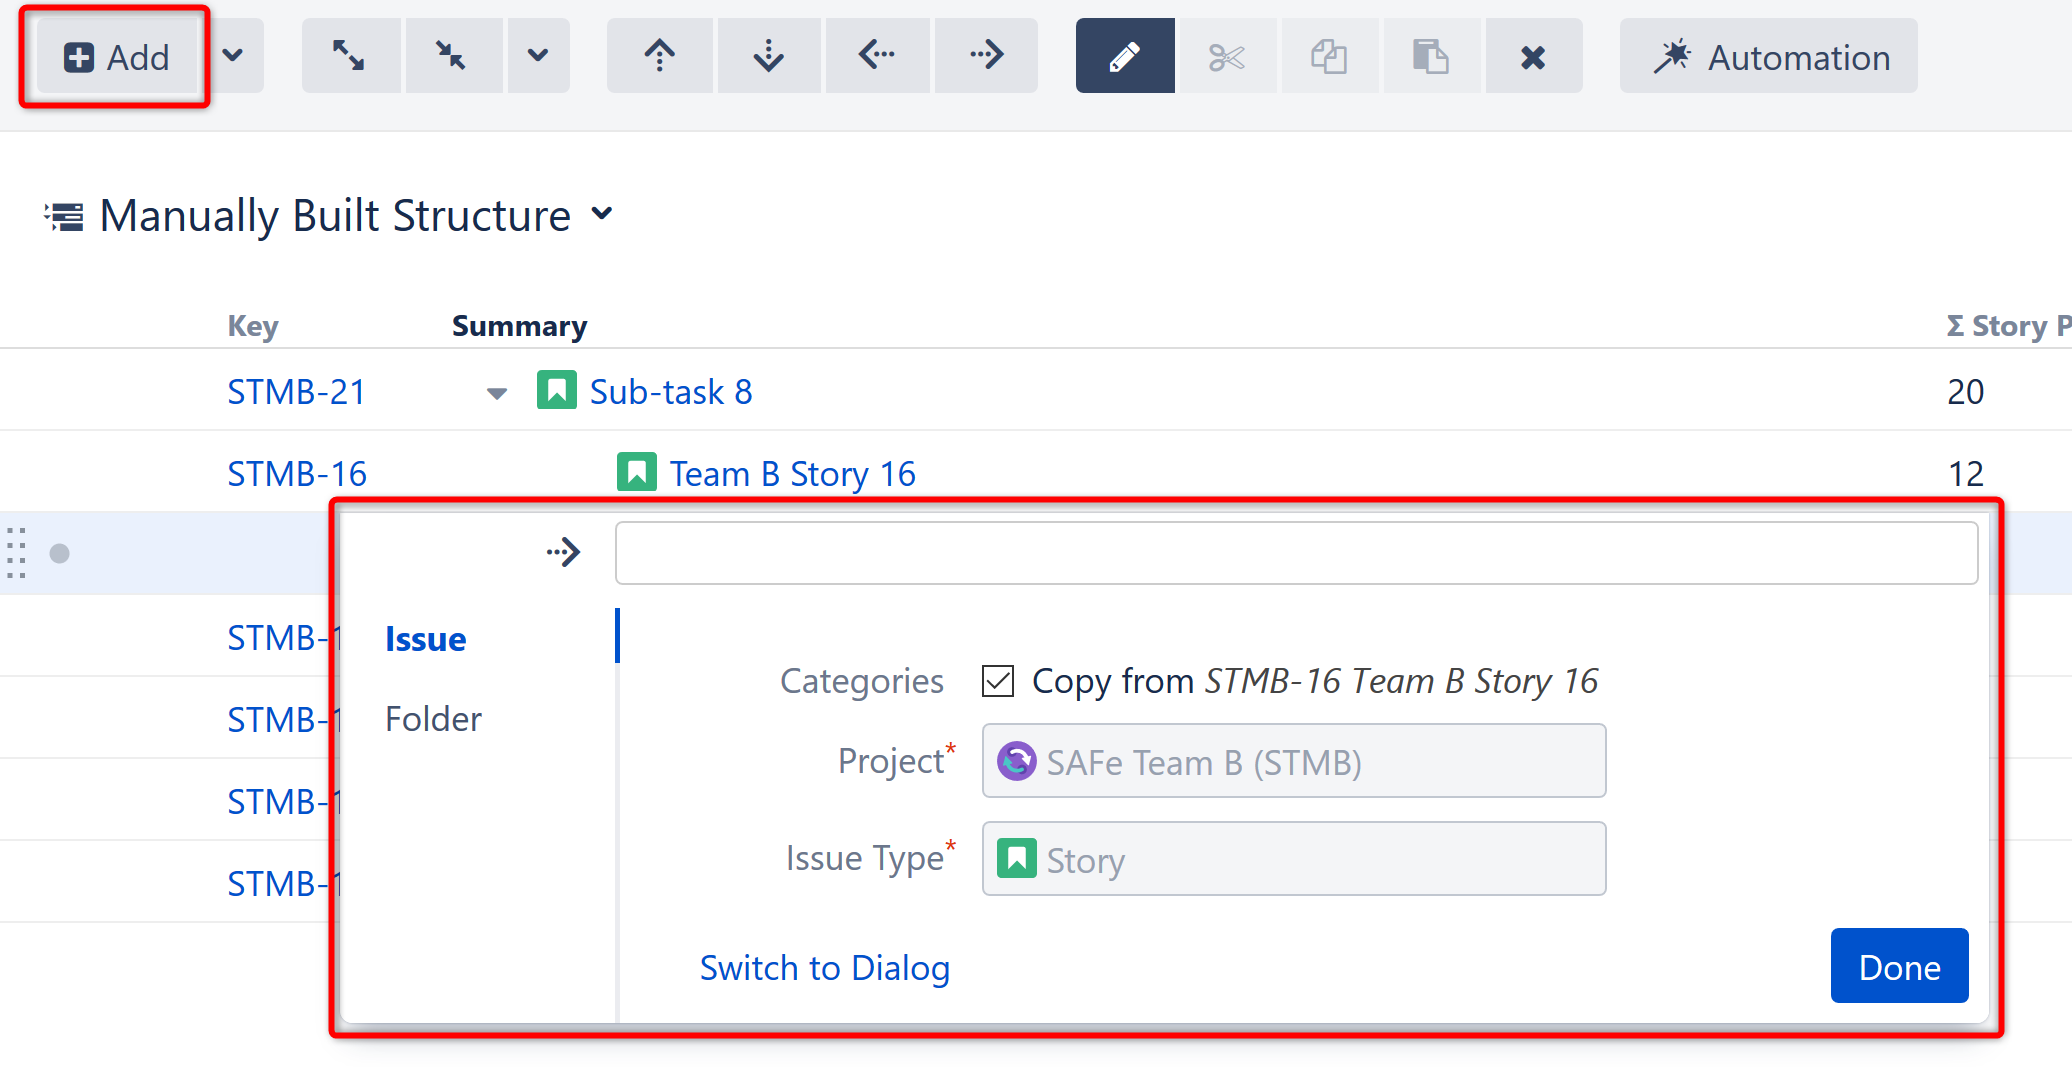
Create a New Issue in Structure
To create a new issue beneath the currently selected item:
- Use the Add button in the toolbar.
- Enter the Issue Summary in the top entry box of the New Issue panel (to the right of the arrow).
- To copy attributes (project, issue type, assignee, version information, etc.) from the last selected issue, make sure the Categories checkbox is selected. To enter all new information, uncheck this box.
- Press Enter or click Done to finish editing and create the new issue on the server.
Keyboard Shortcut
Save some time! To create a new issue, use the keyboard shortcut: Enter.
To create a new sub-issue of the currently selected item, use the shortcut: Shift+Enter.
Press Escape to cancel creating a new issue.
Categories: Copy from...
When you choose the "Copy from..." option, the following fields are copied from the last selected issue:
- Project and Issue Type
- Parent Issue, if the cloned issue is a JIRA sub-task
- Component, Affects Versions, Fix Versions, Environment, Assignee, Priority, Security Level
- All custom fields that are required by the fields configuration for that particular Project and Issue Type
Please note that the archived versions are skipped when copying Affects Versions, Fix Versions and version-based custom fields.
Editing Other Fields during Creation
The New Issue panel only allows you to select the project and the issue type (or copy some fields from another issue). If you need to edit other fields:
- Before you start creating the new issue, add the columns you need to edit to your current view
- Click Add to open the New Issue panel
- To get to the fields you need to edit, hold Ctrl+Alt while using the arrow keys to move between the available columns
- Once you have finished editing the columns, hold Ctrl+Alt and press the Down arrow to return to the New Issue pane.
You can also edit other fields by clicking the Switch to Dialog button, which opens the "Create Issue" dialog.
If you have any required fields, you must enter a value into those fields (or have default values defined). Otherwise, you will be unable to create the new issue.
To correct this, follow the steps above and make sure all required fields are filled in.
Creating Sub-Tasks
It is not possible to create a Jira sub-task from scratch in Structure. However, if you have an existing sub-task in your structure, you can create another sub-task with the same parent using the Copy from.. option.
This refers to the Jira sub-task issue type, not Structure sub-issues.
Create Issues Using the "Create Issue" Dialog
If you need to update fields not currently in your view or that are not editable, click the Switch To Dialog at the bottom of the New Issue panel.
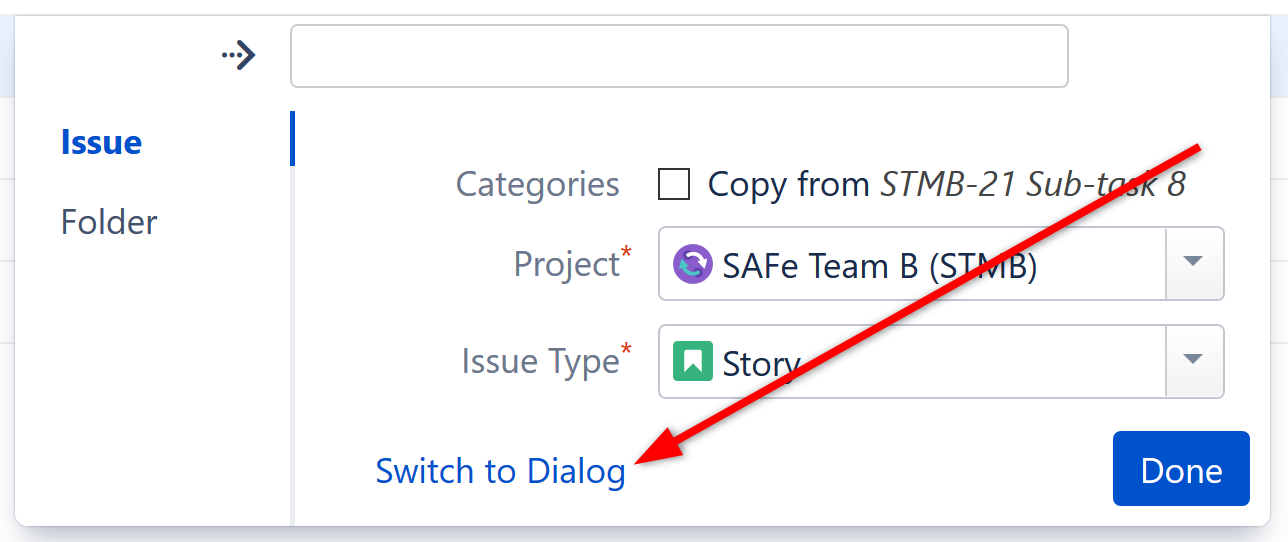
This will switch you to Jira's Create Issue dialog, which allows you to enter information into fields just as you can when creating a new issue directly from Jira. Once you finish entering information and click Create, the new issue is automatically added to the structure.

If you don't want the new issue added to the current structure, click Don't Add to Structure at the bottom of the dialog.
Creating Epics
When creating Epics, the Epic Name custom field is required. To simplify the process of creating multiple epics, Structure will copy the new epic's summary to its Epic Name field, if the latter is empty. This way you can simply type an epic name into the Summary field, and proceed to the next issue.
The copying only happens once, when an epic is created. You can change the summary or the epic name at a later time, if you want them to be distinct. Alternatively, you can also add the Epic Name column to the table and enter new epic names explicitly.
Additional Keyboard Shortcuts
Immediately after you have press Enter or Shift+Enter or Insert to start editing a new issue, you can also use the keyboard to change the creation mode.
Use the following keyboard shortcuts while the summary field is still empty:
Enter or Tab | Cycle through Project, Issue Type and Summary field. When Project or Type field is selected, use arrows or start typing to select a project or type. |
Ctrl+Enter / Cmd+Enter | Toggles cloning mode (Categories: Copy checkbox). |
Alt+Enter / Option+Enter | Switches editor to dialog mode and back to panel. |
If you have already entered the summary, you can use the mouse to change the creation mode, project or issue type.
Uploading New Issue to the Server
After you create a new issue, Structure only displays the Summary field until it receives confirmation from Jira that the issue has been created on the server. Once confirmation is received, the remaining columns for the issue will be loaded.
While the new issue is being uploaded to the server, you can start creating the next issue.