Adding a Test Run Column
To add a Test Run column to a structure, click the + icon to the right of the column headers. In the dropdown menu, select Test Run...
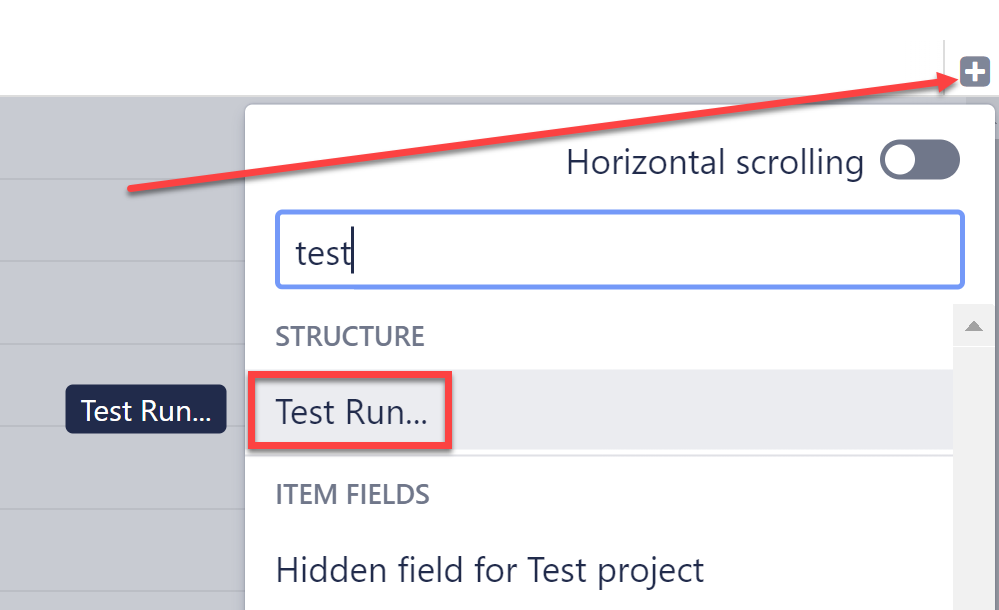
You can select from a previously created test run or choose Create a new test run. When creating a new test run, be sure to give it a descriptive name (e.g., "Test Run 1 2/03/2022 Chrome 79.0"). The name of each test run should be unique within any one structure.
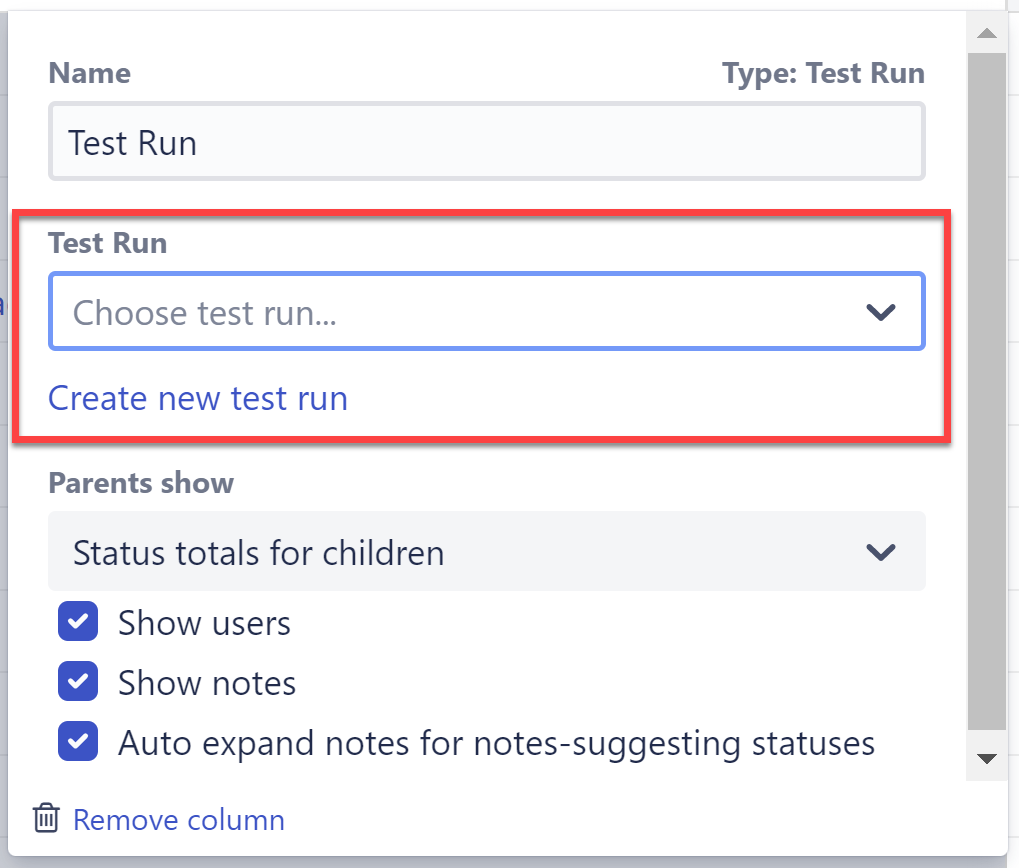
Customizing a Test Run
The following options allow you to choose which additional information will be displayed alongside the test results.
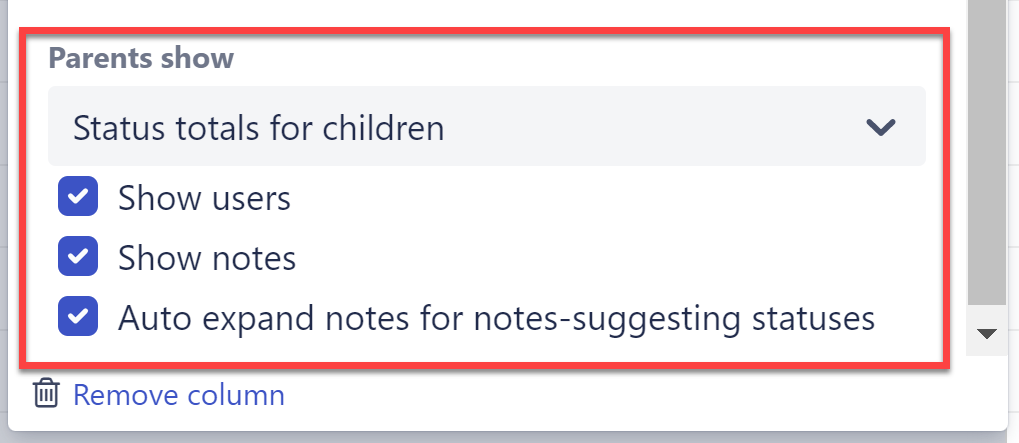
Parents Show
The Parents Show option lets you determine how the results should be calculated for parent items:
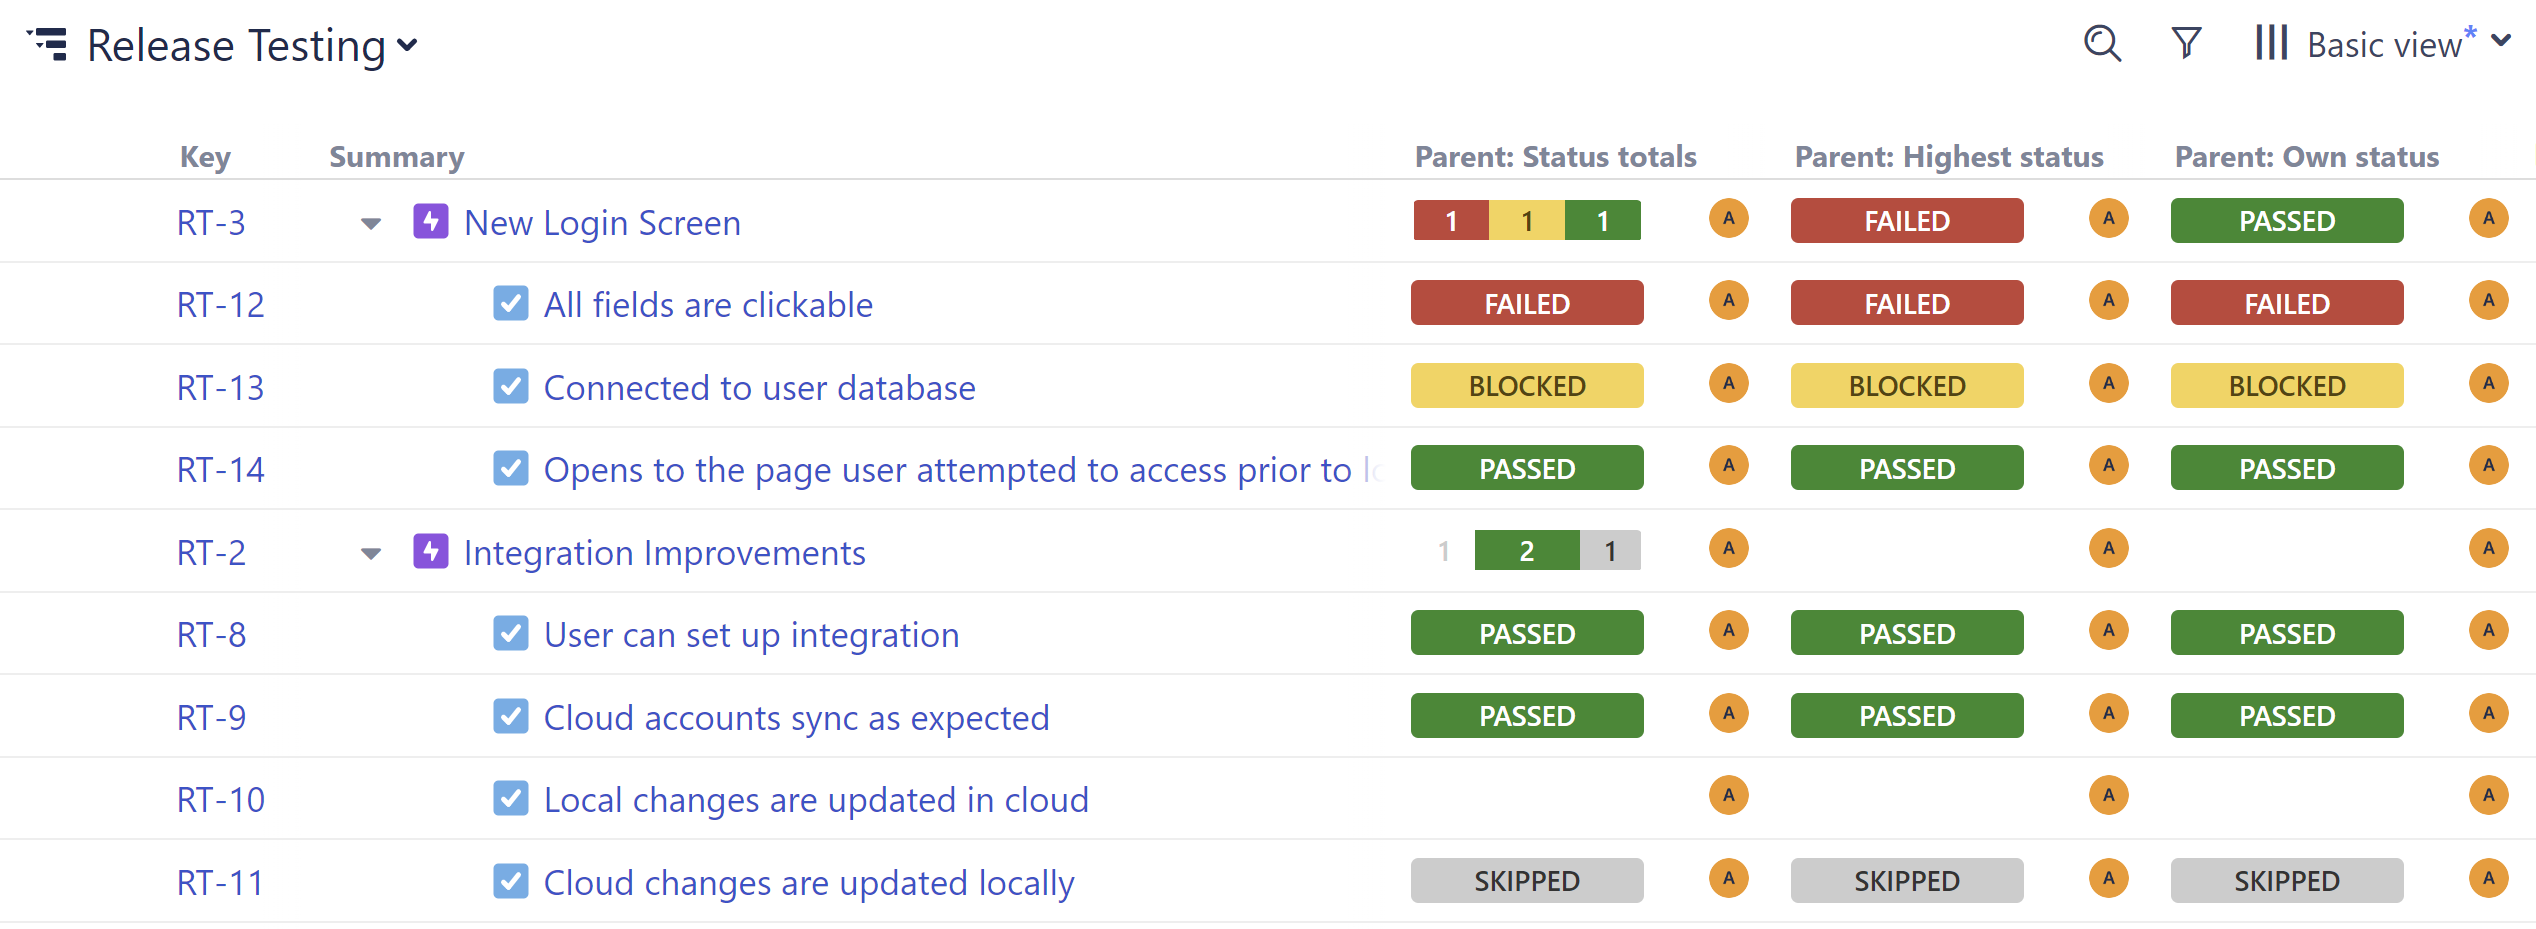
- Status totals for children - Parent items will display the number of child items in each status.
- Highest status of children - Parent items will reflect the highest status of their child items. Note: Highest status can be set by the system admin, but by default this is based on highest priority, so "Failed" is the highest and "Passed" is the lowest.
- Own status - The status of parent items can be set independent of their children.
Show users
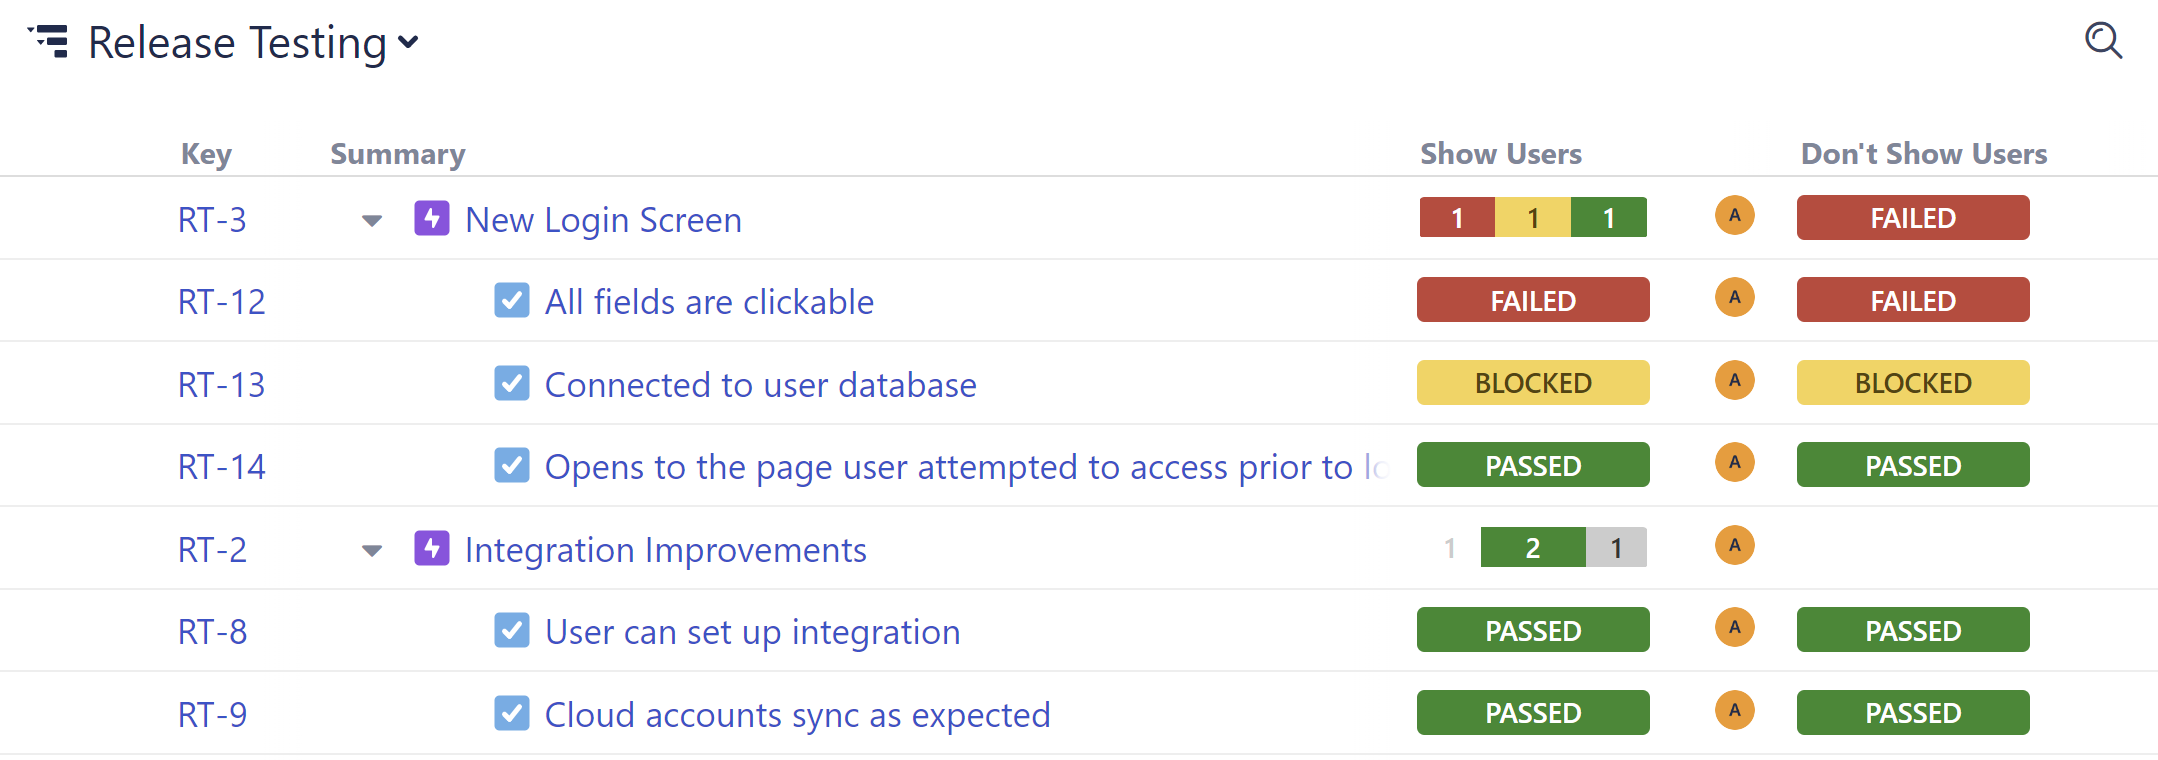
You can choose to display the avatar of the user who set the status by checking the Show users option (see first column below). Parent items will display the avatars of all users who changed statuses for their children.
Show notes
Check the Show notes option if you want to add and view notes for test statuses.

When this feature is enabled, the notes icon is displayed beside all status fields in the column (if the status is empty, the icon will only be visible when you place your mouse cursor over the field).
Create a New Note
Move your mouse cursor over the icon to open the notes dialog. When the dialog opens, you can immediately start typing your comment. When your comment is ready, click the Save button.
Read or Edit Existing Notes
To read existing notes, place your mouse over the note icon. You can then:
- Edit the note by clicking anywhere on the text
- Delete the note by clicking the Delete button
Auto expand notes for notes-suggesting statuses
The additional Auto expand notes option only appears when notes are enabled. When checked, it makes the notes dialog open automatically when a test status is set to ‘Failed’ or ‘Blocked’. Use this feature to remind testers to provide details when selecting these statuses.