Top Down Automation to Manage Issues Across Multiple Projects
One of the great advantages to using Structure is the ability to manage issues from multiple projects in a single location. The following guide will walk you through one approach for adding Epics, Stories, and Tasks from multiple projects into a single structure.
Starting with a brand new, blank structure (see Creating Your First Structure), click the Automation button in the Structure toolbar. This will open the Automation Editing Mode.
Step 1: Insert Epics
Once Automation Editing Mode is on, you'll see a new '+' icon next to the Automation button. Click this and select Insert. 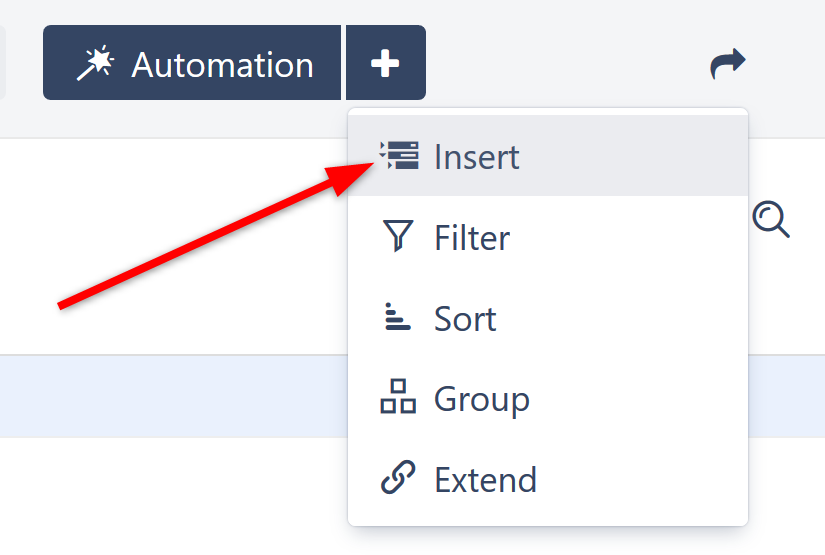
You can import items from an Agile board or existing structure, or you can use a JQL query or text search. Since we want to view issues from across multiple projects, let's use a simple JQL Query: "Issuetype = Epic". If you want to narrow your results to specific projects, you can specify that within your query as well. (To learn more about JQL, see the Atlassian article on Advanced Searching.) 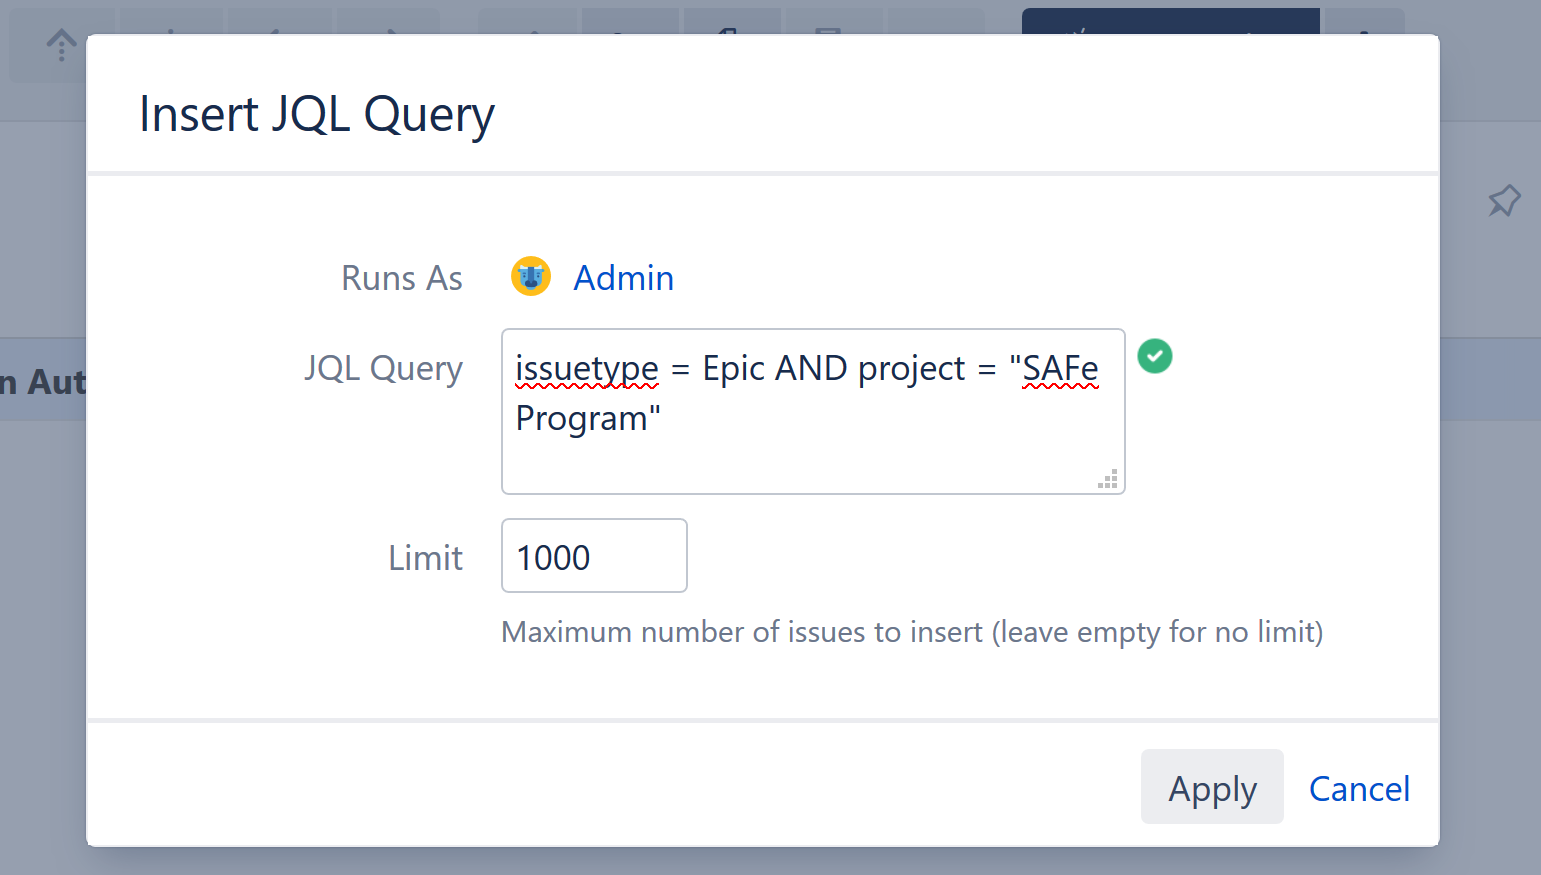
For large Jira instances, you may have hundreds of thousands of issues. While unlikely a problem for Epics, you may want to limit the number of issues to insert if you experience performance problems or simply want more manageable results. To do so, simply adjust the value in the Limit field.
Once you click Apply, the Insert generator will pull all issues that match your query into your new structure. In this case, they will add the Epics from our specified project.

While you are in Automation Editing Mode, all generators are listed in red.
- To make changes to a generator, double-click it.
- To delete a generator, highlight its row and click the delete icon (x) or delete key.
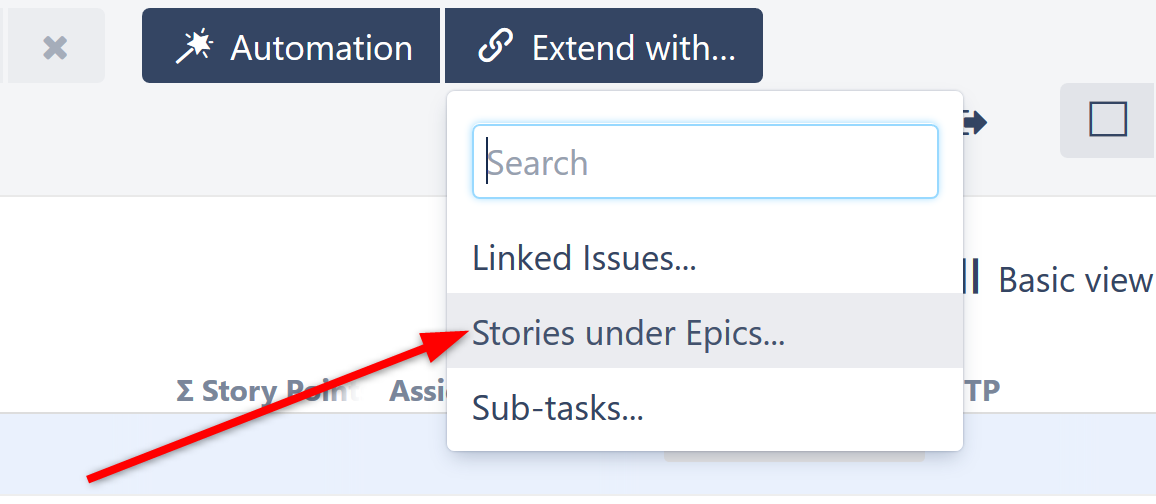
Step 2: Extend with Stories
Now it's time to Extend our results to include Stories and Sub-tasks. To do this, make sure the top line of your structure, containing the structure's name, is still highlighted (this makes sure we are applying the generator to the entire structure) and click the Add Generator button (+) again. This time select Extend.
In the "Extend with..." menu, select Stories under Epics.
The Extend generator gives you the option to "Allow changes via Structure." When selected, moving a story from one epic to another within Structure will also move the story within Jira. This option is selected by default.
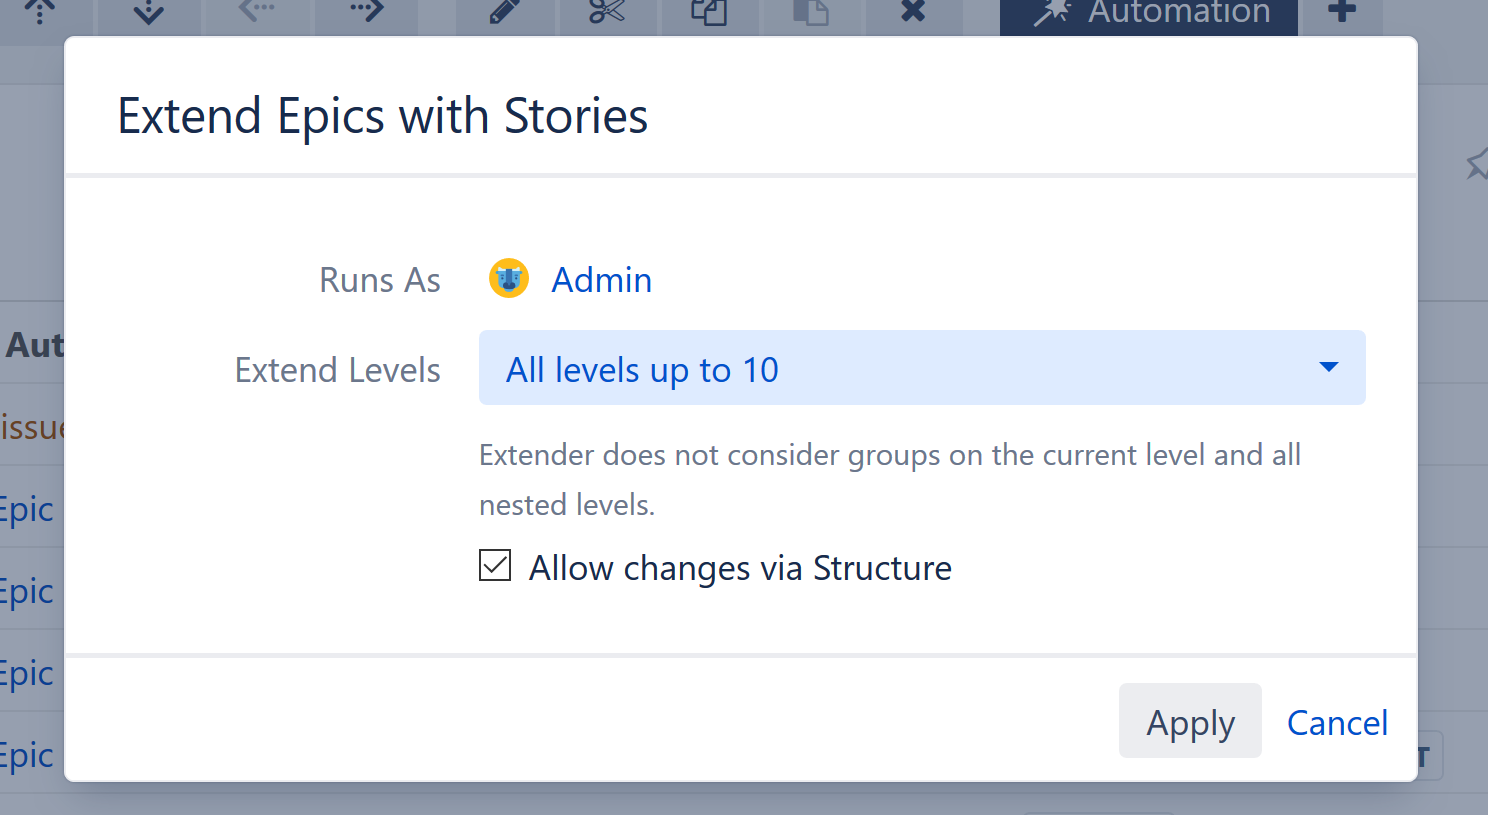
Click Apply. Some (maybe all) of your epics should now have a small arrow next to their Summary. Click the arrow to expand to the next level in the hierarchy – in this case, that's the Stories under each Epic.

If you forget to highlight the top line of your structure before adding the Extend generator, you may get the following error:
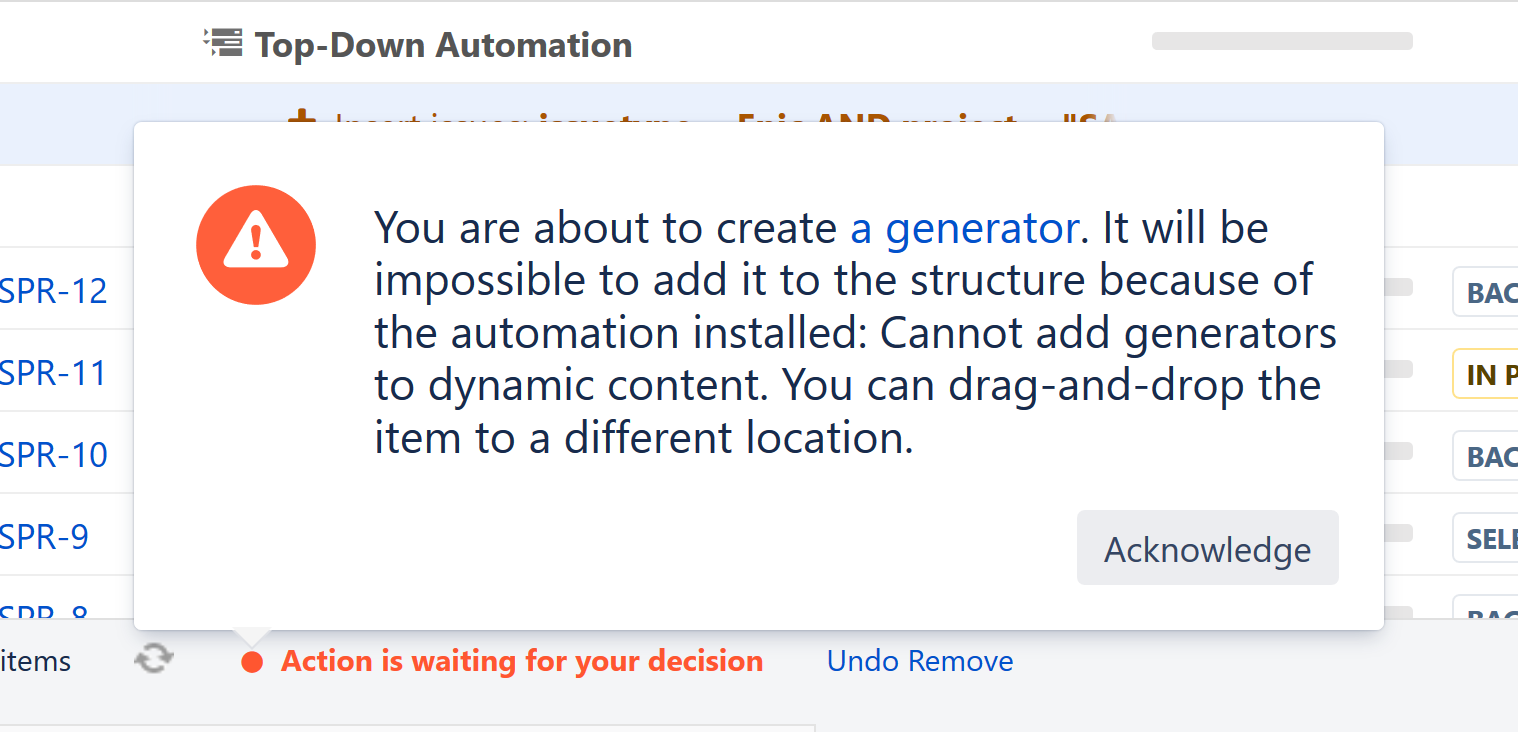
Since we started with a global generator (affecting the entire structure), all other generators need to be global as well, to avoid any conflicts. Simply highlight the top line of your structure (where it says the structure's name), and try again.
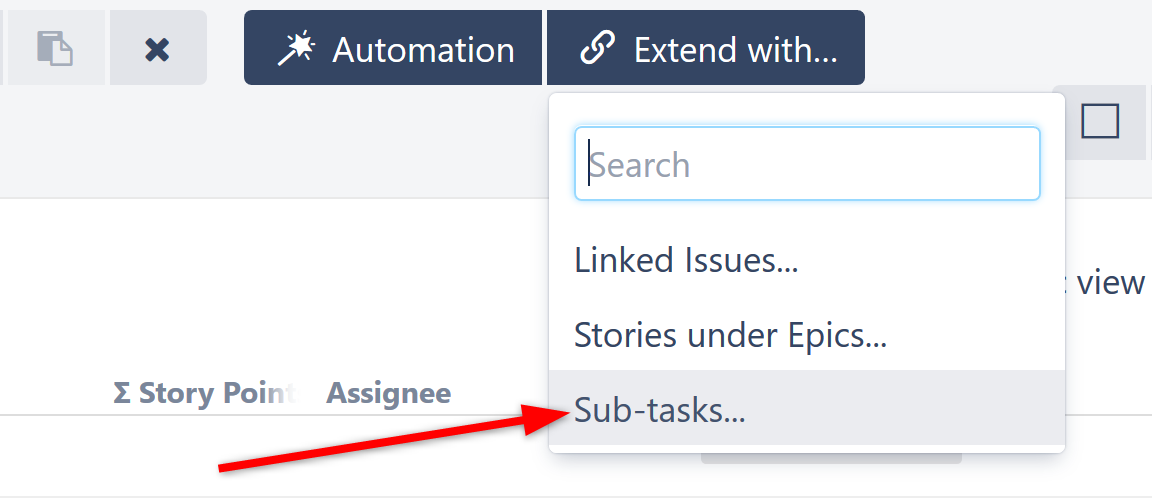
Step 3: Extend with Sub-tasks
Finally, we'll add Sub-tasks under Issues. Once again, make sure the top line of your structure is still selected (highlighted), click the '+' next to the Automation button and select Extend. This time, select Sub-tasks.
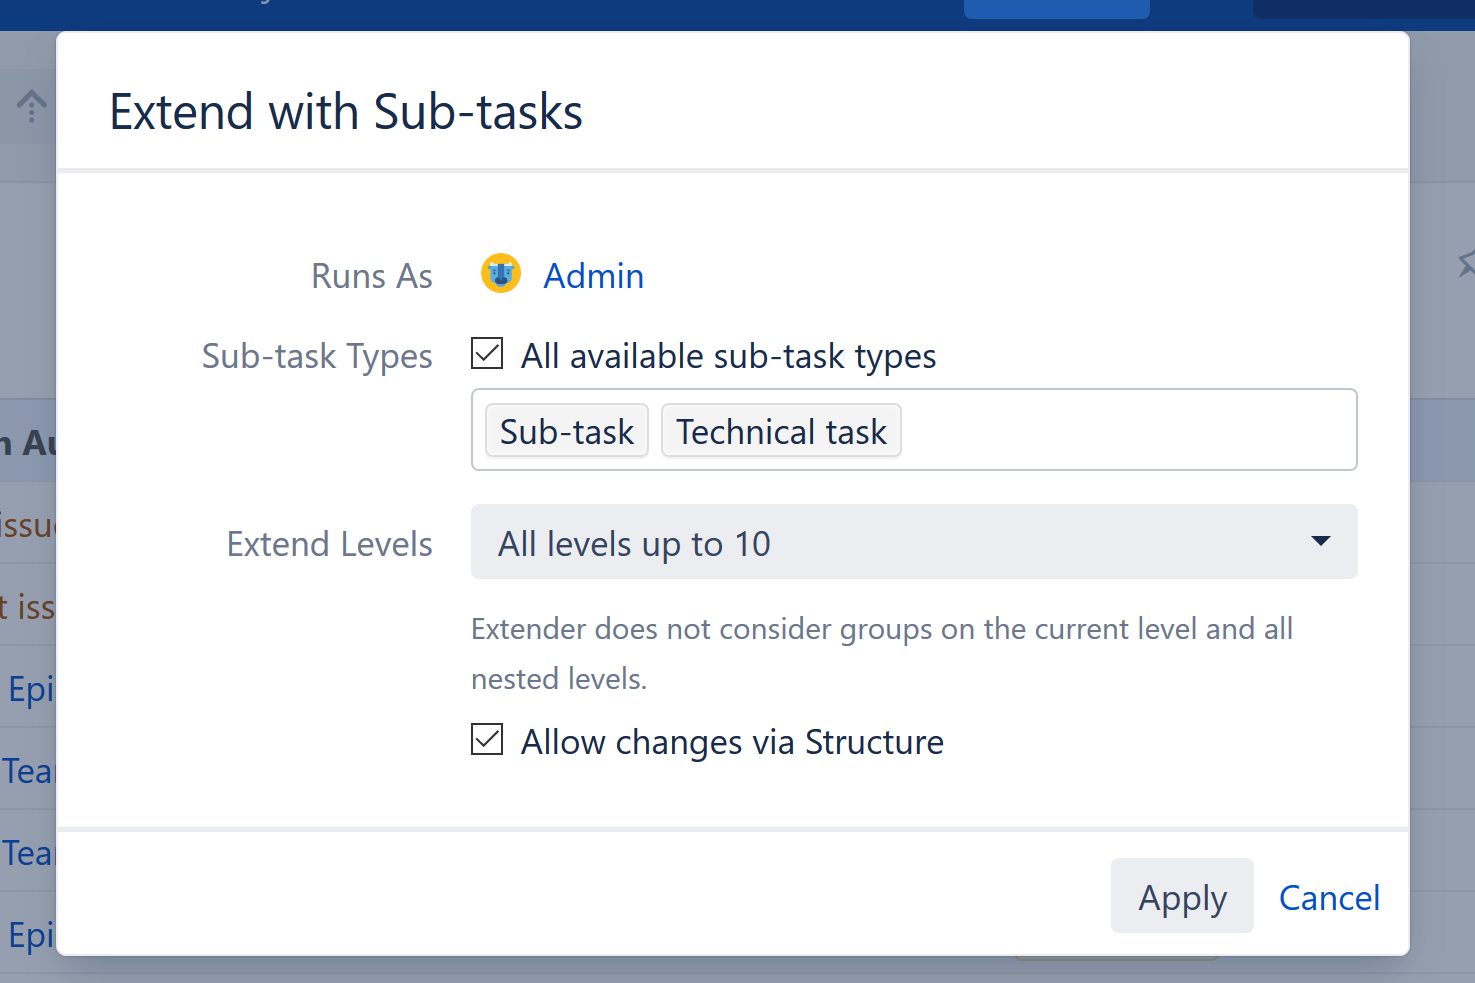
You can choose to only add specific types of sub-tasks, or choose All available sub-task types. You can also select how many levels to include, as well as whether or not you want to allow changes within Structure. Once you've made your choices, click Apply.
Your issues should now appear in a hierarchy, based on the Automation rules we selected. If you want to re-arrange items or move a sub-task from one story to another (or copy it from one to another), you can do so from within your structure. (We'll cover that in Working with Structure.)

You've built your first Automated structure! Now you can track tasks across your organization, easily follow the progress of stories or epics, and so much more.
As we mentioned at the start of this guide, this is just one of many ways to build a top-down structure. Depending on your needs, you may want to start with Themes or Initiatives instead of Epics, and work your way down from there. You may want to add Linked tasks. Or you may want to include other types of generators – we don't have space to cover all those options in this guide, but you can explore all your options in the Generators section of our Structure User's Guide.
We mentioned a few times that before adding a new generator, you should make sure the top line of your structure is highlighted. This makes sure the generator applies to the entire structure. You can also add automation to specific locations in a structure – for instance, you could create a folder for a particular project and import all the epics from that project into there. In this case, you would highlight the folder before adding the automation.
Next Steps
Next, we'll take a look at how to create a bottom-up structure, which can be very useful for tracking projects and tasks across teams or departments.