Searching Issues
Searching in JIRA Client
Search is what JIRA Client mainly focused on. When running search you can use:
- any combinations of search conditions with ANDs, ORs or NOTs,
- sub-queries for refining the results,
- quick text search within found results,
- search of items which are not searchable in JIRA (such as votes),
- search within issues table using regular expressions.
After you have installed JIRA Client and created a connection, you can see a number of useful queries in the Sample Queries folder in the Navigation Area. But of course you will want to create your own search queries. To ease your task of learning the UI elements, we made a list of what you may want to search for and which UI elements and commands you can user for JIRA Client bring it to you.
What You May Want to Find |
Commands and UI Element to Use |
|---|---|
Issue by its ID |
Paste or type the ID in the Quick Search field over the Issues Table and press Enter or |
Issue by its URL |
Paste or type the ID in the Quick Search field over the Issues Table and press Enter or |
Issues containing particular word or phrase |
Type a word or phrase to look for in the Quick Search field over the Issues Table and press Enter or |
All unresolved critical issues created during last 7 days |
Click the New Query |
All issues assigned to you |
Navigate to the Sample Queries folder, double-click the Assigned to me node. |
All issues considered as improvements |
Click the Create Distribution |

Below you can find more details on running search.
Creating Queries
To create a query:
- Click the New Query button
 on the toolbar or press F3 (⌘ + F3 for Macintosh).
The New Query dialog opens.
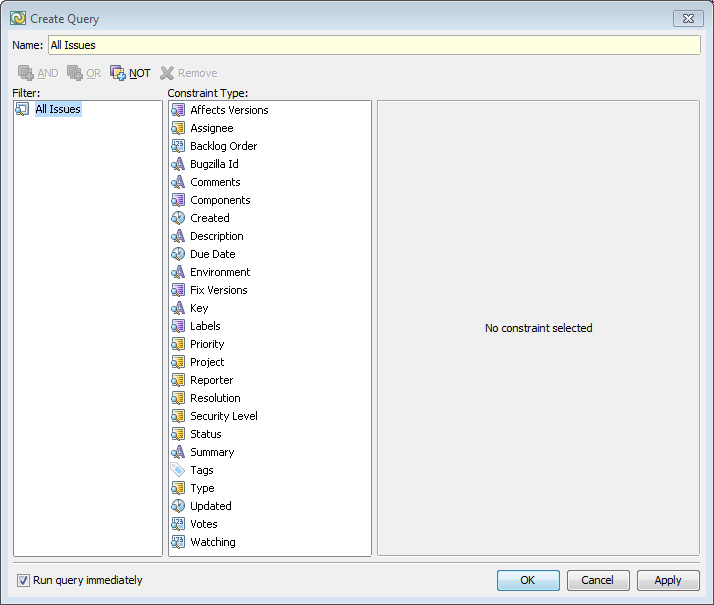
- Type the query name and select any desired combination of conditions with AND, OR and NOT operators and press OK.
Creating Distributions
Distributions help you to refine the search results as they logically split them into more details, for example, you can break down found issues by status, assignee or other property.
To create a distribution:
- Click the Create Distribution
 button on the toolbar or press Ctrl + D (⌘ + F4 for Macintosh).
The Create Distribution dialog opens.
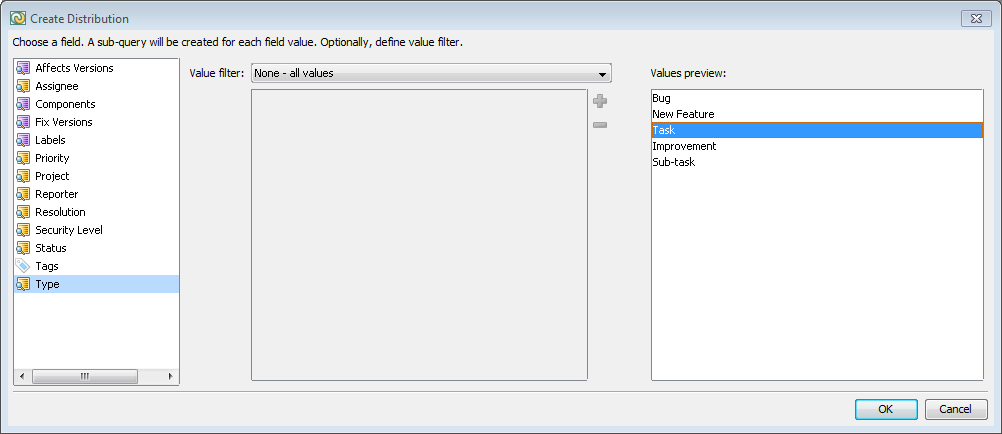
- Select the desired search filters and click OK.
Running Quick Text Search
If you search returned too many results, you can narrow it down and search for a specific word within the discovered issues. To do so:
- Press Ctrl+Shift+F (⌘ + ⇧ + F).
This will open a search box over the issues table.
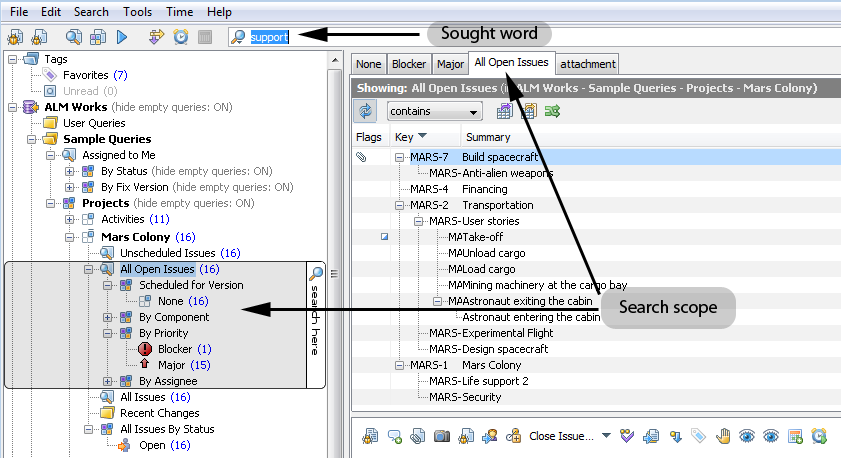
- Type the desired word(s) and press Enter.
To move between the search results, use  and
and  buttons.
For more information, please refer to searching issues section.
See Also