Integrating with IDE
In this section:
Introduction
JIRA Client integrates with such IDE's as:
- IntelliJ IDEA (version 7.0 and later) via TrackLink plugin
- Microsoft Visual Studio 2008 via Tracklink.NET plugin
The integration plugins for these IDEs allow to perform the following actions:
- work with issues retrieved from Deskzilla or JIRA Client, inside the IDE,
- search and get live query results in a tool window inside IDE,
- view the issues summary.
System Requirements
Tracklink for IntelliJ IDEA:
- Deskzilla 1.3 or JIRA Client 1.0 (or later)
- IntelliJ IDEA (7, 8, and 9)
Tracklink.NET for Microsoft Visual Studio 2008:
- Deskzilla 1.3 or JIRA Client 1.0 (or later)
- Microsoft Visual Studio 2008
- .NET Framework 3.5
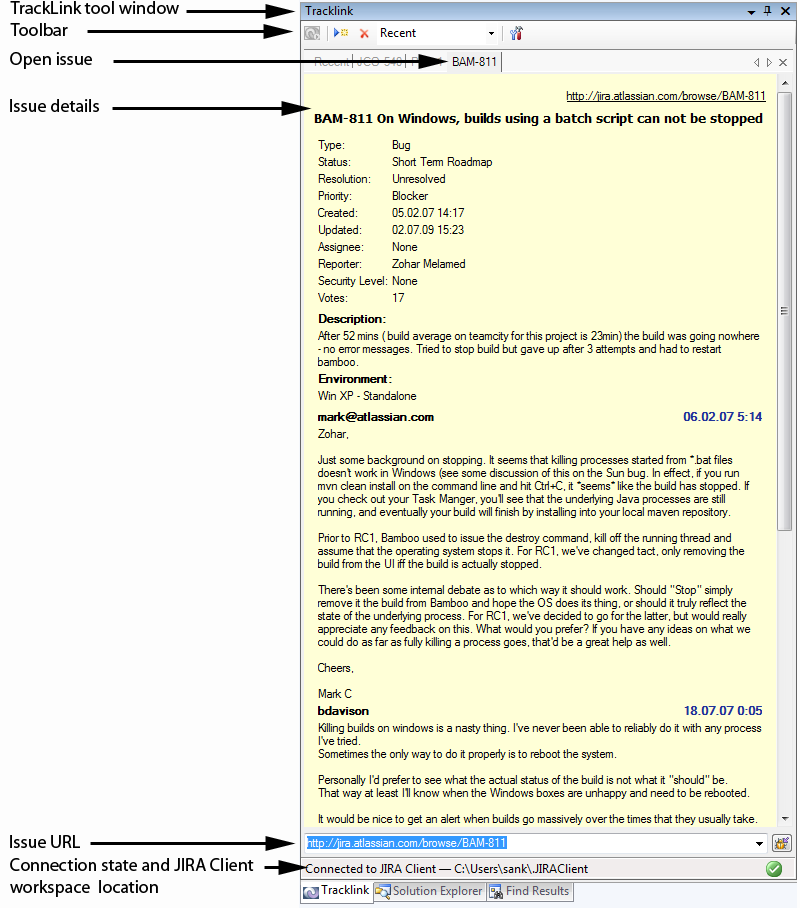
Working with TrackLink
TrackLink plugin for IntelliJ IDEA integrates with Deskzilla and JIRA Client. It provides the following features:
- Quick search through issues
- Viewing issues information
To make sure you have the latest issues information in your IDE, JIRA Client must be up and running.
Installing and Configuring TrackLink
To install TrackLink:
- Start IntelliJ IDEA and do one of the following:
- select File | Configure Plugins command,
- on the Welcome screen, press Open Plugin Manager button.
- select File | Settings menu item, navigate to IDE Settings area and select Plugins.
The plugins list opens.
- Click the Available tab, navigate to TrackLink and select it, then right-click and choose Download and install command on the context menu.
- Confirm your wish to download and install the plugin.
- Wait for the plugin to download and gets installed and restart IntellJ IDEA to activate the plugins changes.
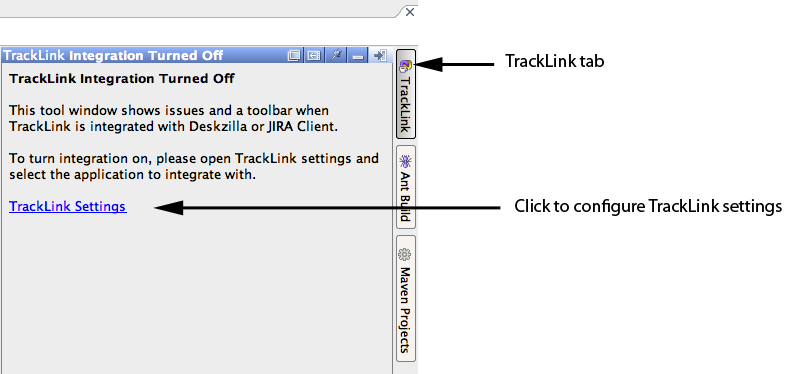
TrackLink plugin is installed, and its tab appears on the right side of the IntelliJ IDEA main window.
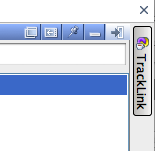
- Click the TrackLink button
 to expand TrackLink tool window and configure its settings.
h. Configuring TrackLink Settings
After installing the plugin you need to configure its settings and turn on integration with JIRA Client or Deskzilla. To do so:
- Click the TrackLink Settings link.
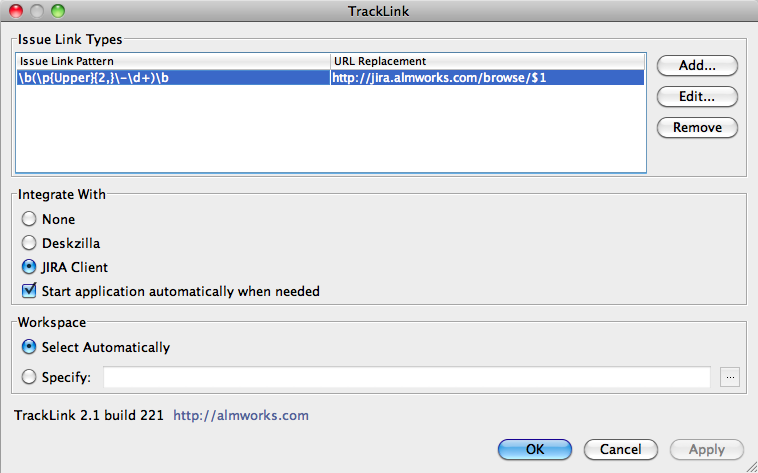
The TrackLink dialog opens.
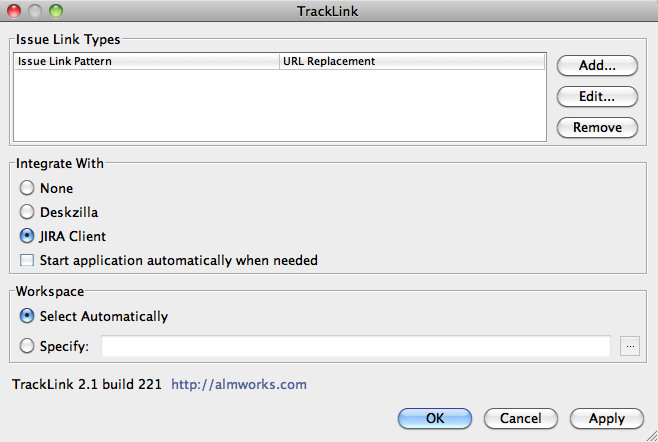
- Specify desired settings:
- Click the Add... button.
The Add Link Type dialog opens.
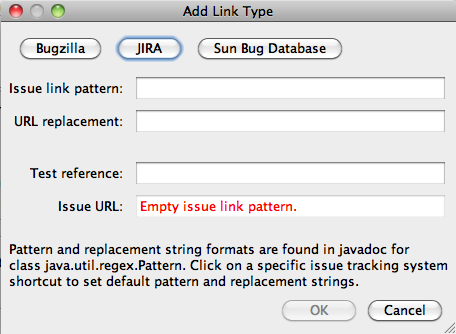
- In the Add Link Type dialog, click, JIRA button to create JIRA issue link type association.
The JIRA Issue Link Type dialog opens.
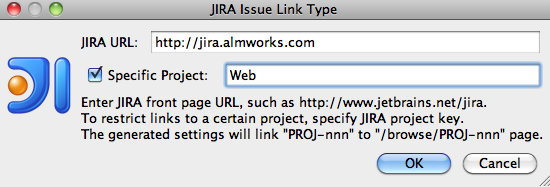
- Specify the issue link type and click OK.
The link type appears in the TrackLink dialog.
- Click the Add... button.
After installation is complete, TrackLink tool window opens. Table below provides a description of TrackLink toolbar buttons.
Button |
Description |
|---|---|
|
Launch JIRA Client. |
|
Add a query for monitoring. |
|
Remove a query from monitoring. |
|
Specify TrackLink settings. |


Specifying Queries for Monitoring
In JIRA Client, specify a query to be monitored in IntelliJ IDEA. To do so:
- Click the Add Query button
 on TrackLink toolbar and select a desired query in the Navigation Area in JIRA Client. As you do it, the query name appears in the dialog.
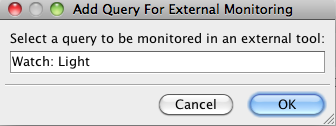
Information on selected query appears in TrackLink tool window in IntelliJ IDEA.
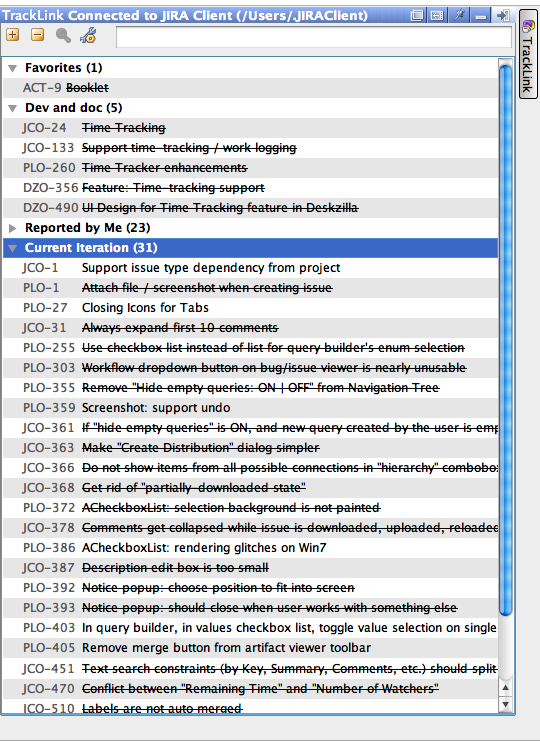
Viewing Issues Information
To view the information on issues in IntelliJ IDEA:
- Navigate to a desired issue in the tool window and double-click it.
The issue summary appears in a pop-up window.
Searching Issues
To search for issues:
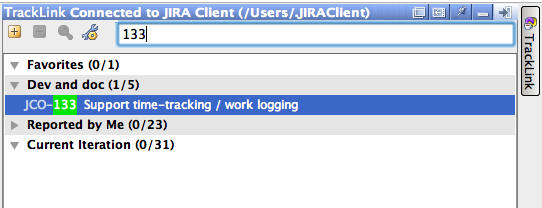
- Start typing the issue key in the search box of TrackLink tool window.
The issues list is filtered, and issues, matching your query, appear as you type.
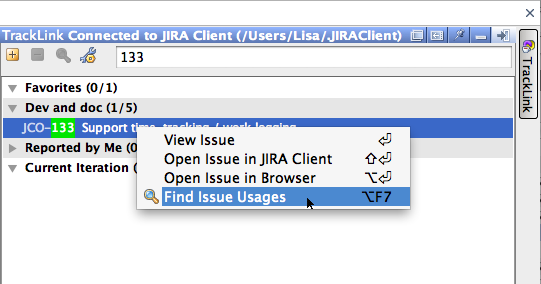
Finding Issue Usages
To find issue usages:
- Select a desired issue in the TrackLink tool window and click Find Usages button
 on the toolbar, or right-click an issue and select Find Usages command on the context menu.
The Find Issue Links dialog opens.
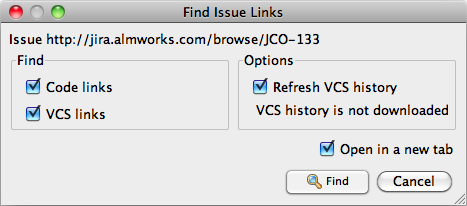
- Select the desired options and click Find.
Working with Tracklink.NET Add-in for Microsoft Visual Studio
TrackLlnk.NET is an Add-in for Microsoft Visual Studio 2008. It integrates with Mozilla's Bugzilla and Atlassian JIRA issue tracking systems via JIRA Client and provides the following features:
- viewing and navigating to a desired issue
- filtering a list of issues and issue details in IDE,
- navigating to a desired issue by its ID or URL,
- connecting to JIRA Client from within Microsoft Visual Studio 2008 and searching for not yet downloaded issues.
Installing Tracklink.NET
Before starting the installation, make sure Microsoft Visual Studio 2008 is shut down.
To install Tracklink.NET Add-in for Microsoft Visual Studio 2008:
- Download and run the Add-in distribution package from our website or launch JIRA Client and select Tools | Integrate with IDE menu item.
The Visual Studio Content Installer dialog opens.
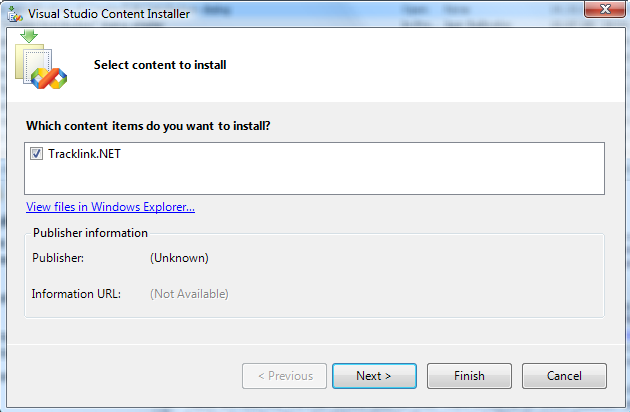
- Follow the instructions of the installation wizard.
The Add-in is installed into the following directory:
C:\Users\User Name\Documents\Visual Studio 2008\Addins
The configuration data and logs are stored in the following directory:%appdata%\ALMWorks\Tracklink.Net
To view custom query results and latest issues' details in Microsoft Visual Studio 2008, you must have Deskzilla or JIRA Client installed, configured, and running.
After installation is complete, Tracklink tool window opens. Table below provides description of its toolbar buttons.
Button |
Description |
|---|---|
|
Click to launch JIRA Client. |
|
Request a query from JIRA Client. |
|
Remove current collection. |
|
Specify watched settings for watched collection. |


Specifying Queries for Monitoring
To select a query for monitoring in Microsoft Visual Studio 2008:
- Launch Microsoft Visual Studio 2008 and select *Tools | TrackLink * command.
The Setup Tracklink.NET dialog opens.

- Select JIRA Client as an application to integrate with and specify other settings and click OK.
TrackLink tool window now displays items in JIRA Clients Favorites folder (if any).
- On the Tracklink.NET tool window toolbar, click Request query from JIRA Client button
 and select a desired query in JIRA Client Navigation Area.
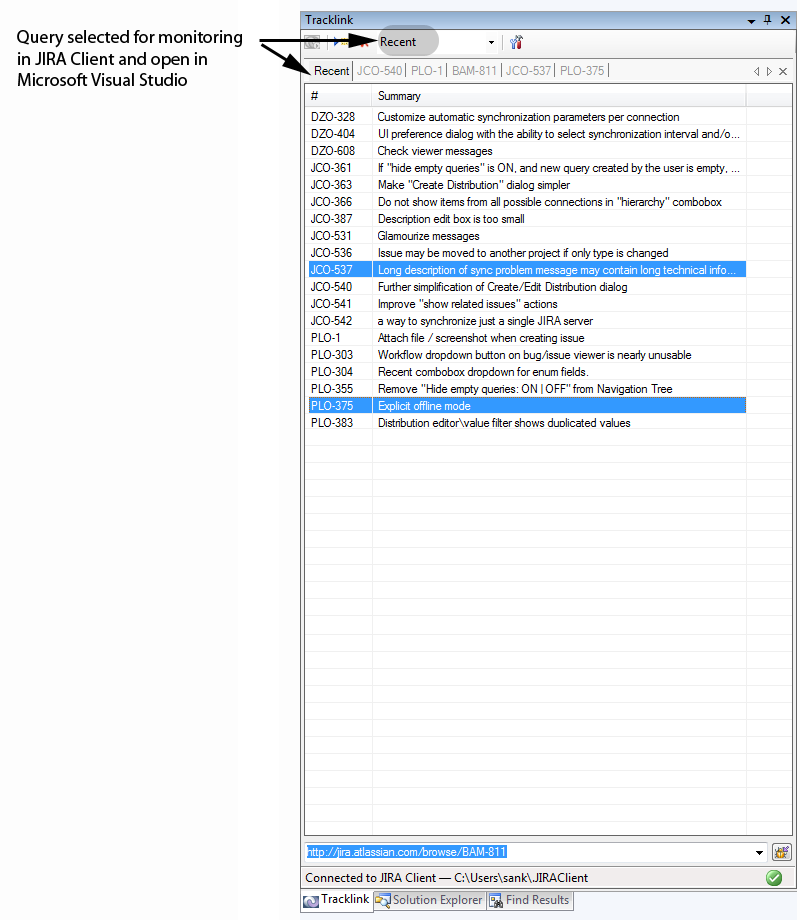
The query opens in Microsoft Visual Studio 2008, and you can browse issues right inside the IDE.On picture below Recent query is selected in JIRA Client and opens in Microsoft Visual Studio 2008.
- To navigate to a desired issue, double-click it to open in a separate tab in the tool window.
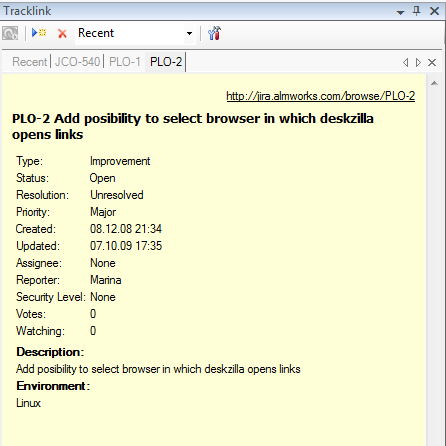
Navigating to an Issue by URL
To navigate to an issue by URL:
- Type the issue URL in the lower part of a tool window and click Load issue button
 .
.
The issue opens in a separate tab of the tool window.
Specifying the Settings of Monitored Queries
To specify Tracklink.NET settings:
- Navigate to Tracklink.NET tool window and click Select watched collections settings button
 .
. - In the Tracklink.NET Settings dialog which opens, select desired issue loader options.
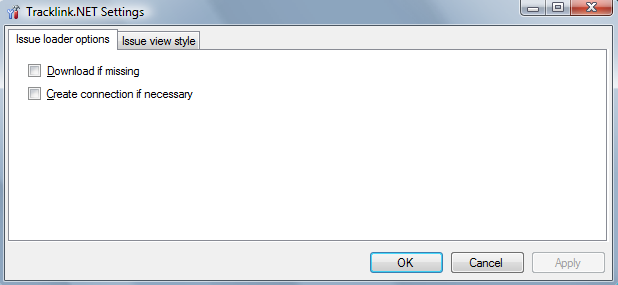
- Select Download if missing to download information on issues which are not in the queries you have selected for monitoring.
- Select Create connection if necessary to have JIRA Client create a connection if it doesn't exist. When you search for issues, which are not in configured connection, a Connection Manager is launched in JIRA Client, and you can create a new connection to have the requested issue available in Microsoft Visual Studio.
See Also