Customize your structure, call attention to critical information or color-code data fields using wiki markup within formula columns.
Wiki markup allows you to:
To add wiki markup to a formula column:
Click the Add Column button (+) and select Formula

As you save/update the formula, your new column should update automatically. Once you're finished, click anywhere on your structure to close the Add Column dialogue and see your new column.
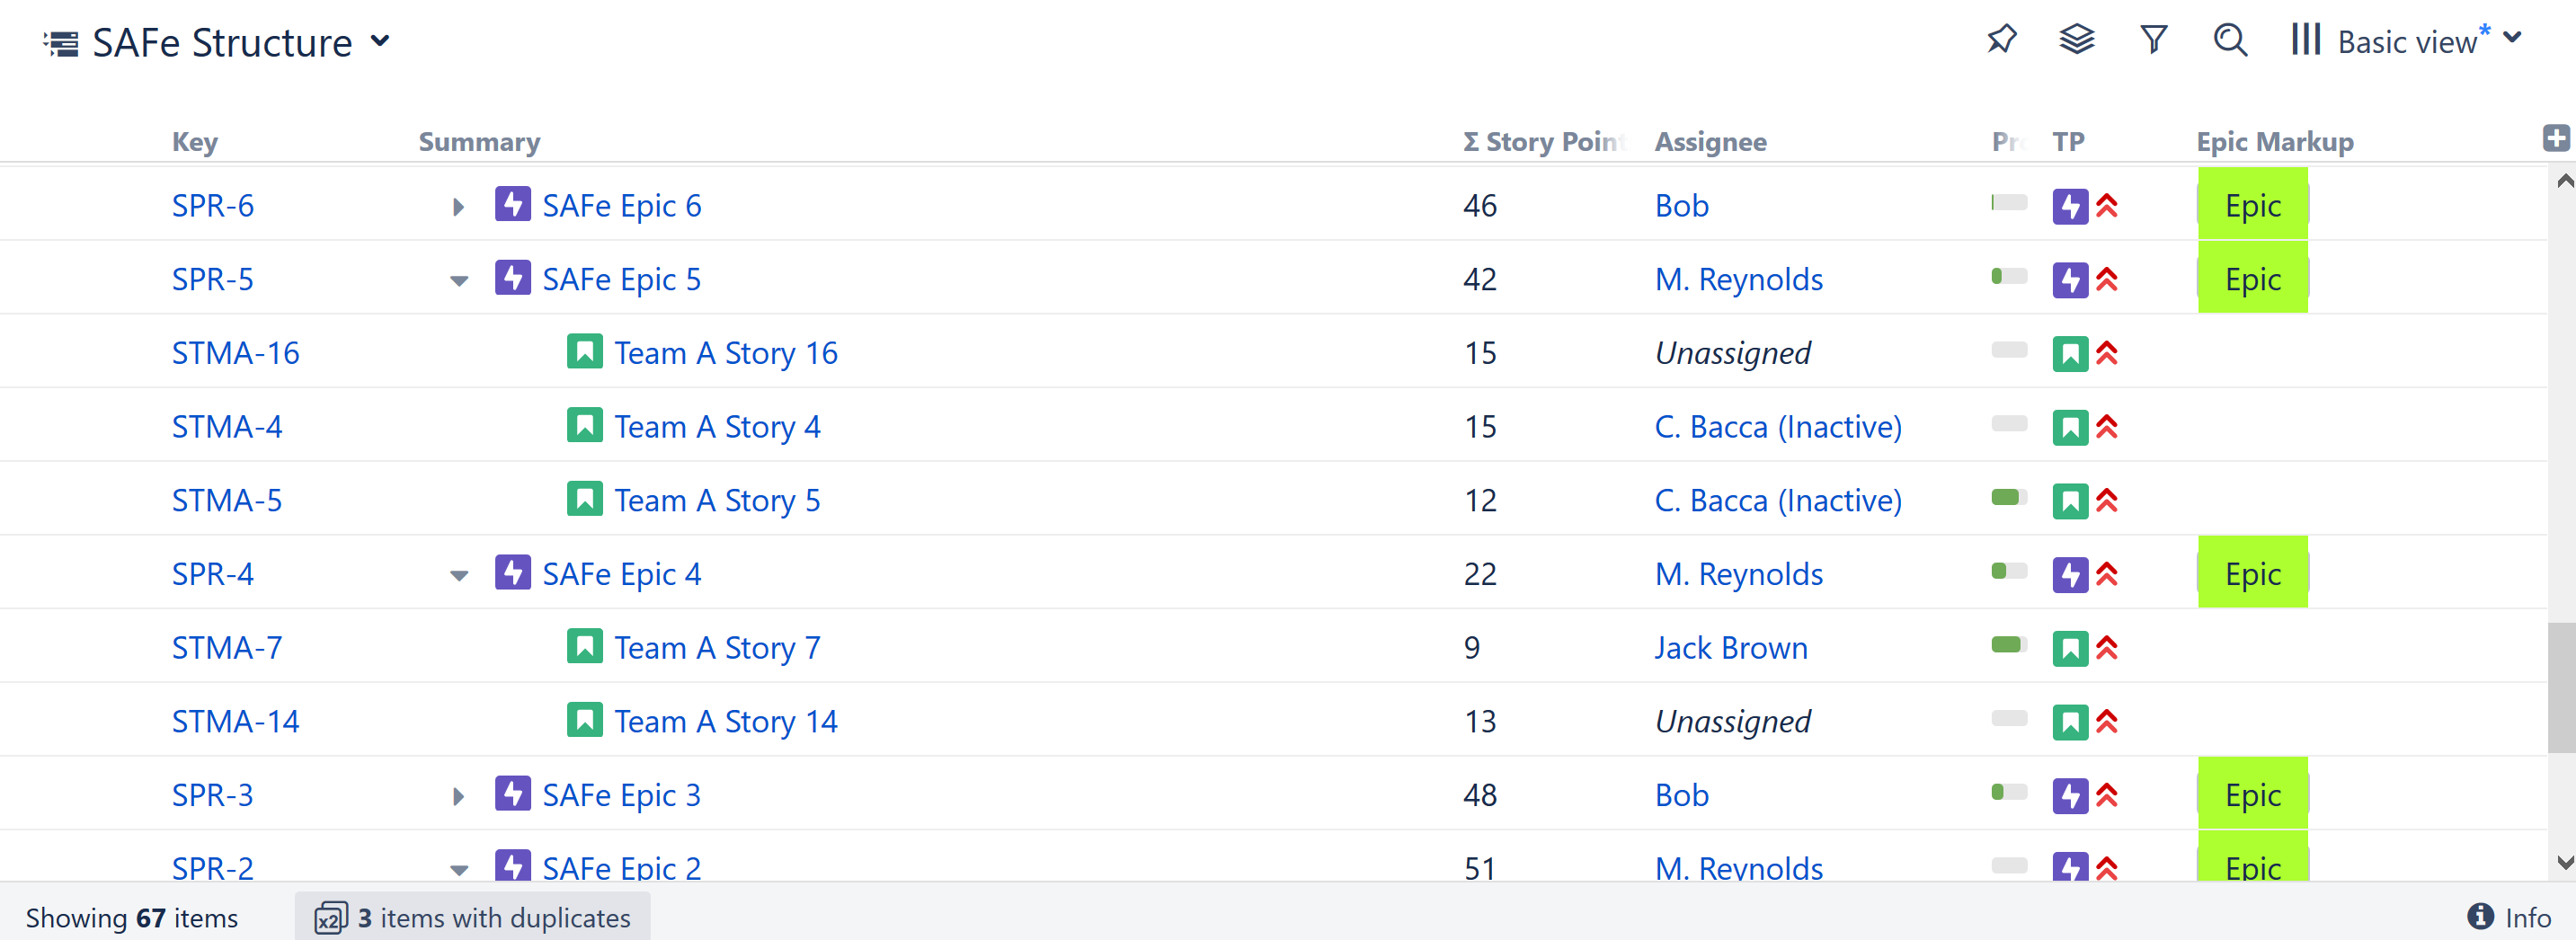
The example above highlights all the Epics in the structure:

Here's the formula we used - just in case you want to try it yourself: If (issuetype="Epic"; "{panel:bgColor=#ADFF2F}Epic{panel}")
With a few more If statements, you could color-code your entire structure by issue type. Or you could assign different colors to each Assignee or some other custom field. The possibilities are endless! |
Structure uses the Jira Markup language to enable wiki markup within formula columns.
Using wiki markup, you can add the following elements to a cell:
You can find a complete list of available formatting options and conventions on Jira's Text Formatting Notation Help page.
| All markup language should be included between double quotes ("). |
While it is possible to add tables and lists to a formula column, we do not recommend it. Due to the limited space, these items may not appear as expected. |
Wiki Markup can be exported to Excel or printed, using Structure's Export feature.
Your markup should export just as it appears in Structure, with some exceptions:
| It's fine to mix text and emojis/images in the same column, just not the same cell. |
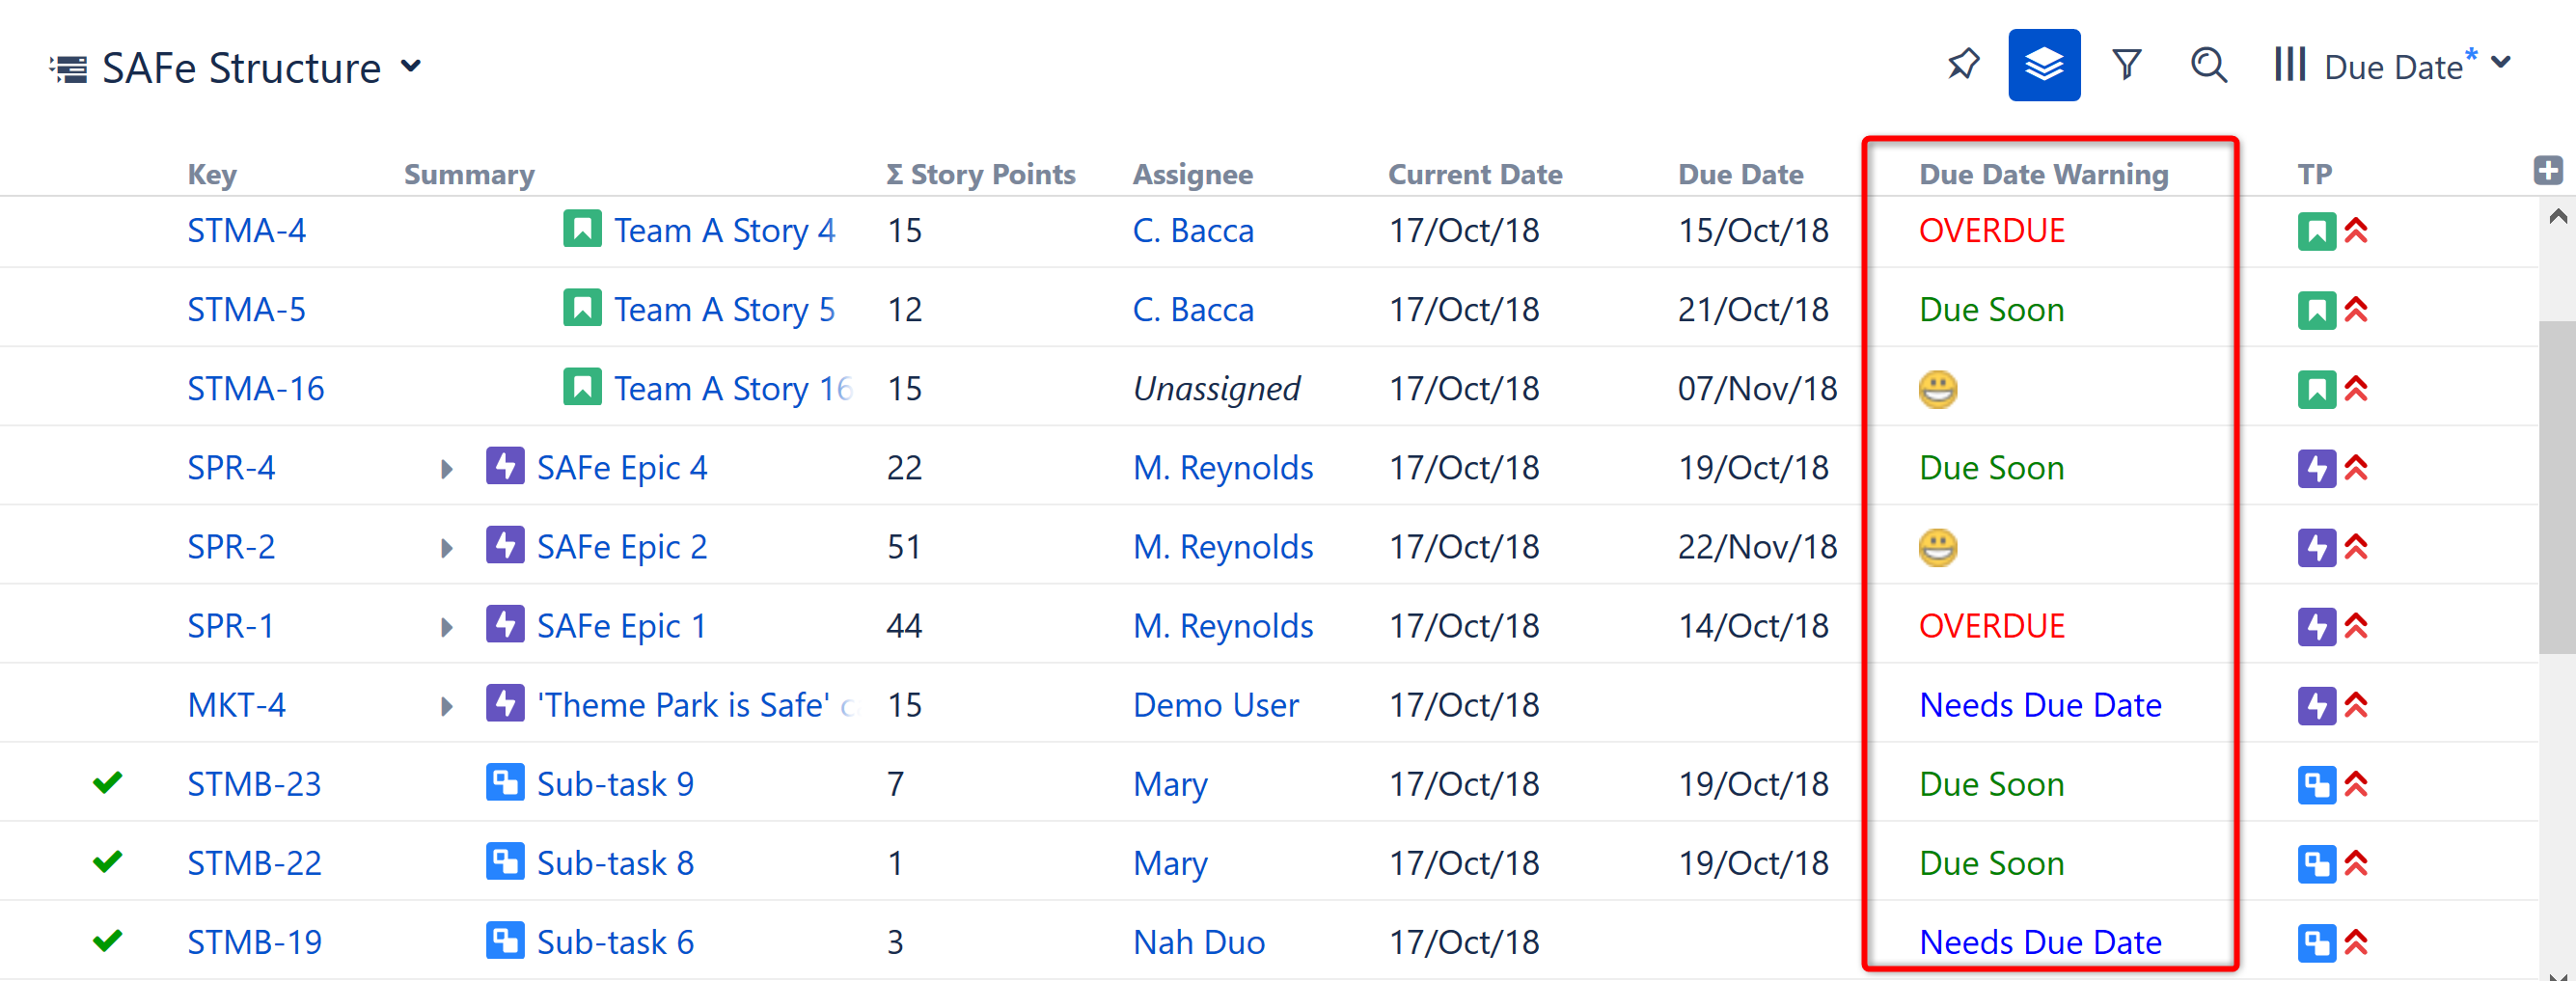
In the following example, we have created a simple formula to draw attention to overdue and upcoming due dates:

To accomplish this, we added markup language to a standard If statement:
if (DueDate < today(); "{color:red}OVERDUE{color}"; DAYS_BETWEEN(today(), DueDate) <=7; "{color:green}Due Soon{color}"; DAYS_BETWEEN(today(), DueDate) >7; ":D"; "{color:blue}Needs Due Date{color}")

| We used text to call attention to overdue items, but you could also add a flag: "(flag)" |
To learn more about using If statements, DAY_BETWEEN, or any other functions, see Expr Function Reference.
In this example, we've created a column to quickly identify each project we're working on. In this case, each project is marked by a unique star color.

To create this column, we used the special character notations for stars "(*)" - along with color designations:
If (Project = "SAFe Program"; "(*b)"; Project = "SAFe Team A"; "(*y)"; Project = "SAFe Team B"; "(*r)"; Project = "Marketing"; "(*g)")
You could apply this same concept to any field, and you don't have to stick with stars. For example, you may want to color-code issues by team – or insert photos of your team mascots! |