Change Text Color
This example uses color-coded text to let users know when issue due dates are approaching (or overdue).
IF dueDate < today():
  ":panel[OVERDUE]{color=red}"
ELSE IF DAYS_BETWEEN(today(), dueDate) <= 7:
  ":panel[Due Soon]{color=green}"
ELSE IF DAYS_BETWEEN(today(), dueDate) > 7:
  ":smile:"
ELSE:
  ":panel[Needs Due Date]{color=blue}"
Change Background Color
This example changes the background color of the cell, according to the status category, and returns the summary text for each issue.
WITH format(text, color) = """:panel[${text}]{backgroundColor=${color}}""" :

CASE(status.category,
  "To Do", format(summary, "gray"),
  "In Progress", format(summary, "blue"),
  "Done", format(summary, "green")
)
You can easily customize this by changing the return value, altering the colors, or combining this effect with a larger formula.
Try experimenting with text and background color combinations - this can be a great way to draw attention to key data points.
Customizable Progress Bars - Based on a Custom Progress Field or Function
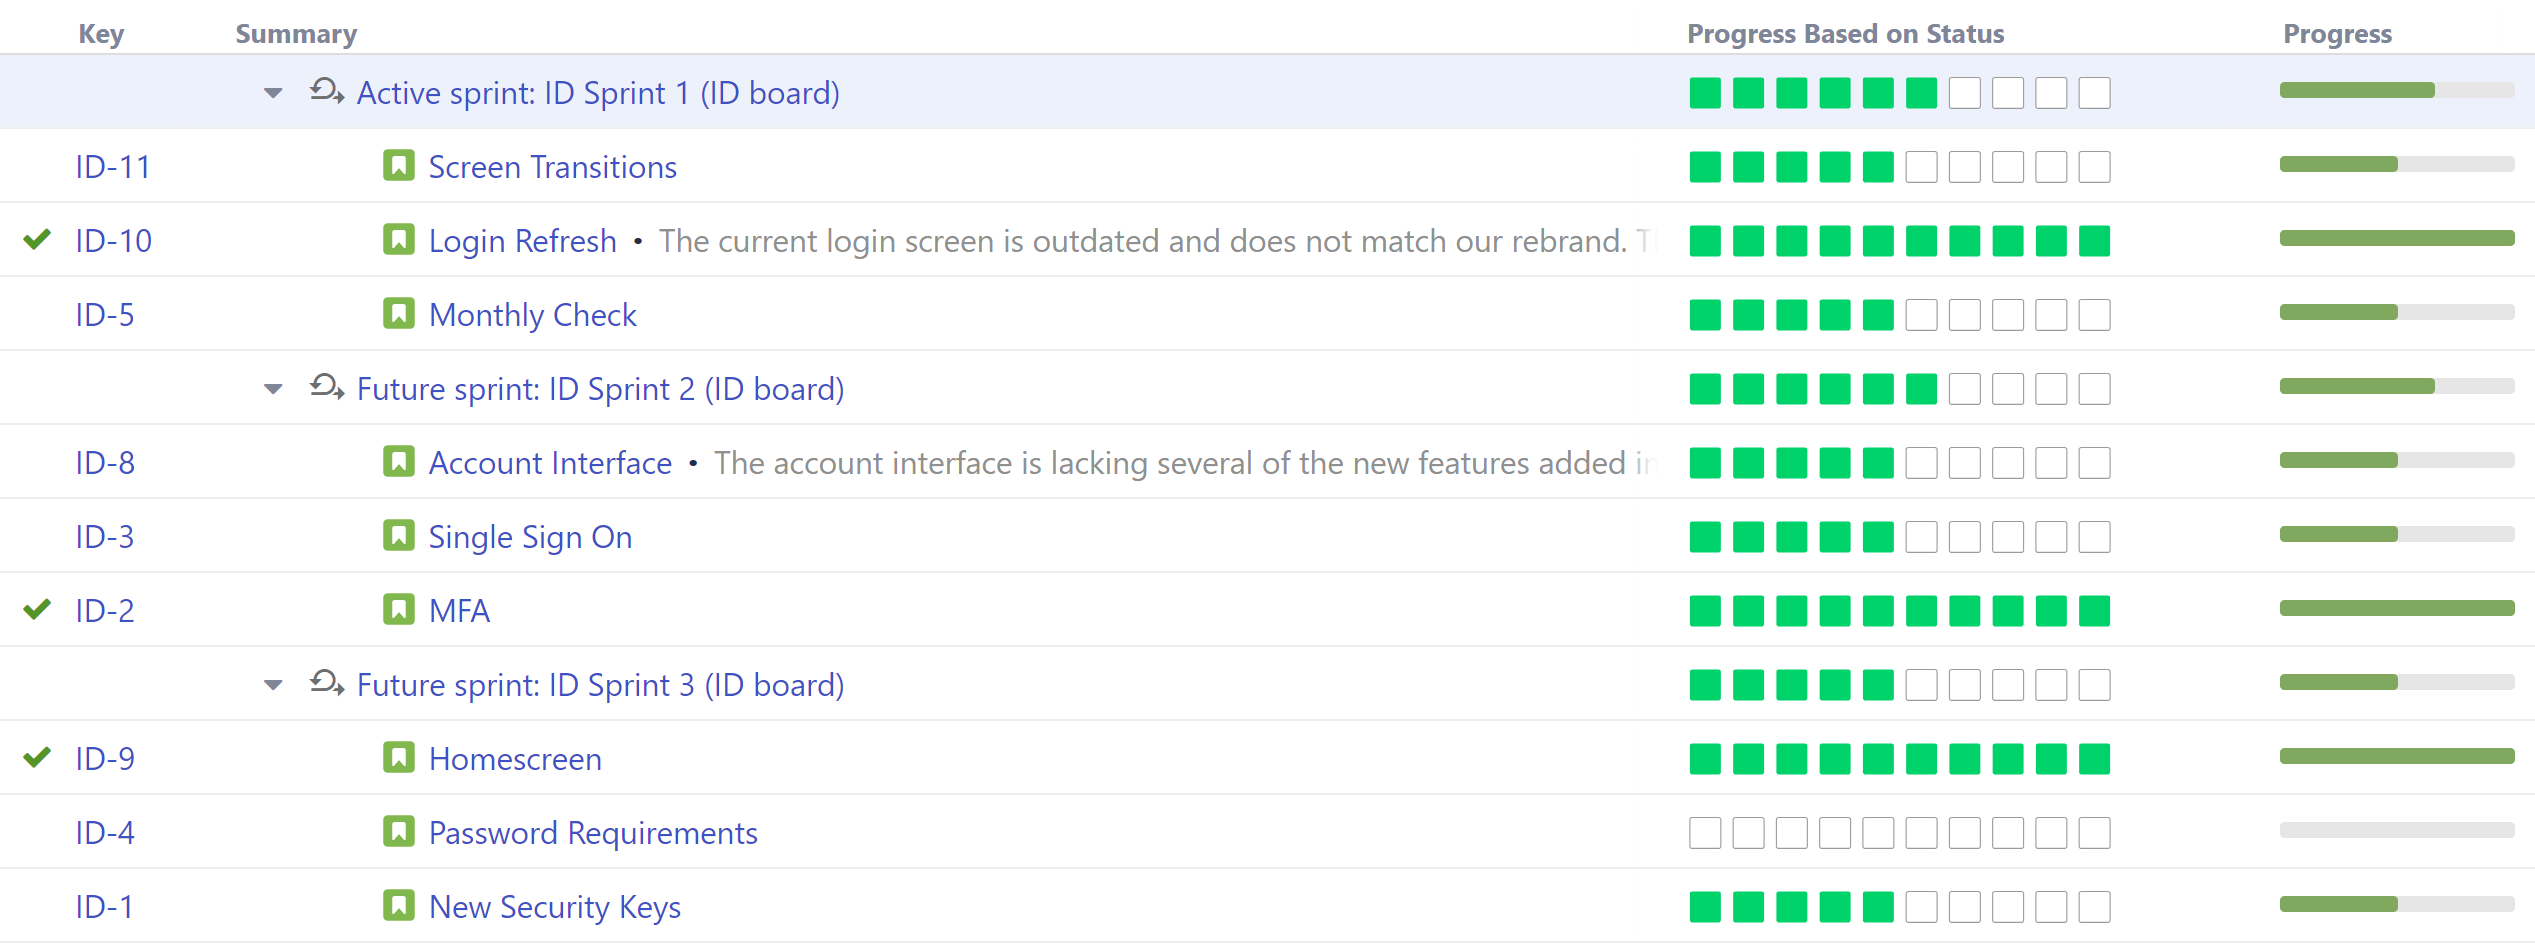
The following formula creates custom progress bars based on a custom progress field or user function.
We used the following formula to build the custom progress bar:
WITH simpleProgressBar(progress, maxProgress, stepCount) = (
  WITH _bars(count, emoji) = REPEAT(emoji, count):
  WITH doneBarsCount = FLOOR(progress / maxProgress * stepCount):
    _bars(doneBarsCount, ":green_square:") CONCAT _bars(stepCount - doneBarsCount, ":white_large_square:")
):


simpleProgressBar(customProgress, 1, 10)
Starting with this, you can tailor the progress bar to your team's particular needs.
- Colors can easily be configured by altering the "color" values - in this case, we used green and white squares.
- The stepCount value can be adjusted depending on how many squares you want to visualize.
- The progress calculation (customProgress) can be based on a custom field or custom user function. In the following example, we added a custom user function to mimic the default calculation in our Progress by Status column:
WITH simpleProgressBar(progress, maxProgress, stepCount) = (
  WITH _bars(count, emoji) = REPEAT(emoji, count):
  WITH doneBarsCount = FLOOR(progress / maxProgress * stepCount):
    _bars(doneBarsCount, ":green_square:") CONCAT _bars(stepCount - doneBarsCount, ":white_large_square:")
):


WITH customProgress = AVG {CASE(Status; "Done"; 1; "In Progress"; .5; "To do"; 0)}:
simpleProgressBar(customProgress, 1, 10)
Customizable Progress Bars - Based on Status Categories
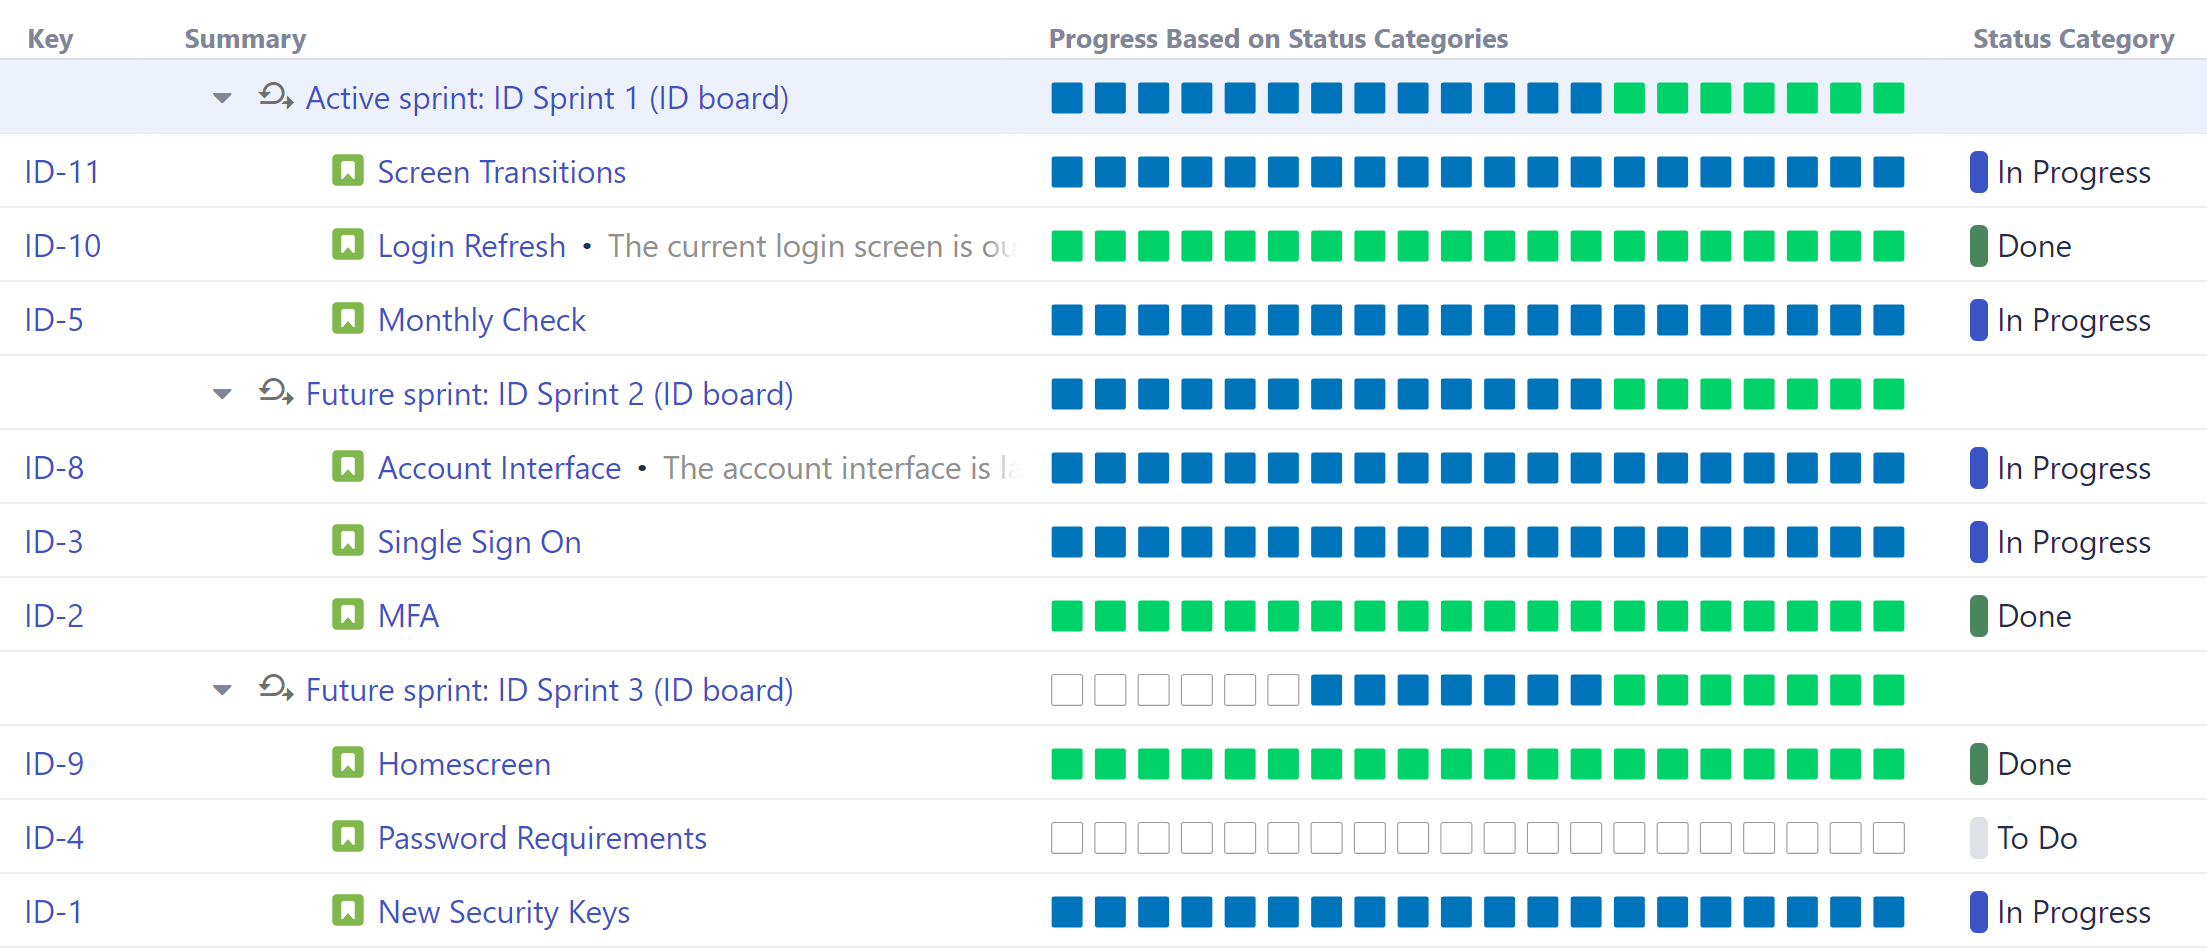
The following formula calculates progress based on the Status Categories of the issue and its children.
WITH multiProgressBar(progressArray, maxProgress, emojiArray, stepCount) = (
  WITH _bars(count, emoji) = (IF count > 0: REPEAT(emoji, count) ELSE ""):
  WITH barCountsWithInitial =
    ARRAY(
      ARRAY(ARRAY(ARRAY(0, maxProgress, stepCount))),
      progressArray)
   .FLATTEN() // imitate foldl with initial value
   .REDUCE( (prevArray, p) ->
 	WITH s = prevArray.LAST().get(1):
  	WITH k = prevArray.LAST().get(2):
  	WITH pCount = if (s = 0; 0; FLOOR(p / s * k)):
  	WITH newElement = ARRAY(pCount, s - p, k - pCount):
  	ARRAY(prevArray, ARRAY(newElement)).FLATTEN())
   .MAP(a -> a.get(0)):
  WITH barCounts = barCountsWithInitial.SUBARRAY(1, barCountsWithInitial.SIZE()):
  progressArray.INDEXES()
	.MAP(_bars(barCounts.GET($), emojiArray.GET($)))
	.JOIN("", "", "")
):
WITH all = COUNT#truthy { statusCategory }:
WITH todo = COUNT#truthy { statusCategory = "To Do" }:
WITH inProgress = COUNT#truthy { statusCategory = "In Progress" }:
WITH done = COUNT#truthy { statusCategory = "Done" }:
multiProgressBar(
  ARRAY(todo, inProgress, done), all,
  ARRAY(":white_large_square:", ":blue_square:", ":green_square:"),
  20
)

