To build a structure in Speed mode, start with scope (what projects do you work from) and then tell Structure what you want to see on every level of your hierarchy (issue types, groupings by field, etc.).
Step 1: Define Your Scope
Select the projects you want to include in your structure. Select as many projects as you need.
This does not add all the issues from these projects to your structure - you will decide which issues to include in the next step - but it does limit which issues can be included. Only issues in the selected projects can appear in the structure.
Step 2: Organize Your Issues
Next, you get to decide how you want your issues organized. You can add issue levels or group levels.
- Issue level - adds a new level of issues, based on issue type. When you add an issue level, you need to select the issue type and link type (how these issues are related to the issues above them). In some cases, Structure will select the link type for you, but you can edit it if necessary.
- Group level - groups the issues in the level beneath it based on a Jira field.
You can add issues/groups in any arrangement:
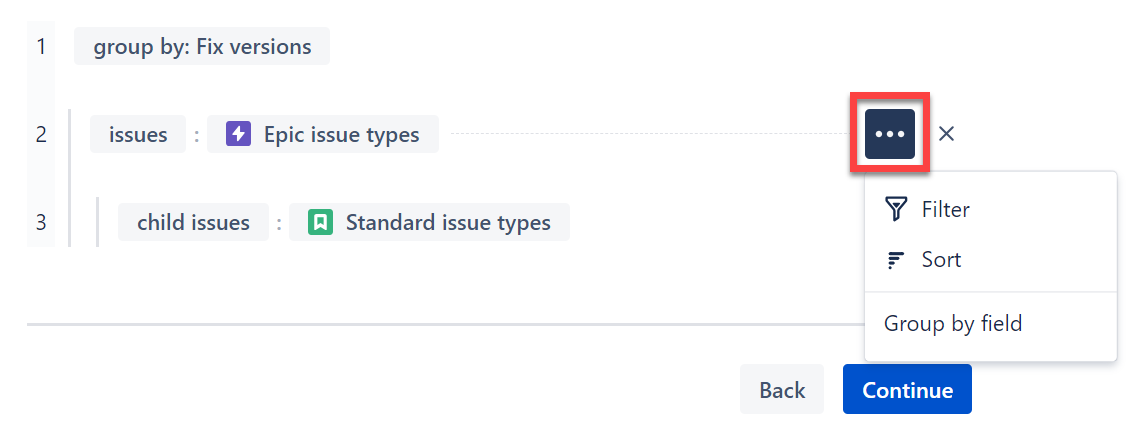
To filter, sort, or group an issue level, hover over the level and click the three dots (...) to the right.
To apply a filter at the project level, click the Filters button beside the projects list.
Step 3: Name Your Structure
Give the structure a name and meaningful description (optional). You can also share your structure with members of your team, or keep it private.
Once you're finished, click Create and the new structure will be built automatically.
Next Steps
If you're happy with the structure you've created, move on to Editing Issues in Structure.
If you'd like to learn more ways to build structures, move on to Building a Structure in Power Mode.


