Welcome to Structure Quick Start Guide! We kept this guide as brief as possible while covering all the major features the plugin has to offer. It will only take a few minutes to read, and we're sure it will be useful both for the seasoned Structure pros and for new users!
To make new features easier to find, we've marked them with the ![]() icon. We've also added links to relevant articles from the previous version documentation.
icon. We've also added links to relevant articles from the previous version documentation.
Basic Facts
- Structure lets you create 'containers' (called structures) where you can add issues and then arrange them into a meaningful hierarchy.
- You can add issues from any number of JIRA projects and arrange them in any way regardless of issue types, statuses or any other properties.
- You can create as many levels of hierarchy as you need.
 In Structure 3+ apart from working with issues, you can also create special Folders for organizing your issues.
- In Structure 3+ you can have the same issue multiple times in one structure, which is essential when you need to show many-to-many relationships (for example, one bug breaking several features).
- You can build structures manually or automatically with the help of the Generators and Transformations, which allow you to add, filter, sort and group issues.
- Structure offers a set of really useful custom columns, including progress (calculated by various criteria), totals for numeric fields and more.
Creating Your First Structure
- Start by creating a new structure through Structure | Create menu.
- As you create the structure you can specify who can view and edit it. Please refer to the previous version documentation for full details.
- Once you click Create and Open, you will see an empty structure. Now let's add some issues.
- Open the Secondary Panel by clicking the Layout control in the top right corner, or use the Add | Search & Add toolbar button in the top left corner.

- You can see the JQL search field and the search results below it. Run the JQL query to find the issues you want to add to your structure. You can also switch to Plain Text Search or open an existing structure in the secondary panel by clicking the JQL link.
- Now select the issues you want to add by clicking the circle in the leftmost column next to each issue and drag them into the structure using the handle control next to the selection circle.
- You can start arranging issues into a hierarchy using either drag-and-drop or the control button in the toolbar above the structure board.
- Try inserting the same issue into several places in the structure. You can do that either by dragging it from the secondary panel to the main panel several times, or by moving the issue inside the main panel while holding down the CTRL key (Option key on Macs)
You can quickly switch between structures in both main and secondary panels by clicking the structure name and selecting the structure you want to see. If your structure is not among the recent structures, start typing the structure name and the list of suggested structures will be updated to match your input.

When you have two panels open side by side, you can hide from the right panel the issues that are present in the left panel by clicking the hide button in right side of the panel toolbar next to the view selector.

Working with Issues and Folders
Apart from adding existing issues into your structure you can also create new ones right there.
Creating Issues and Folders
- In your structure, focus on an issue under which you want to create a new issue and press Enter (or press Shift+Enter to create a new sub-issue on a level below). The New Issue Panel for quick issue creation will appear. Alternatively you can click the Add button in the top left corner to add a new item (an issue, a folder, etc.) to the structure.
- Specify the issue summary, select project and type, and press Enter or click the Done button to create the issue.
- You can switch to JIRA's native New Issue dialog by clicking the Switch to Dialog link at the bottom of the panel. To go back to the panel, click the Switch to Panel button in the dialog.
- When the New Issue Panel is open, switch to the Folder tab on the left side of the panel to create a folder. Folders exist only in Structure and can be used as containers for issues. You can move them around just like issues.

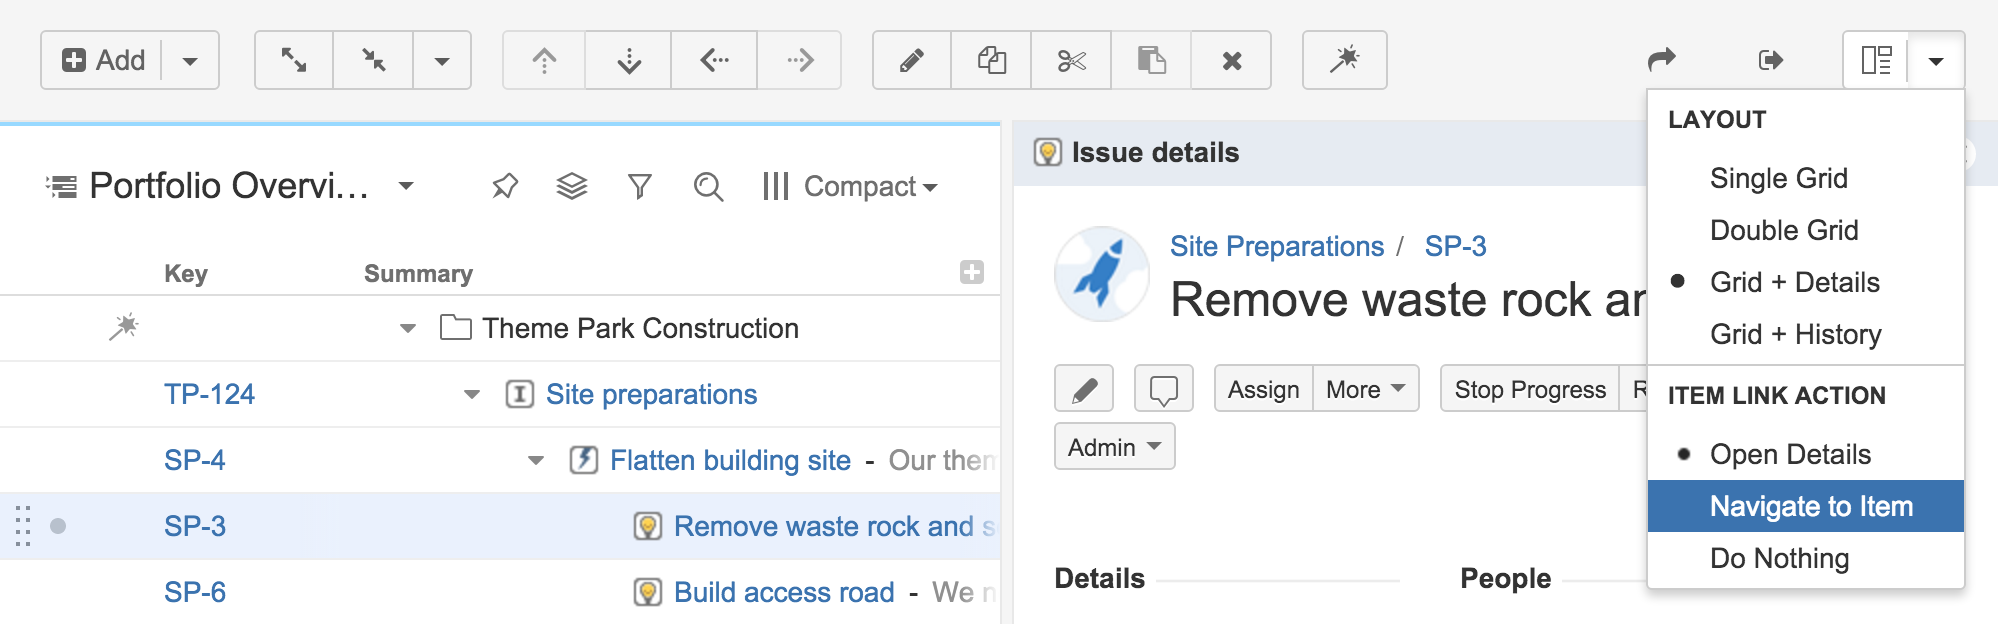
You can quickly see the full issue information in the Issue Details panel, which opens once you click the issue summary or issue key. If you don't want to open the panel, you can select another behaviour: either go to the standard JIRA Issue Details page or do nothing. You can change this setting by clicking the drop-down button next to the Layout control in the top right corner.
Editing Issues
You can edit issues right in the structure. Add the columns for the fields you want to edit and double-click the value you want to modify to switch to the editing mode. You can also edit issues in the Issue Details panel.
Special Columns and Views
Structure offers several very useful custom columns:
- Progress. Progress can be calculated based on the Time Tracking, Status or a custom field such as Story Points. Add the Progress column to your structure and review the calculation settings by clicking a small triangle, which appears if you move the mouse over the column header. You can find all the details on how the progress is calculated in the full documentation.
- Σ Totals. You can show totals for any numeric field and the value for each issue will be calculated as a sum of the values of its children. This is especially useful for showing such things as Estimates, Time Logged, Story Points, etc. You can set this option for any numeric field in the column header (Sum over sub-items) or you can just add one of the pre-defined columns.
- Work Logged. You can show the work logged for every issue over a selected period.
Once you've added all the columns you need, you can save them as a custom view. To do that, click the name of the currently selected view (in the right corner above the structure grid) and click the Save As link.
 Automating Structures
While the ability to organize issues manually is already valuable in many situations, the true power of Structure lies in its automation functionality. Using the new features you can quickly create dynamic structures and easily segment and break down your issues based on various criteria.
The automation works through special Generators - a set of functions that manipulate issues in a certain way.
Types of Generators
Insert. Insert Generators allow you to add the results of a JQL or text query to the structure and keep them up-to-date. If some issue is updated and no longer satisfies the query, it's not shown anymore. Apart from the query results, you can add entire structures into other structures or add epics and stories from selected Agile boards.
Filter. If you want to remove some of the issues after you've built the structure (for example, remove all closed issues), you can use the Filter Generator and specify the query that describes the issues that you want to keep - the rest will be removed from the strucutre.
Sort. To arrange your issues in a certain order you can use the Sort Generator. You can sort by pretty much any field, but note that there are two Sort Generators with different behaviour:
Rank. If you use JIRA Agile and add sorting by Rank, Structure can update the Rank as a user moves issues up and down inside the Structure.
Manual. If you are working with a structure where issues were added by the Insert Generator based on some JQL query, by default you will not be able to re-order issues in such a structure. To be able to do that, you need to add the Manual Sorting Generator.
Group. With this function you can break a list of issues into groups based on your JIRA fields. Groups can be nested. For example you can take a list of issues and group them by fixVersion and then by Assignee. Thus you will see the existing fixVersions on the top level, Assignees on the second and then the issues themselves on the third, grouped accordingly. If you enable editing via Structure in the generator settings, Structure can update the fields by which the issues are grouped when you drag-and-drop issues from one group to another.
Extend. Using the extend functions you can pull in issues related to those that are already in the structure. You can extend with sub-issues, JIRA links and Epic links (if you are using JIRA Agile). As with other generators, you can enable editing via Structure and the links will be updated as you move issues in your structure.
Configuring Generators
To configure generators you need to switch to the Automation Editing mode. To do that click the Automation (magic wand) button in the toolbar.
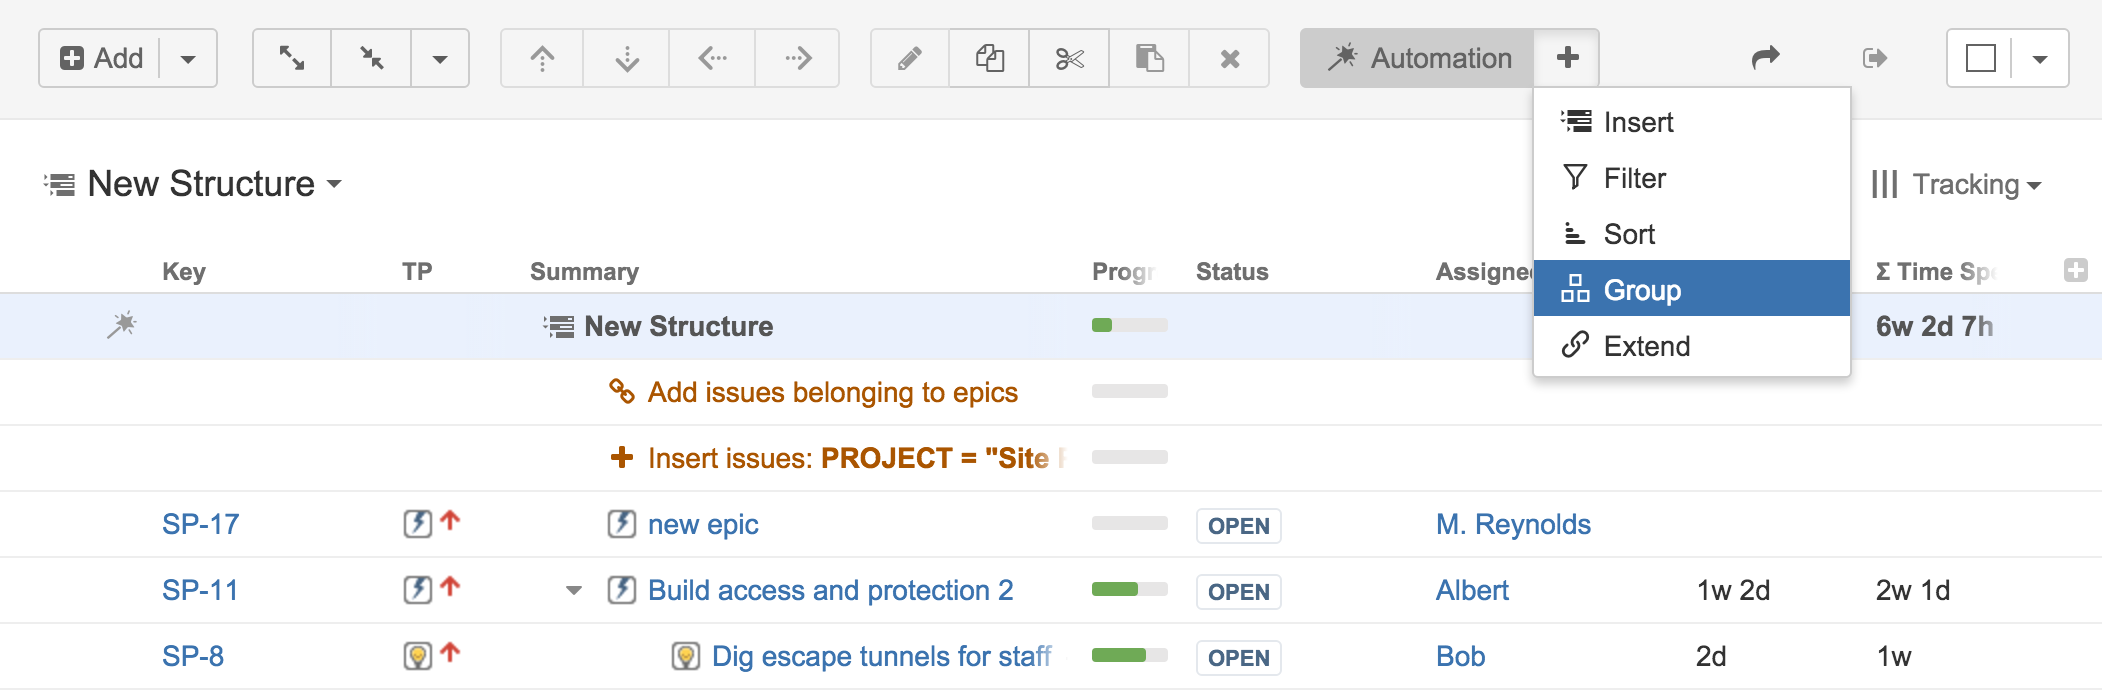
The special root item showing the structure name will be displayed at the top of the structure. Select this item and then click the Plus next to the Automation button and select the kind of the generator you'd like to add.
As you add more generators, they are re-ordered automatically based on their type. In some cases you can manually reorder generators. For example, you if you have two groupers, you can change their order to change by which field the issues should be grouped first. The same can be done with sorters.
If you want the generator to be applied to the whole structure, make sure you set focus on the root item before adding this generator.
You cannot add generators under issues that were added to the structure by some other generators (for example, inserter or extender results).
- If you need to edit a generator, double-click it and the edit dialog will appear.
Once you are done with the configuration, click the Automation button to hide the details.
When you use the Group, Extend or Sort by Rank generators, by default the structure will be able to update some JIRA data as you move issues in the structure. For the grouper it will update the field by which you group as you move an issue between the groups. For the extender it will update the JIRA or Epic links as you move a child from one parent to another. For the sorter by rank it will update the Agile Rank as you move an issue up or down.
If you want to disable this, deselect the Allow changes via Structure checkbox in the generator settings.
Further Structure Adjustments via Transformations
Structure generators allow you to build a structure that you can share with other users. Sometimes you will need to adjust the way it's organized for your personal needs, but you won't want to modify the structure for everyone else. For example, you might only want to see issues assigned to you, ordered by a certain field, and the issues which are linked to them. You can do this with the help of Transformations.
The simplest transformation is Sorting. Click the column header to sort issues by the column field in descending order, click again to sort in ascending and click the Summary column header to remove the sorting and return to the original structure order.
Transformations function in a way similar to the generators, but are only applied locally without affecting the structure settings:
- To enable transformation editing, make sure you are not in Automation editing mode, then click the Transformations button next to the Views menu.

- In the bar that appears, you can add various transformations similarly to how you added generators.
- As you switch between the structures, the transformations remain and you can see every structure transformed the same way.
- The ability to save transformations is coming soon. Currently there are two pre-defined filters: Unresolved and Assigned to me. You can access them pressing the Filter button next to the Transformation menu.
- You can hide the Transformations toolbar by clicking the small 'upwards arrow' button or remove them completely by clicking the cross on the right side of the transformations panel.