Portfolio to Execution with Roadmunk and Structure
Connecting Roadmunk and Structure lets you link high-level planning with execution data, making it easy to track progress across all your projects and make decisions based on up-to-date, real-world data.
The following guide will show you how to turn your high-level roadmap into a structure, plan and track your work in Structure and Structure.Gantt, and update your original roadmap with your working data.
To get the most benefit from this integration, you will need:
If you aren't currently using any of these, you can download free trials at the links above.
Before you can work between Roadmunk and Structure, the system administrator needs to connect the two systems. See Connecting Roadmunk and Structure
Step 1: Build a Roadmap in Roadmunk
If you already have a roadmap you want to integrate with Structure, skip to Step 2 (Integrate with Structure). You don’t need to change your existing roadmaps for the integration to work.
If you haven’t created a roadmap yet, see Building Roadmaps. For best results, we suggest including start and end dates for all items in the roadmap. These will provide a baseline schedule for work planning and progress updates.
You can learn more about working with roadmaps on the the Roadmunk Knowledge Base.
If you have not yet installed Roadmunk, you can download a free trial here: Roadmunk
Step 2: Integrate a Roadmap with Structure
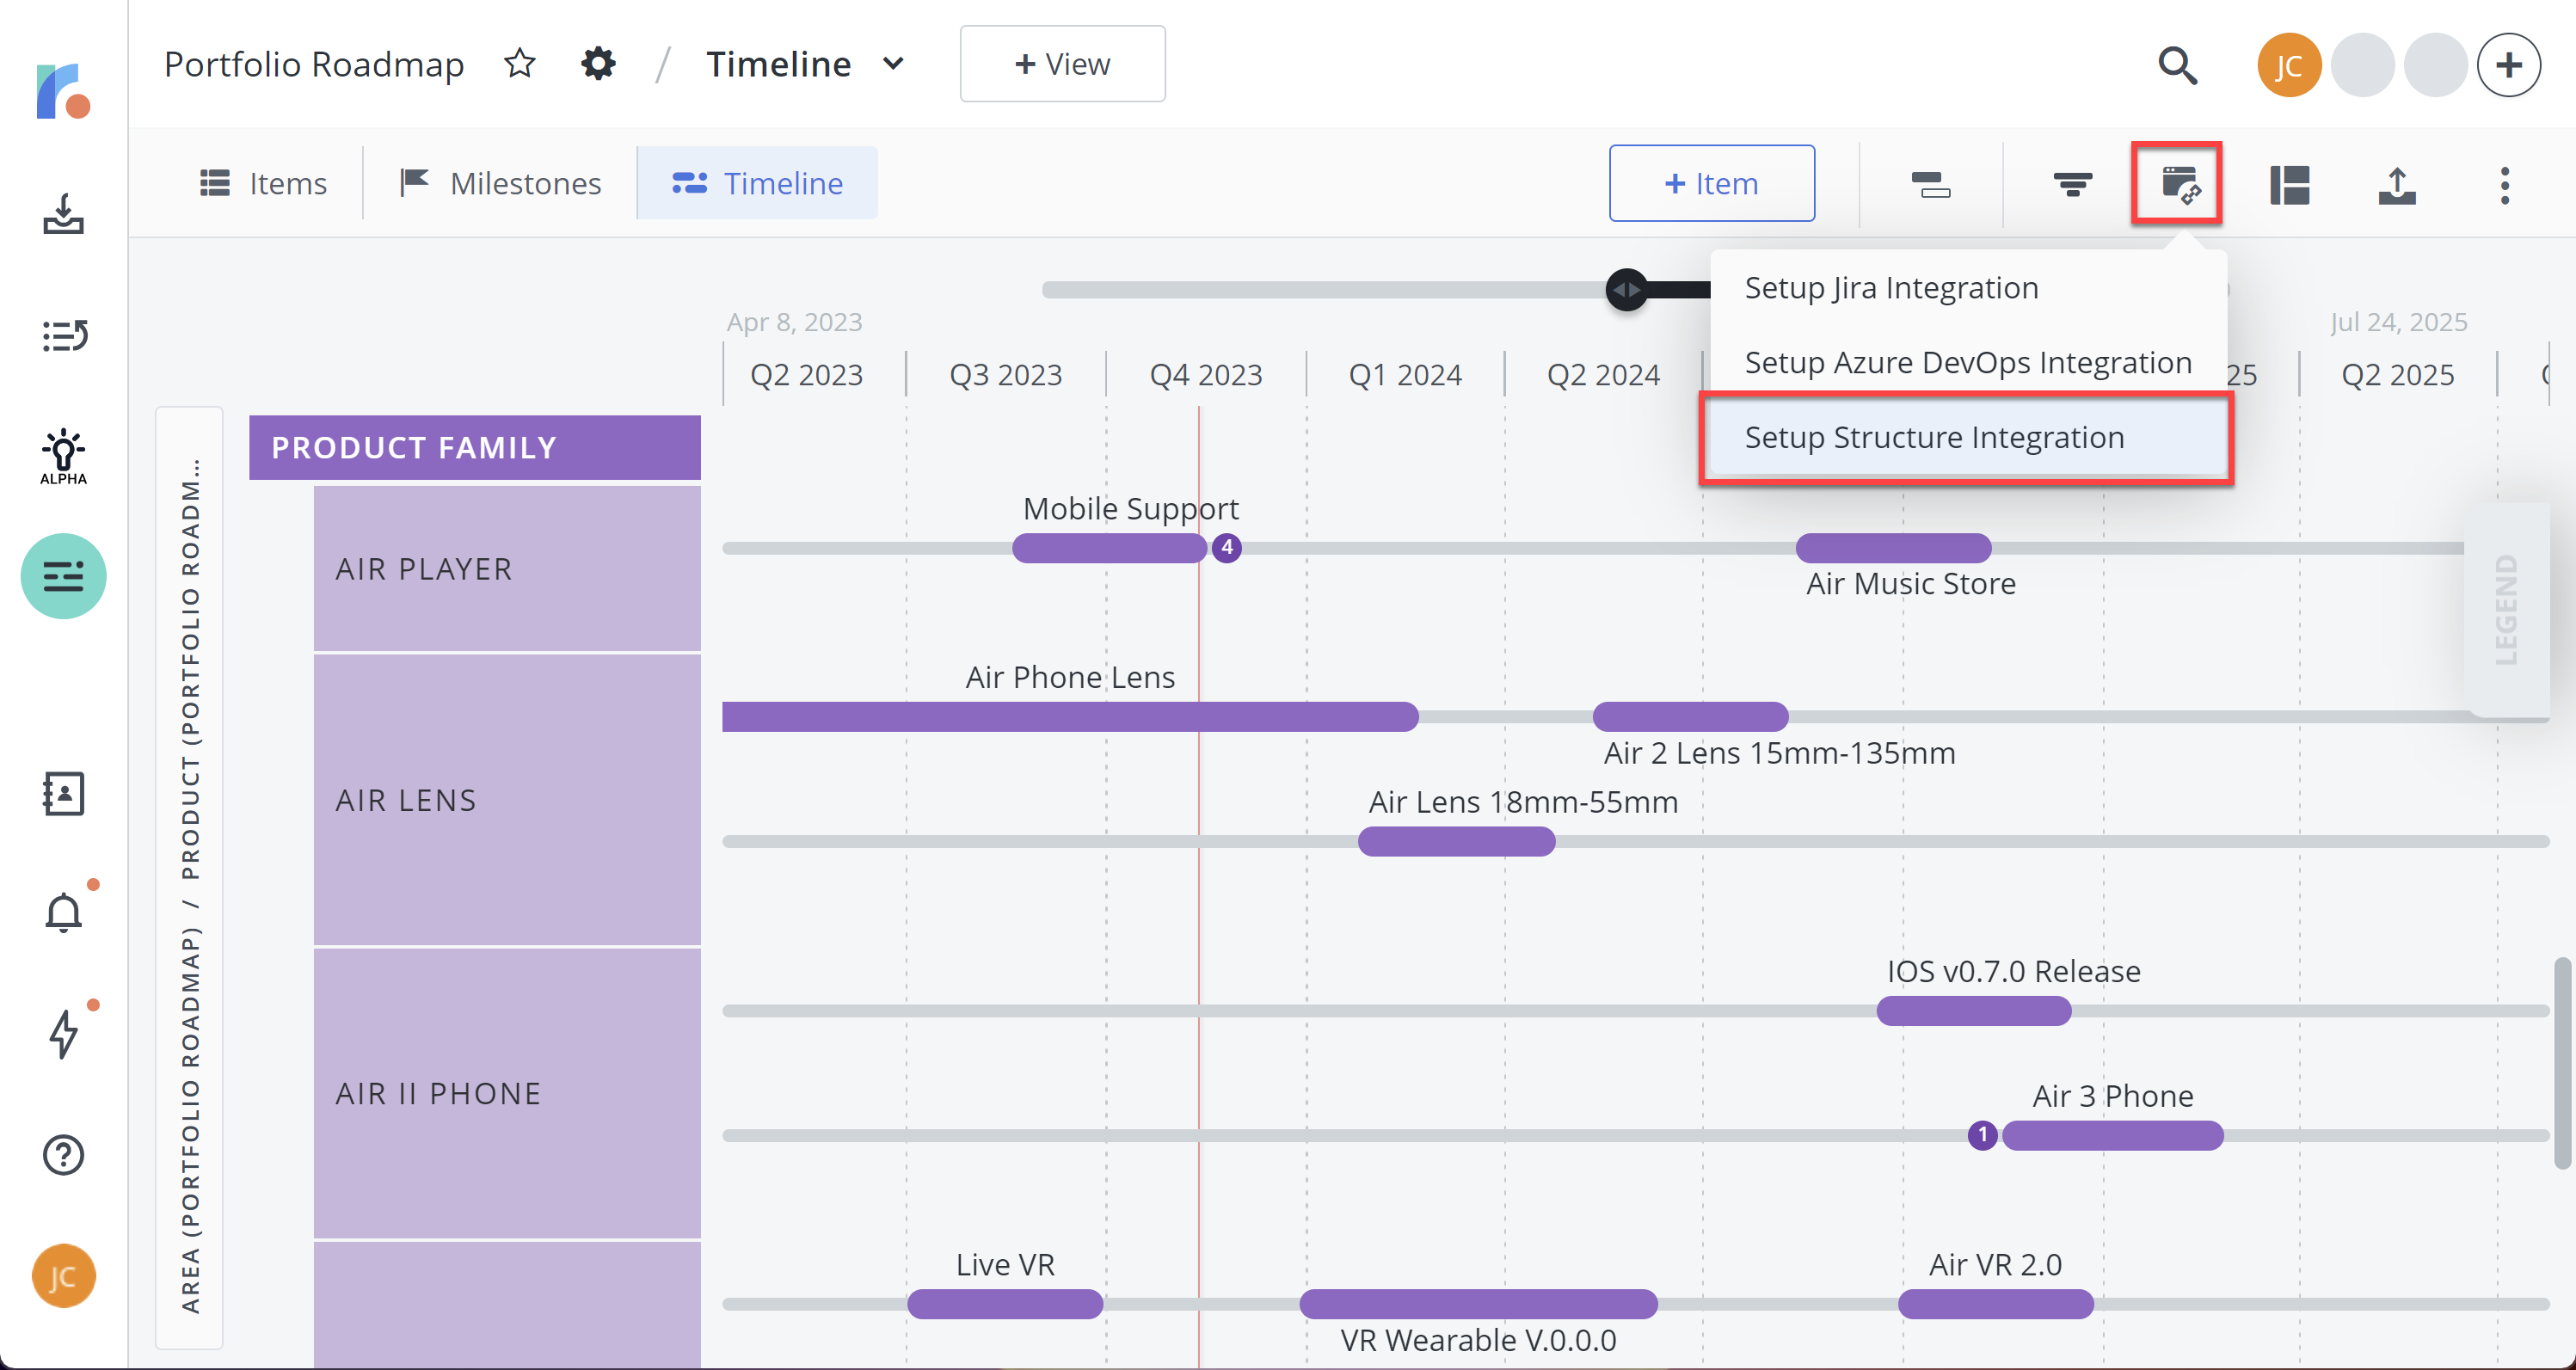
In Roadmunk, open your roadmap, click the Integrations button, and select Setup Structure Integration.
Make sure the system admin(s) have set up an integration between Roadmunk and Structure.
If the roadmap you want to integrate with Structure has already been integrated with Jira (or another system, you will need to create a copy of that roadmap before connecting it to Structure:
Copy of the existing roadmap: see Duplicating a Roadmap
Integrate the new roadmap with Structure
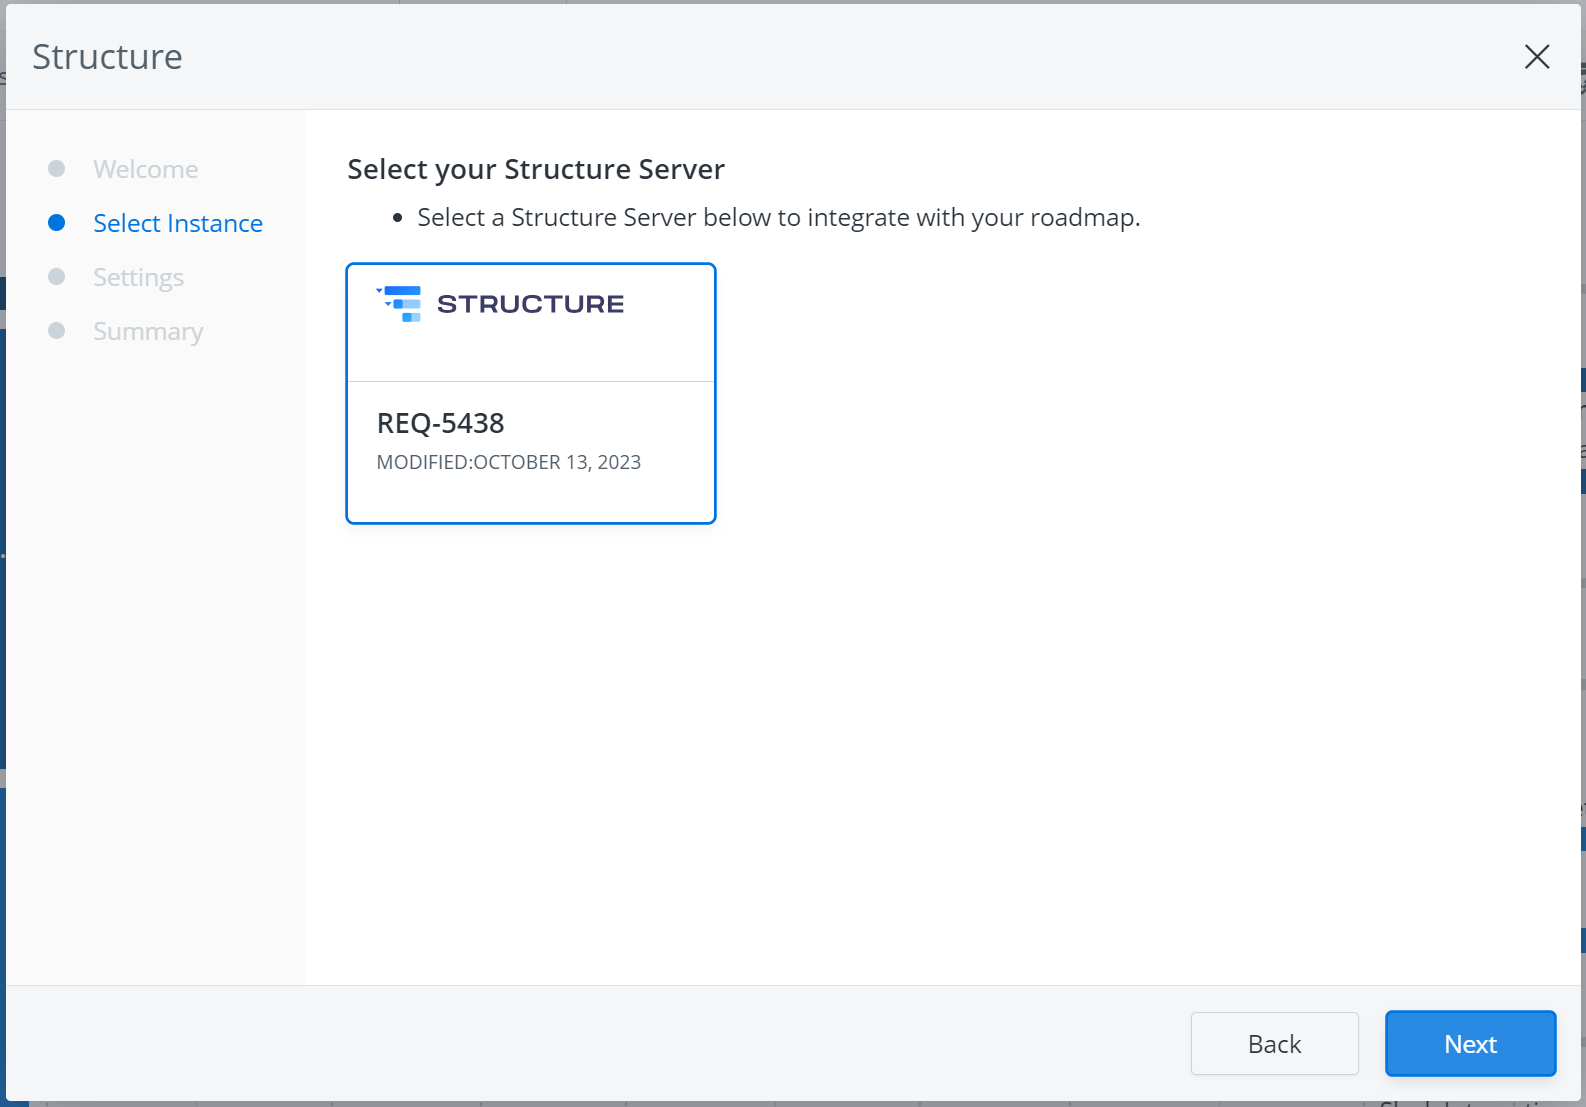
On the welcome screen, click Next.

Select the Structure server instance you want to use. Then click Next.
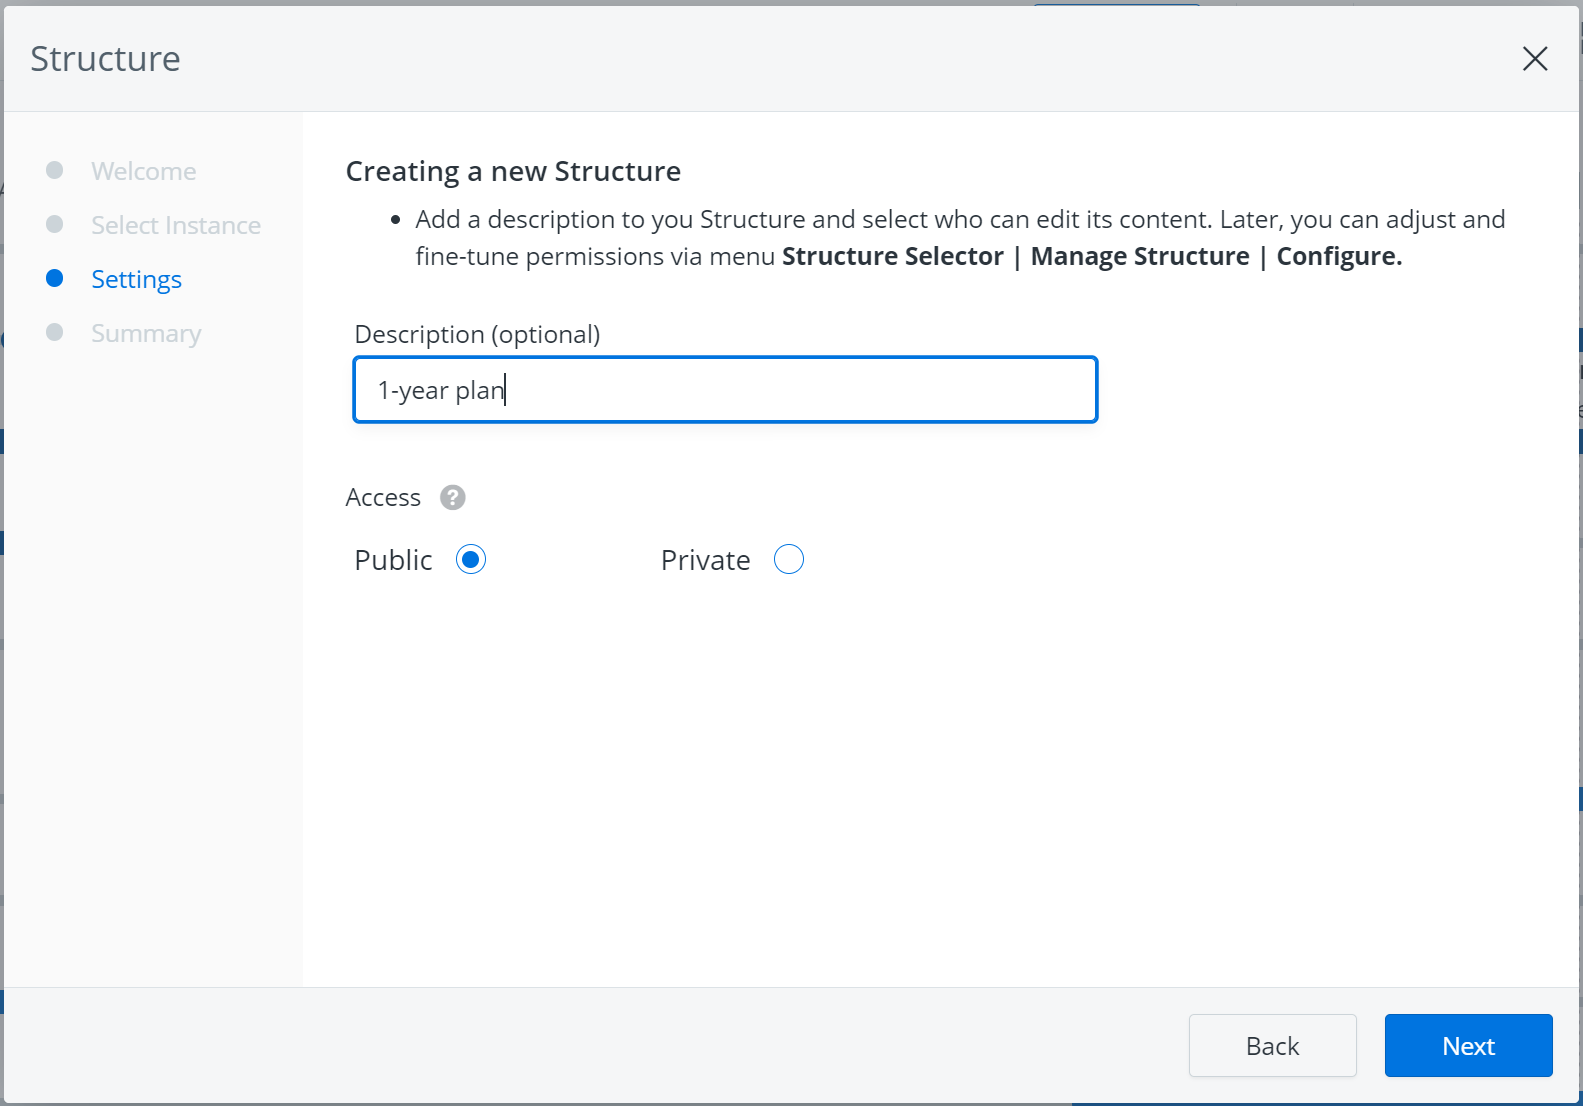
On the Settings screen, you can add a description for the structure (optional) to help other users know what it’s for and select whether the structure will be public or private:
Public - all Structure users will be able to view the structure, but only the owner (you) can make changes.
Private - only you will be able to see the structure.
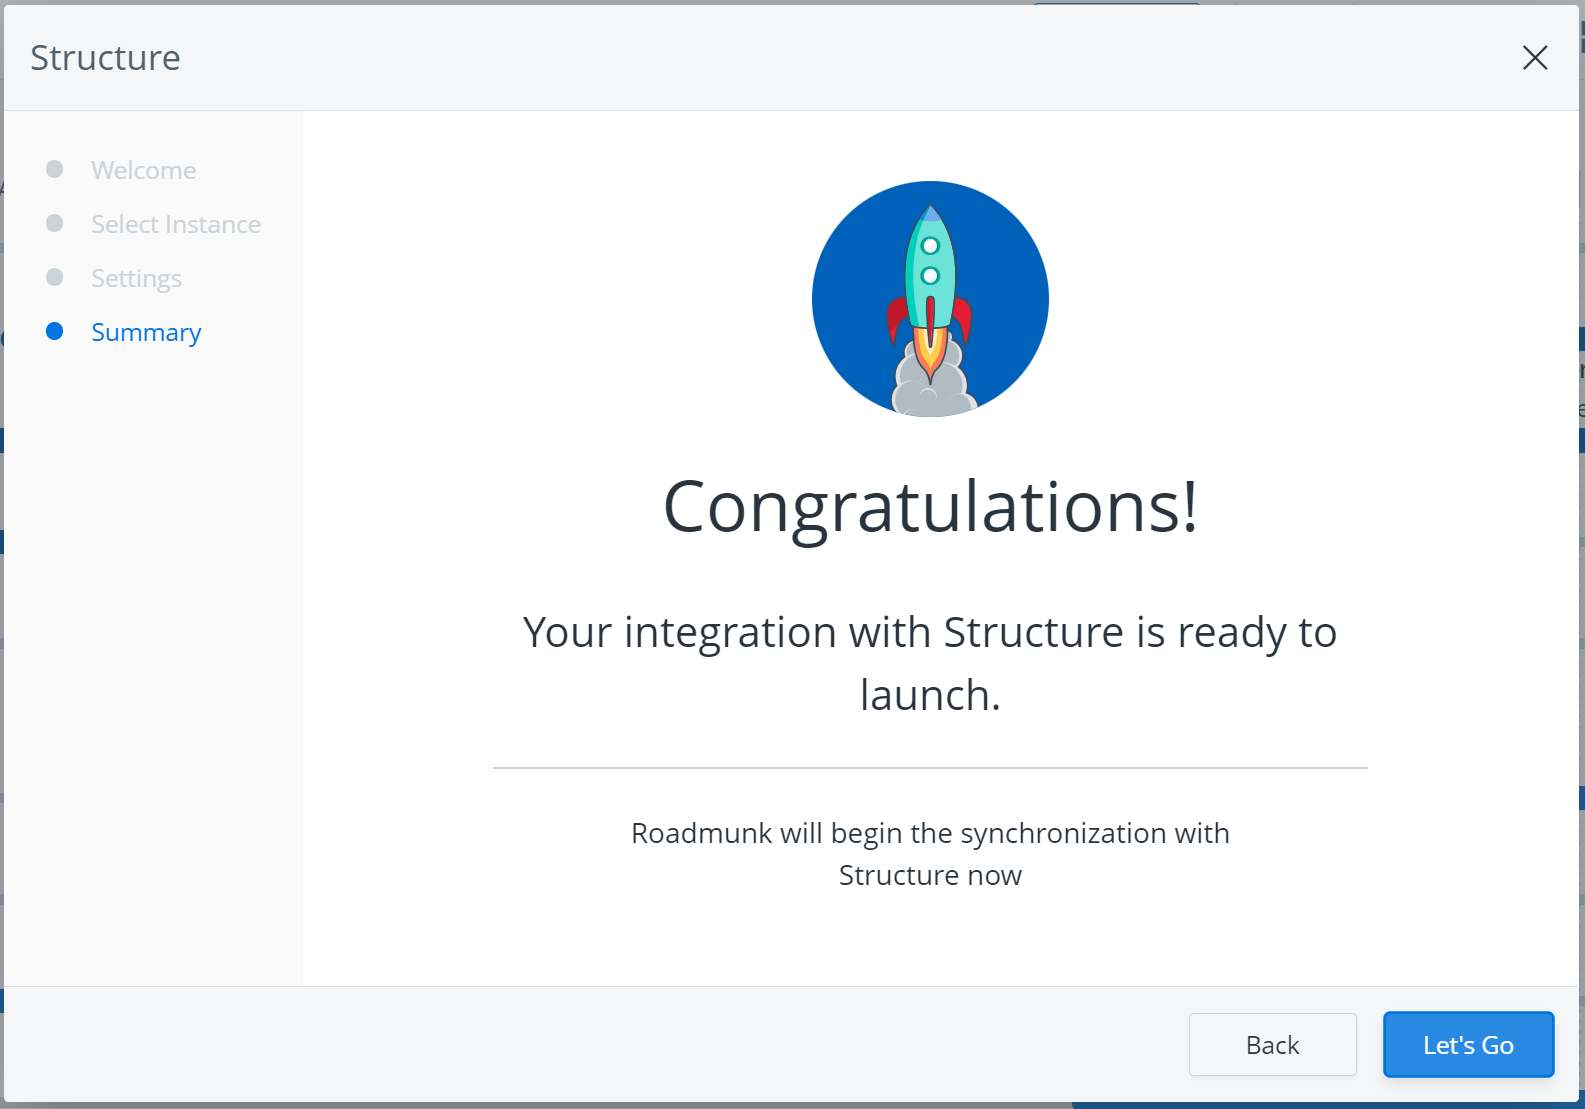
That’s it! The structure has been created. Click Let’s Go to start working with your structure.
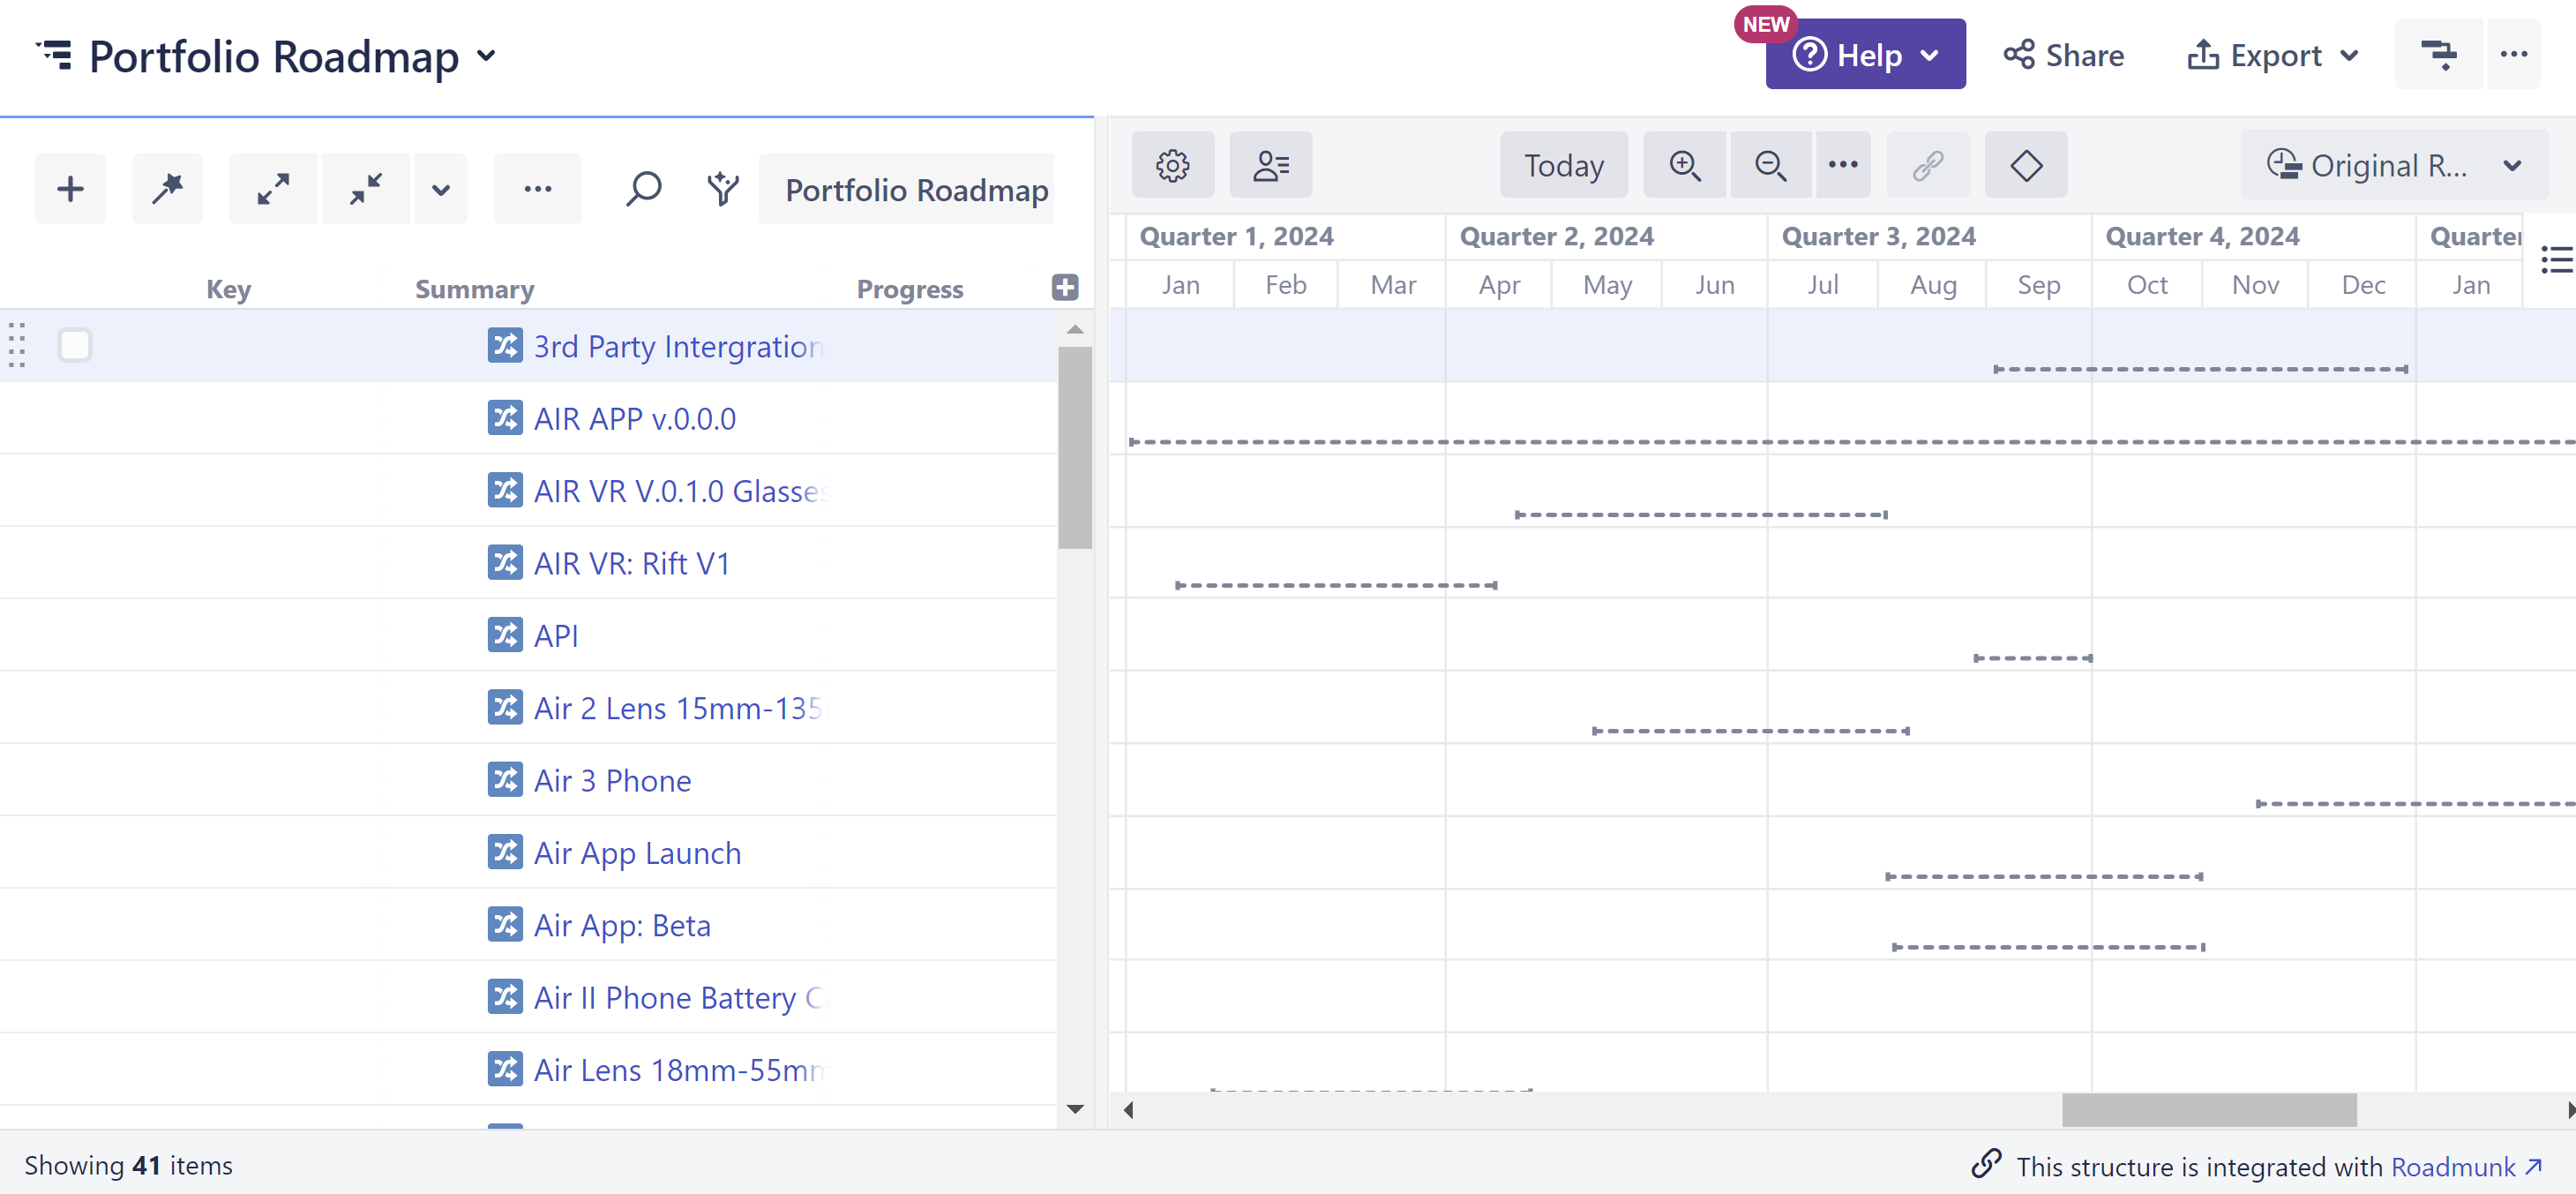
A new structure will be created, along with a new Baseline in the associated Gantt chart (dotted lines on the timeline). This baseline will allow you to compare your working timeline (created as you add and assign work) to the original plan.
Step 3: Assign and Track Work in Structure and Structure.Gantt
Next, Project Managers can add, assign, and track work for each roadmap item.
Add Epics
The easiest way to assign work to roadmap items is to open a second structure that contains the issues you want to add. Select the issues you want to add to a particular roadmap item and drag them beneath it.
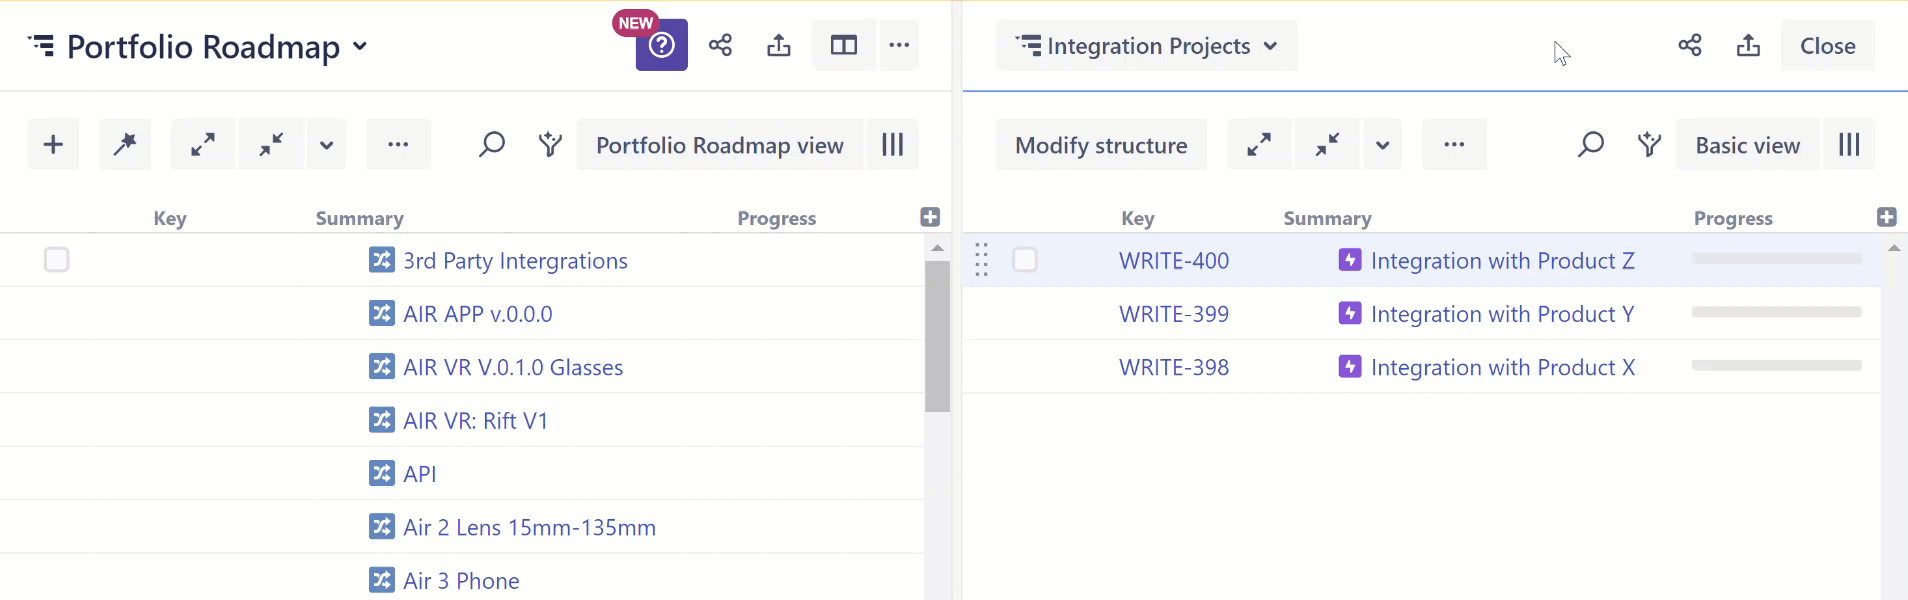
You can repeat this process as many times as you need, using a single structure that contains items from multiple projects or several smaller structures.
Add Tasks and Stories
Next, add Stories and Tasks from the epic using the Issues Under Epics generator.
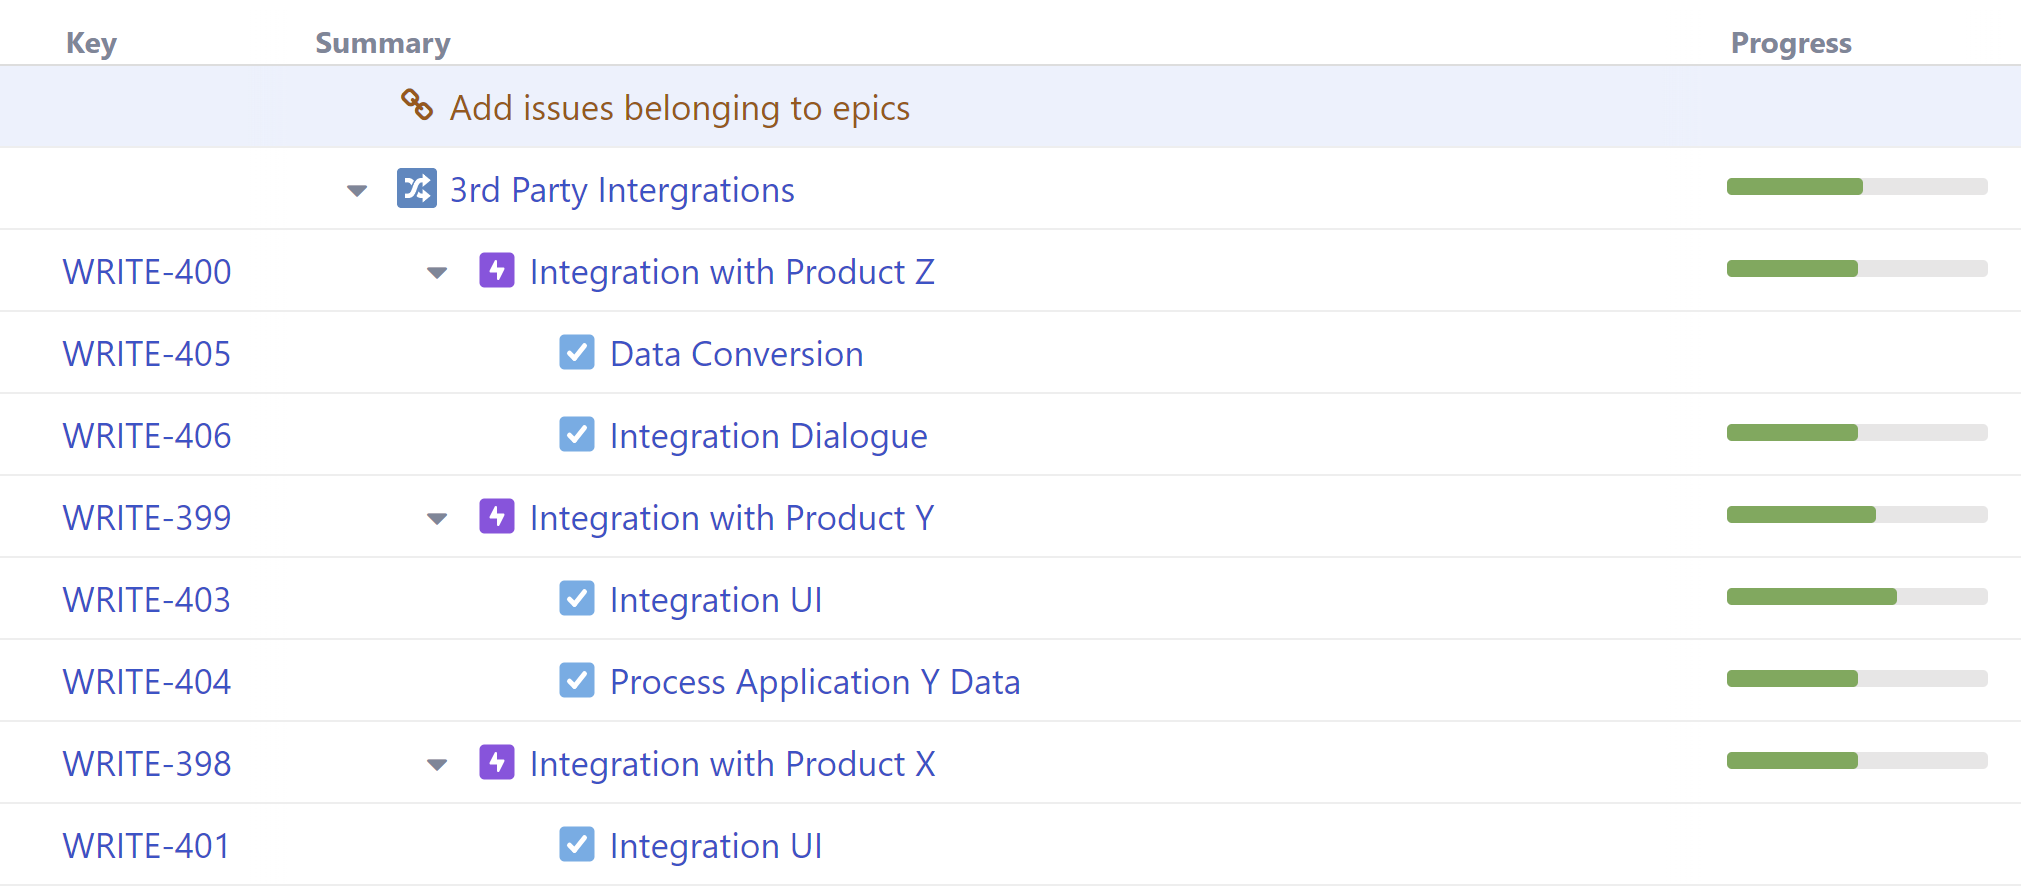
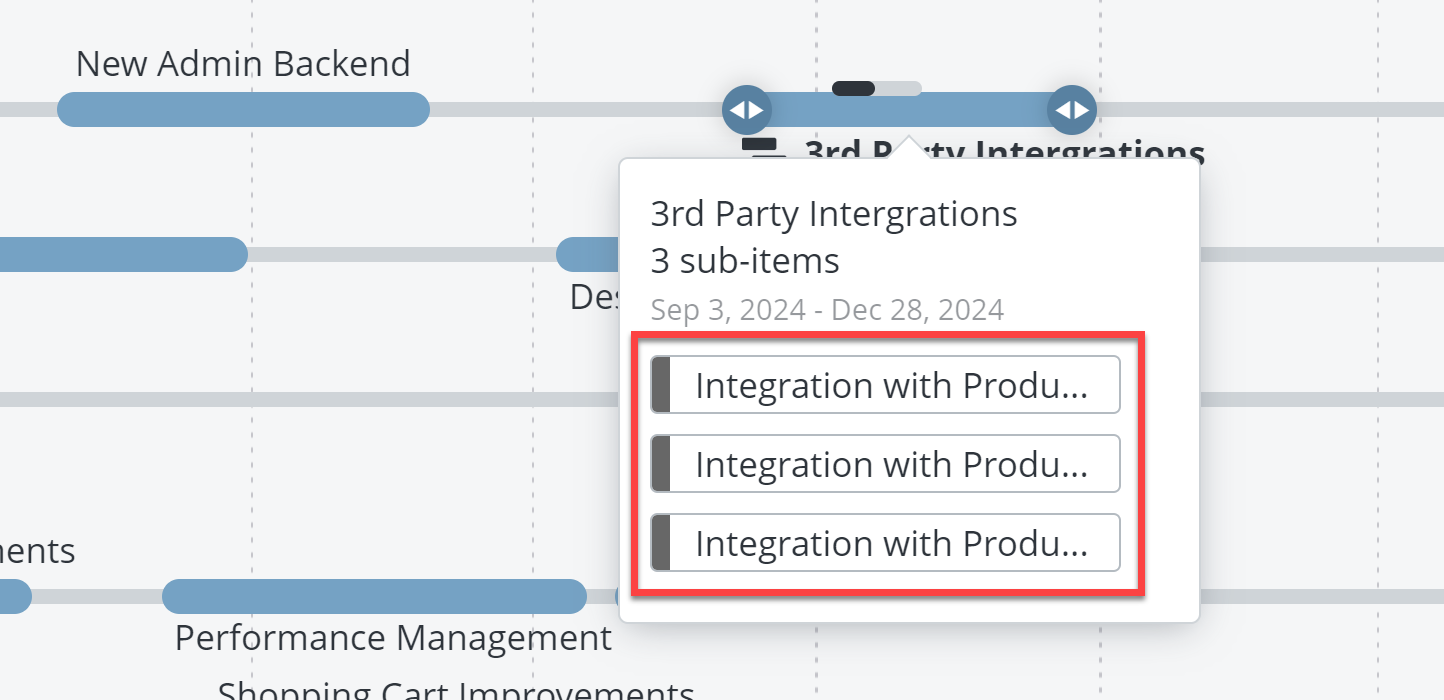
The progress for each task is automatically rolled up to the associated epics and roadmap items.
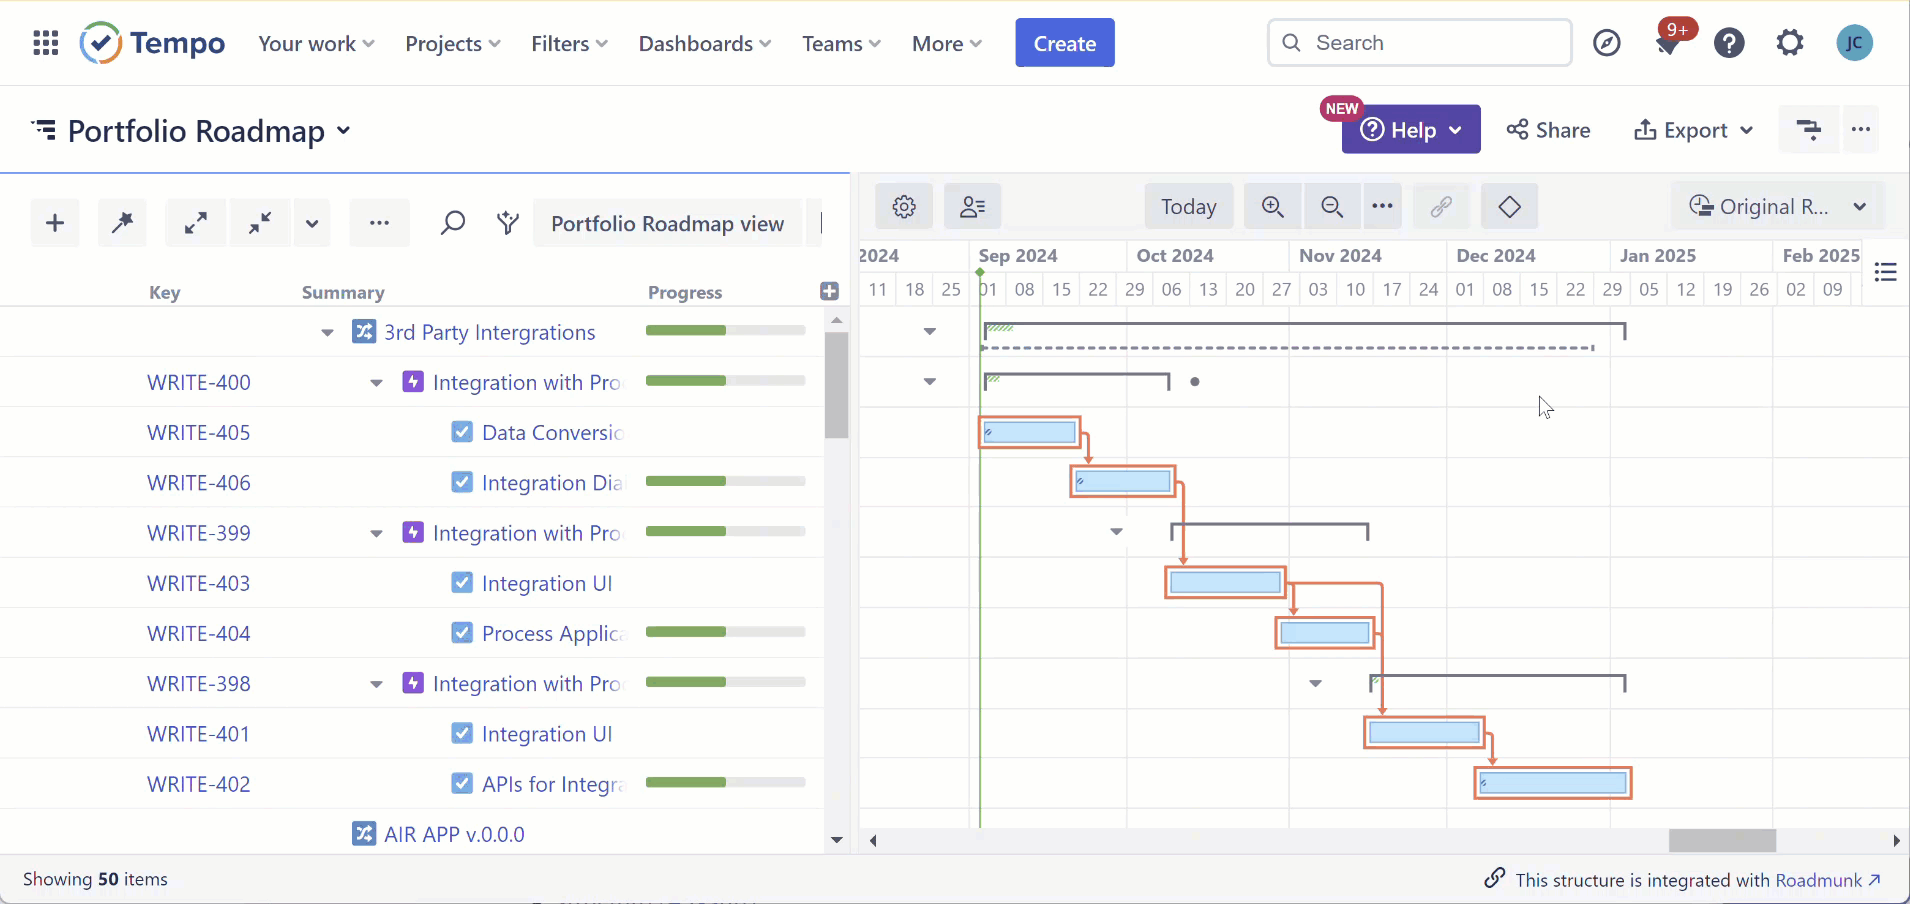
Manage Timelines
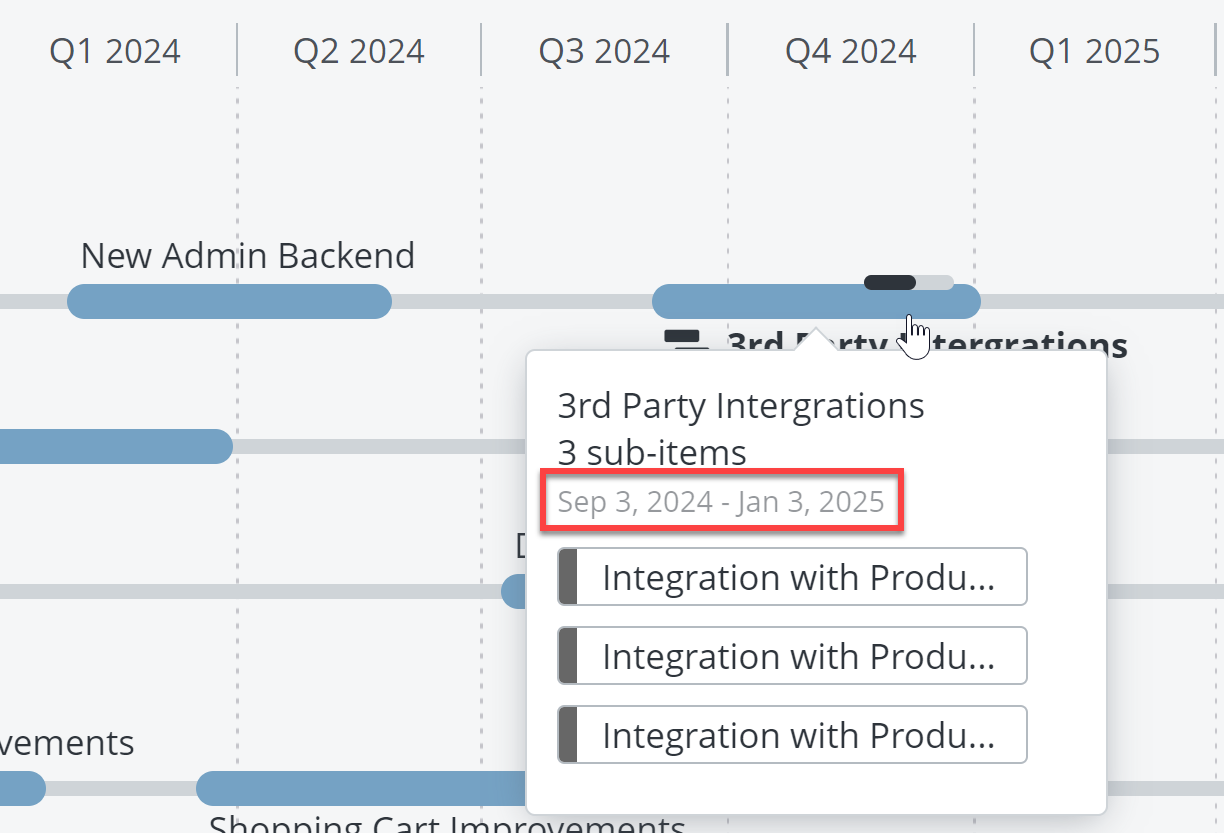
Once issues have been added to the structure, the PM can return to the Gantt chart to add dependencies, manually adjust dates, and visualize the timeline for each roadmap item.
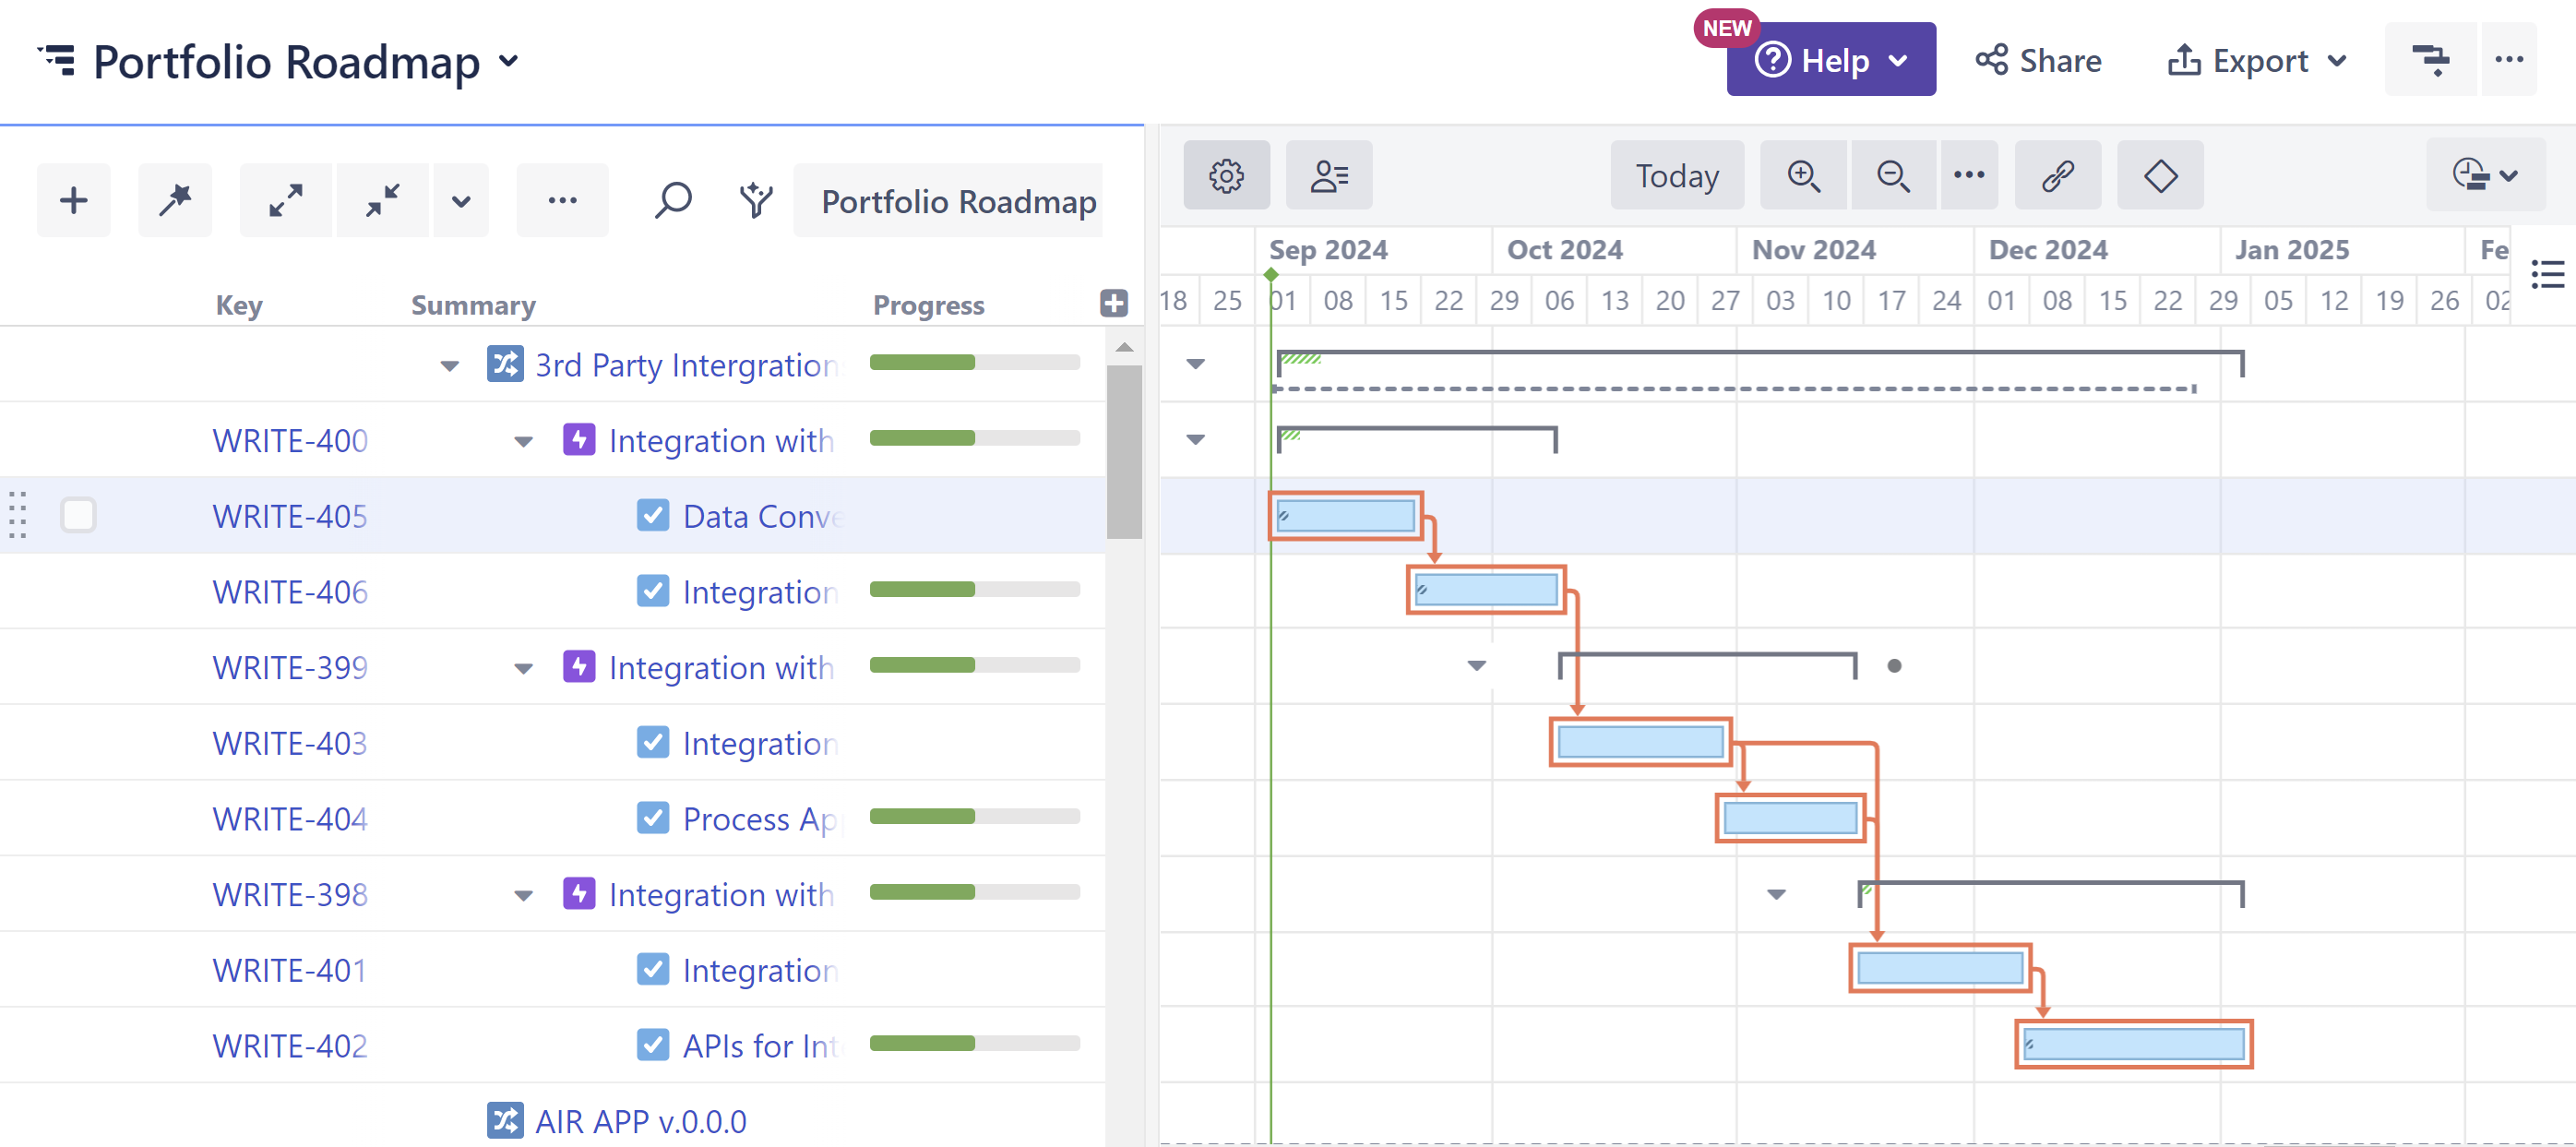
In the above example, work for the 3rd Party Integration looks like it will exceed the roadmap’s timeline. Based on this, the PM can reduce scope, adjust start dates, or add additional resources (see below) to meet that deadline.
Adjusting for Different Teams
Some teams work in Scrum, others in Kanban. Some estimate time using Story Points; others prefer Original Estimates. Structure.Gantt allows you to customize scheduling rules for each team, project, or group of Jira issues.
For best results:
Customize your base configuration using the most common scheduling practices within your organization. See Gantt Configuraiton.
Create slices for individual teams or projects that utilize different scheduling methods. See Slice-based Configurations.
Assign Resources
Once work has been assigned to teams or individuals (using Structure, Jira, or Planner by Tempo), the PM can quickly identify any periods of overallocation or opportunities to assign additional work. As they make adjustments to the Gantt chart, leadership can refresh the roadmap to view the updated Gantt timeline.
Create a Baseline to Update the Roadmap Timeline
Once you’ve made all the necessary adjustments to work requirements, dependencies, and resource allocations, it’s time to lock in this new timeline so leadership can see it on their roadmap.
To do this, simply create a new baseline in Structure.Gantt:
Open the Baseline menu
Select Create New
Create your new baseline
Once your new baseline has been created, return to Roadmunk and refresh the Structure integration. The existing roadmap items will be updated with your new working dates.
Step 4: Update Your Roadmap
Leadership can get progress updates for their roadmaps at any time.
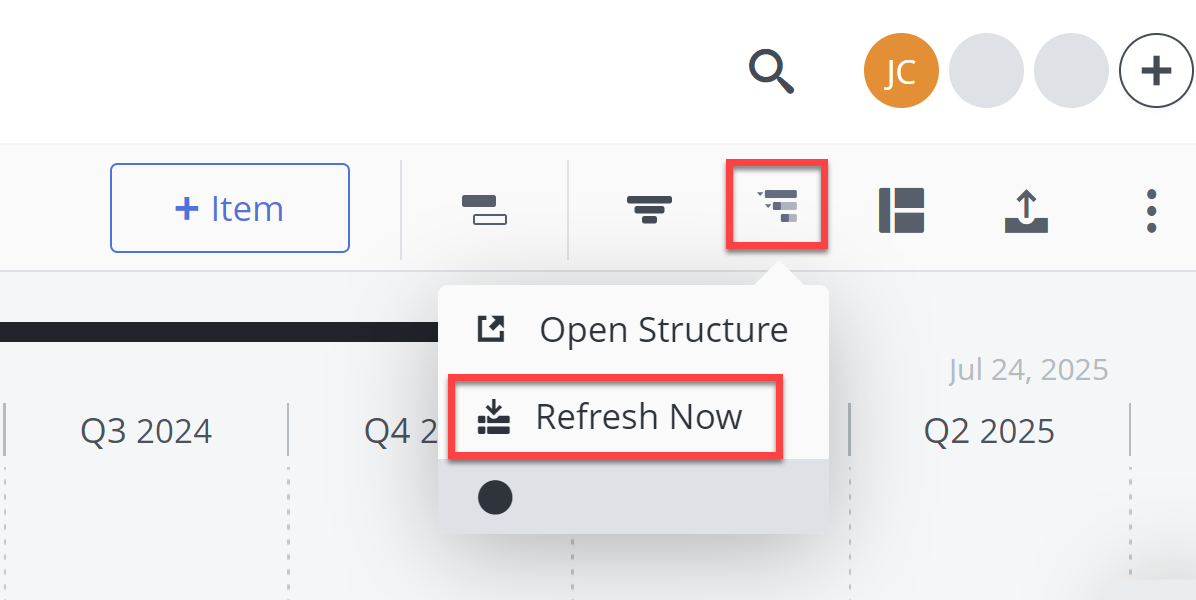
To get an update, open the roadmap, click the Structure icon, and select Refresh Now.
When you sync the data from Structure, the issues you added to the structure will be added below their corresponding roadmap items.
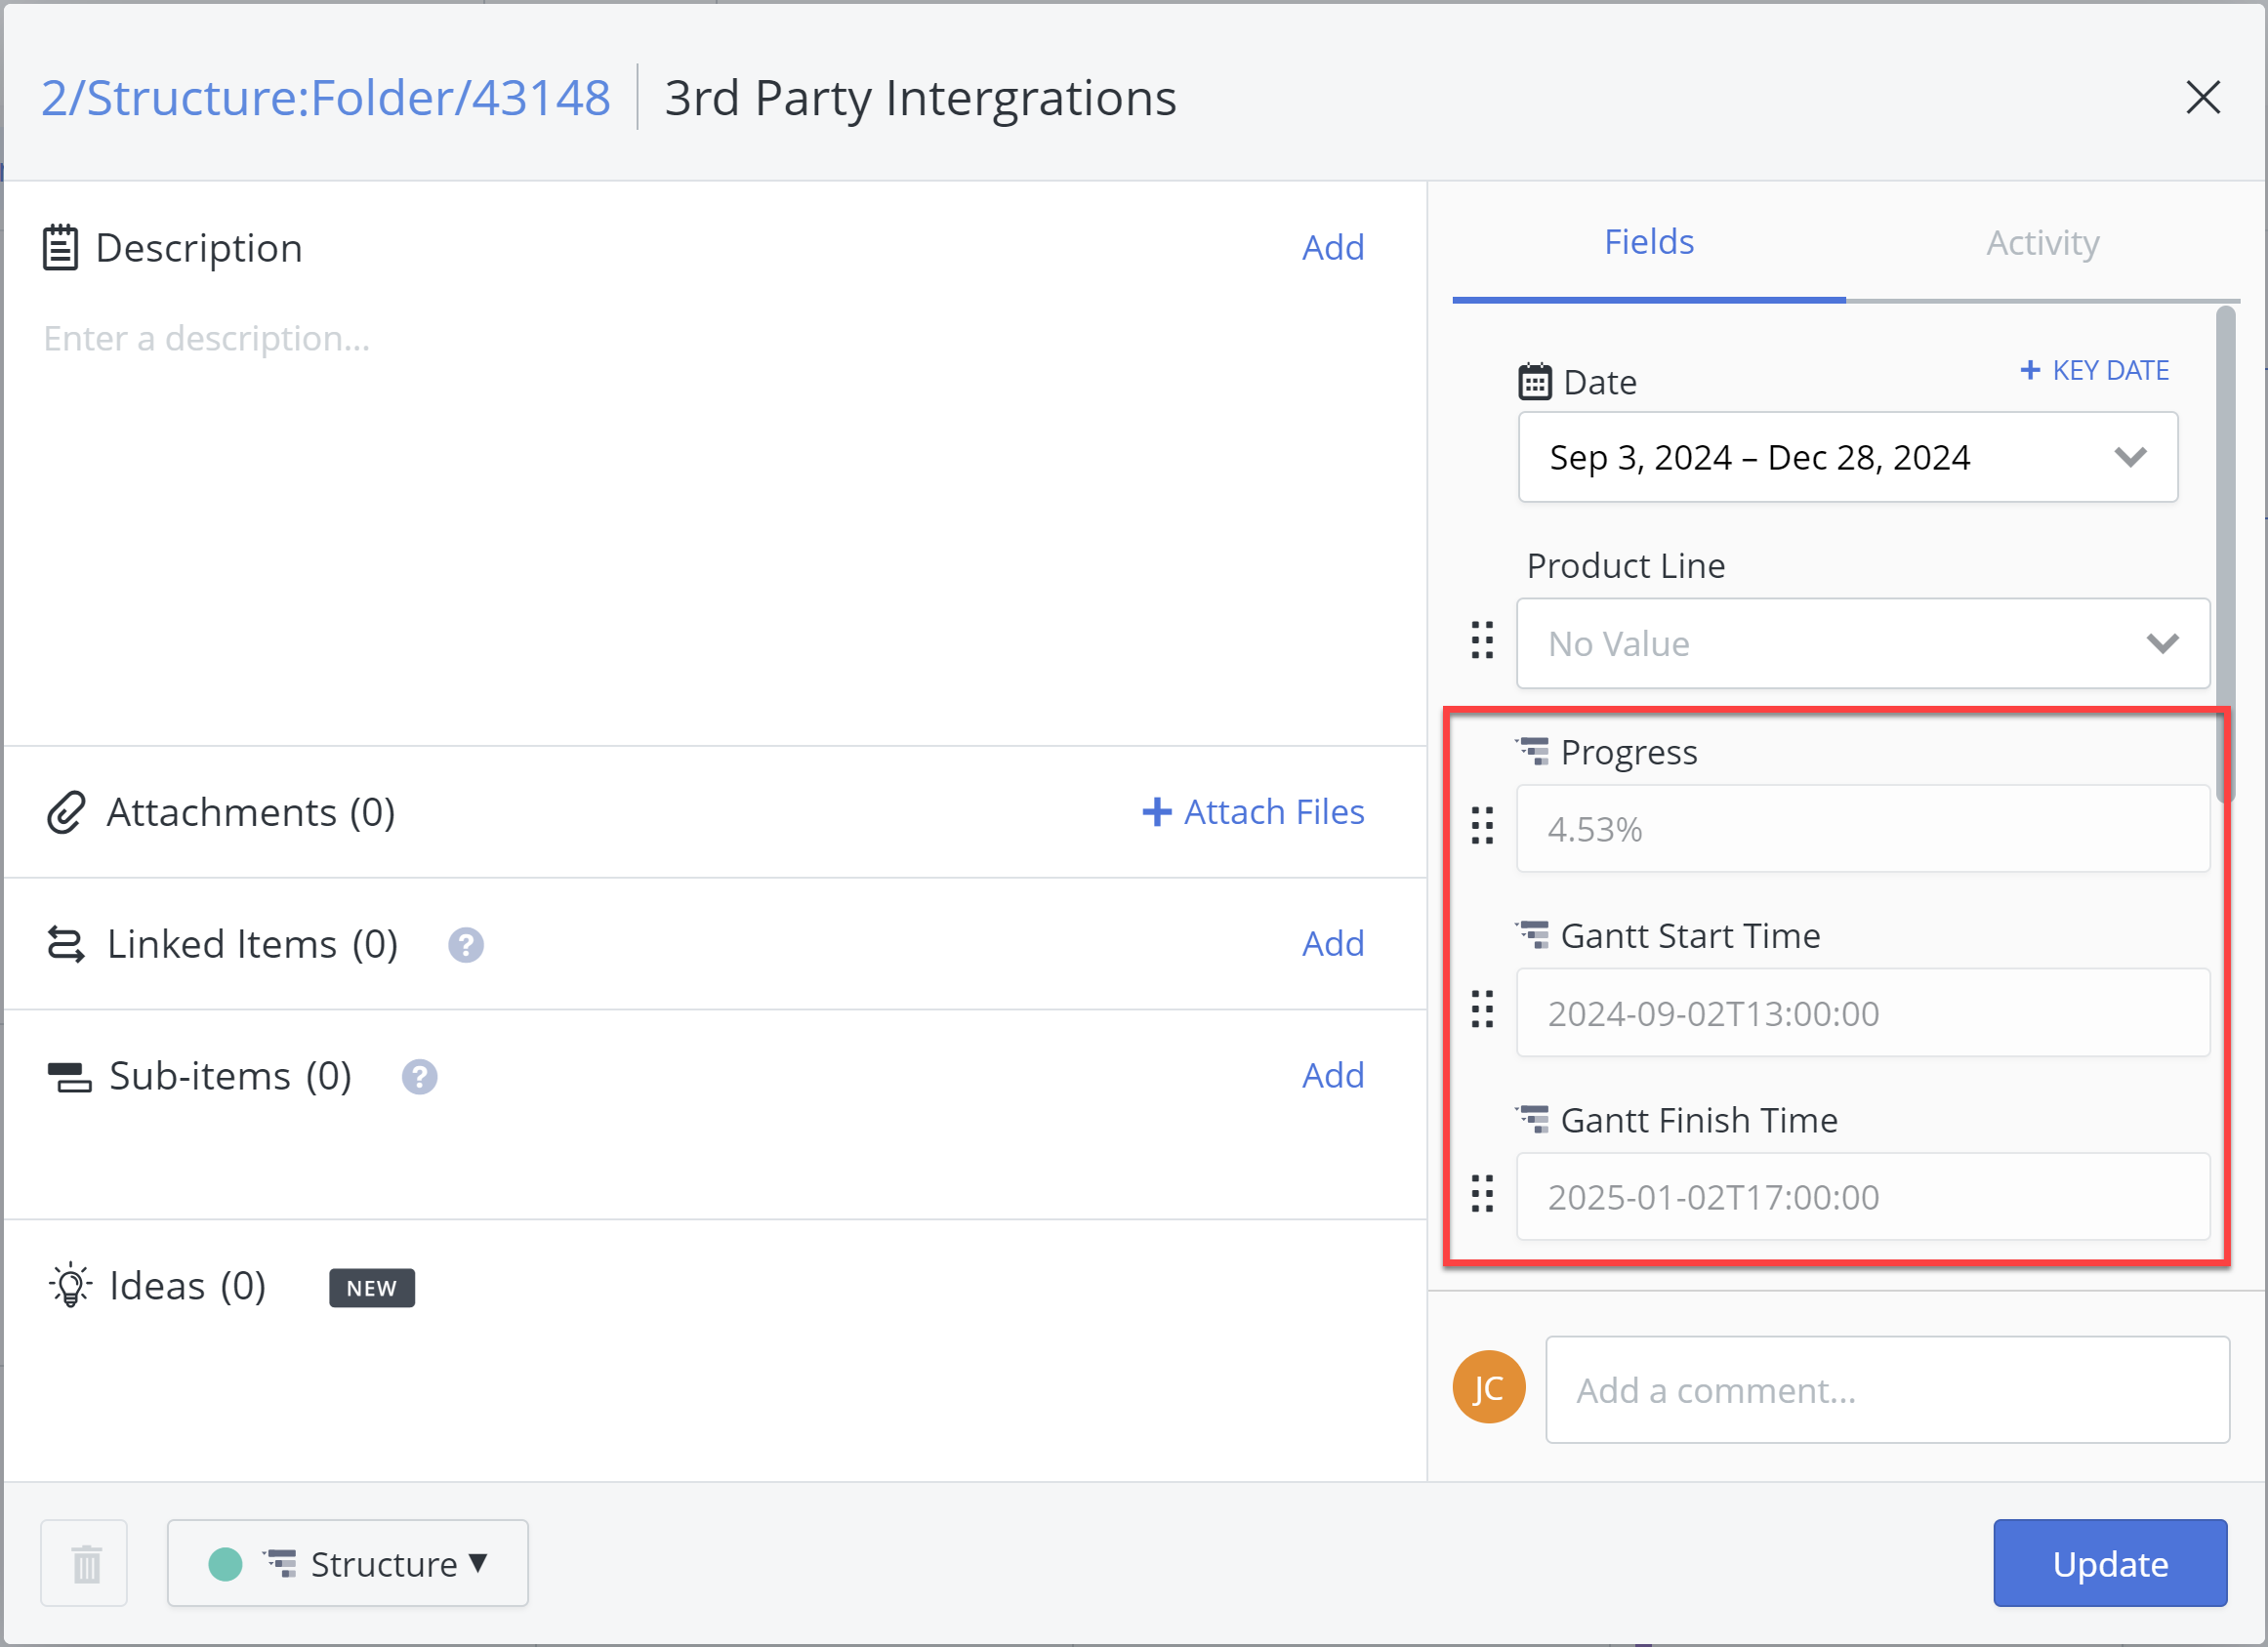
Progress and timeline data from Structure and Structure.Gantt is also added to each item so that it can be compared to the original plan.
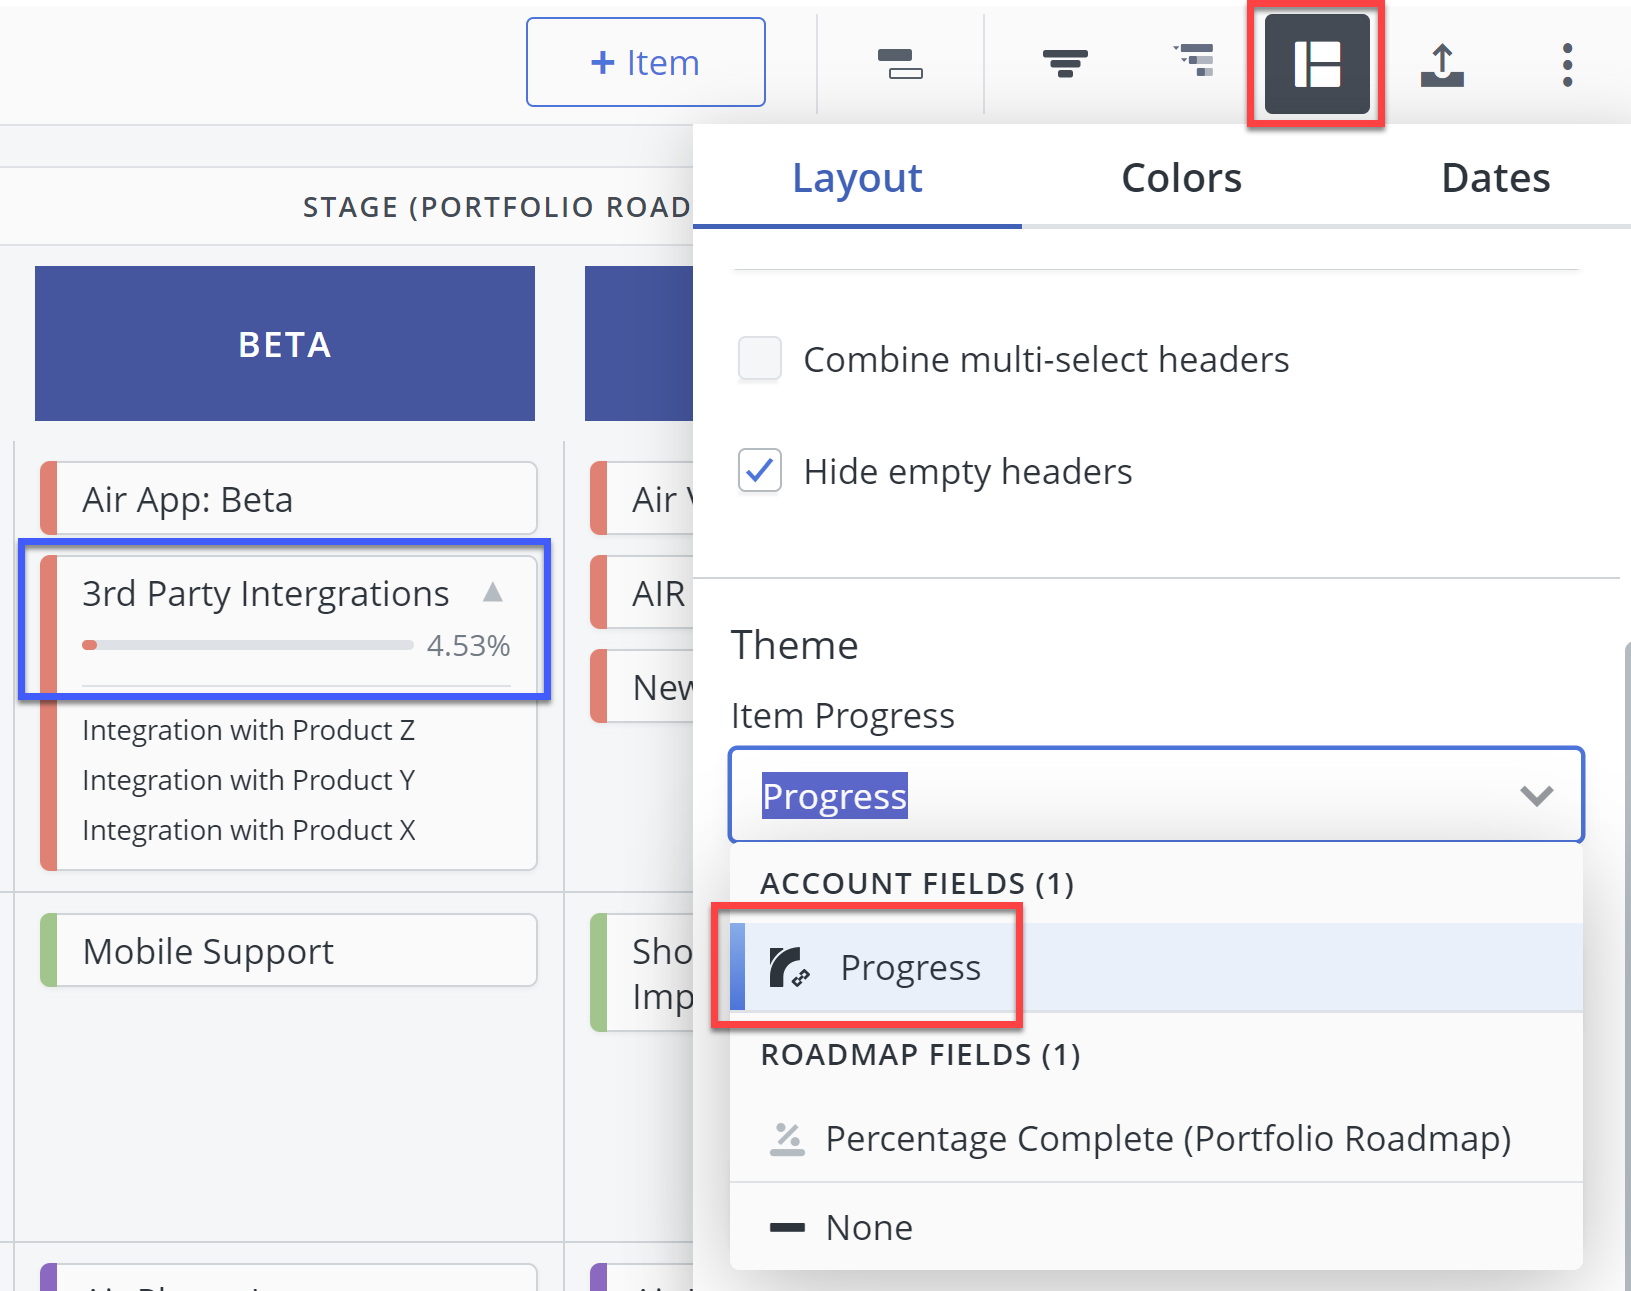
To display the progress from Structure on your roadmap, open the Format menu, locate Item Progress, and select the integration Progress option:
Update the Roadmap Timeline
It’s also possible to update the start and end dates on your roadmap based on the working dates in Structure. To do this, you need to create a new baseline in Structure.Gantt.
Once this is done, refreshing the Structure integration will update the roadmap dates to match the new Structure.Gantt baseline dates.